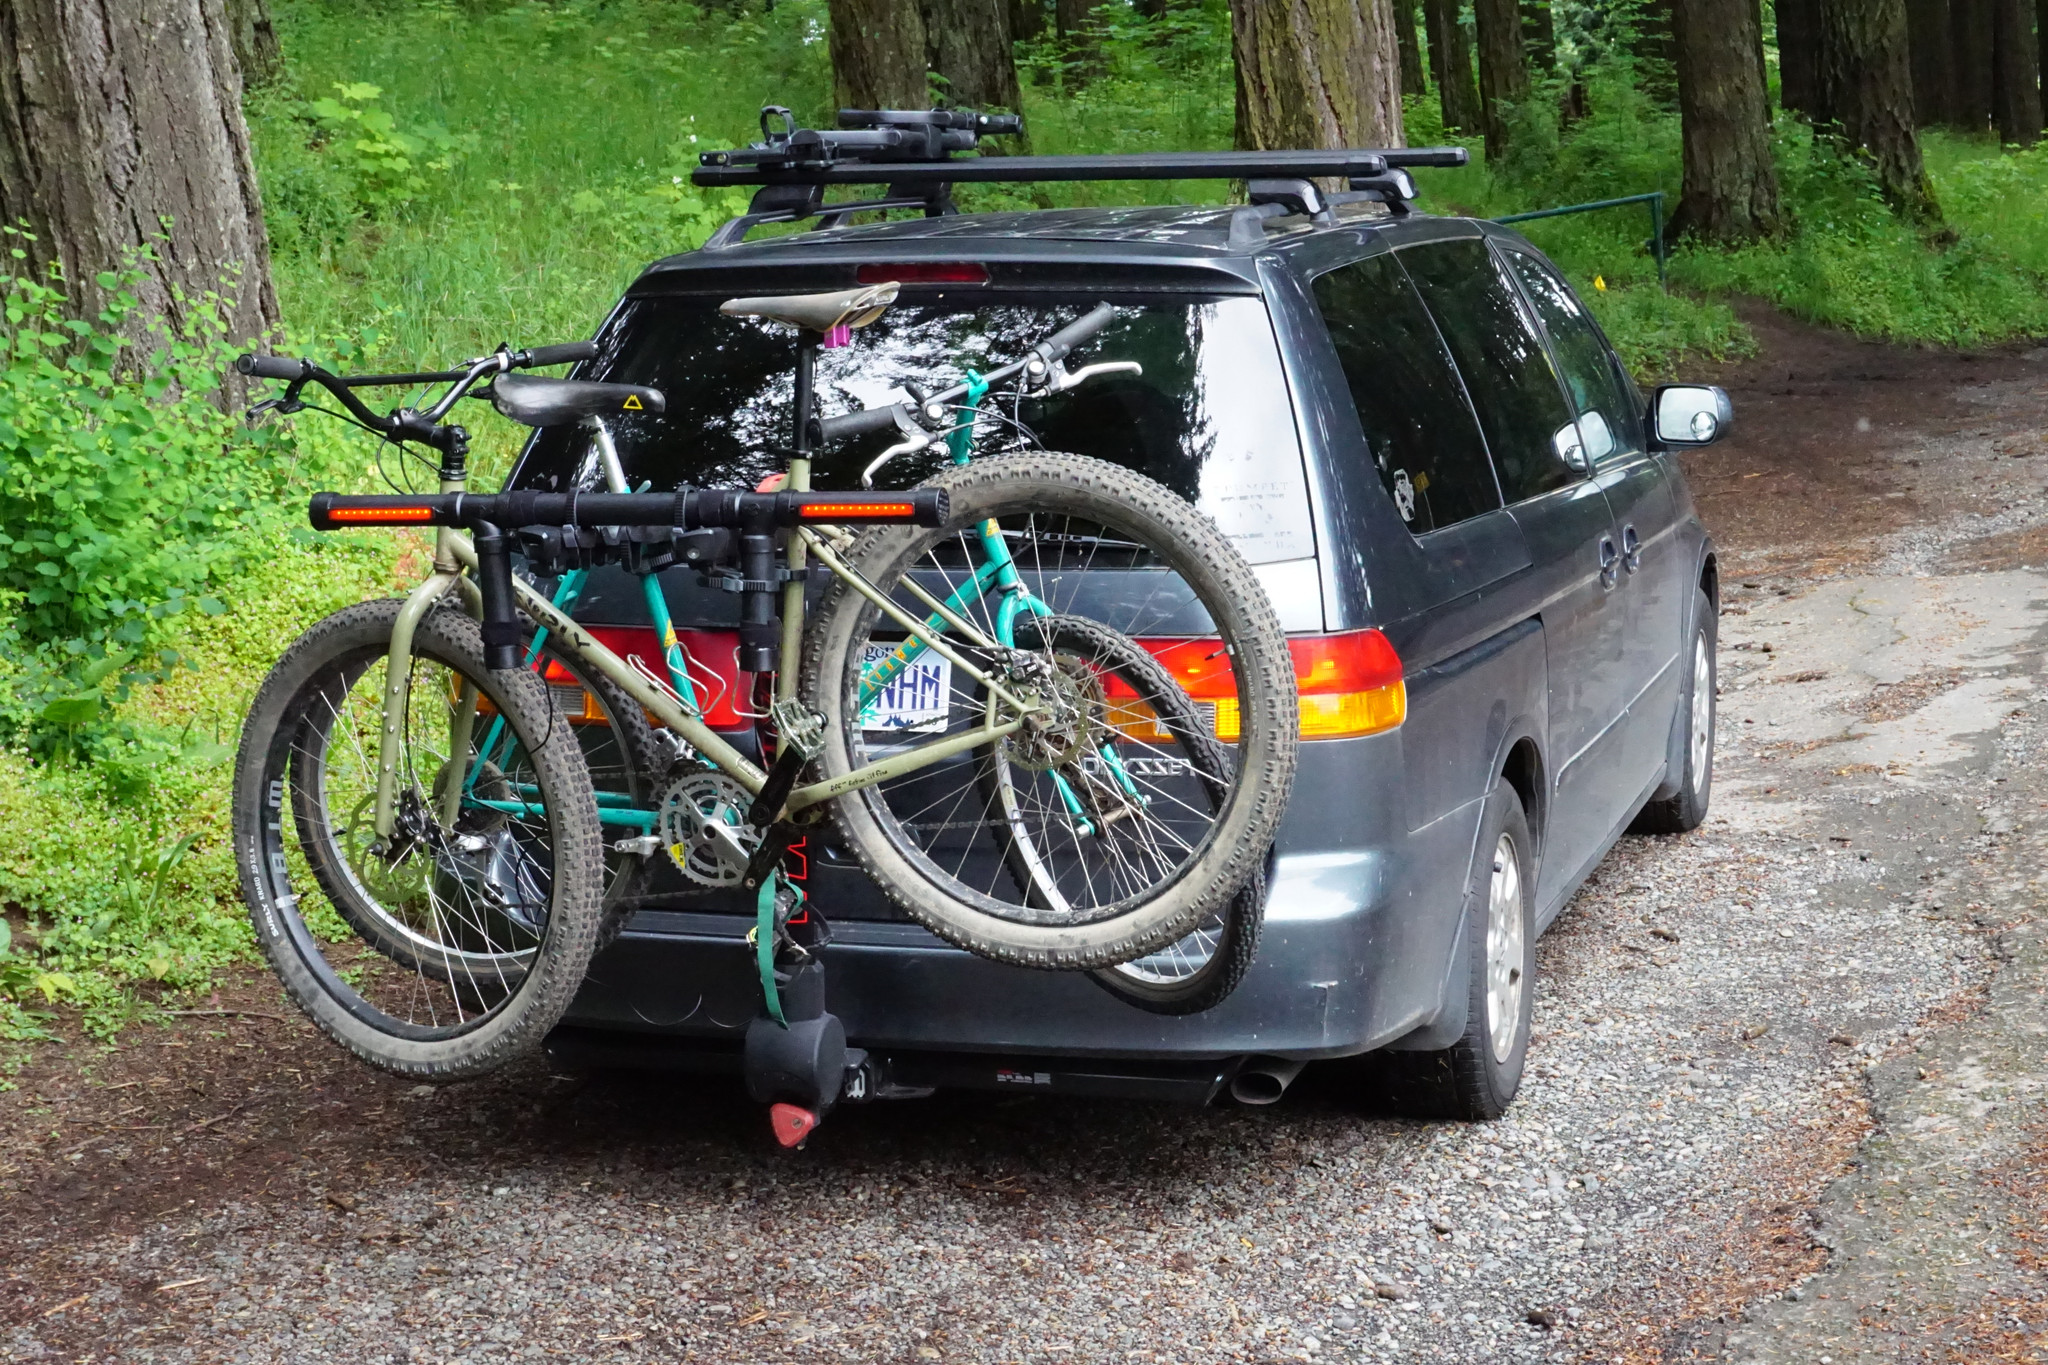
Carrying bikes on the back of your car can be much more convenient than lifting them onto the roof. But have you thought about what this does to turn signal and brake light visibility? Some bike, rack, and vehicle combinations can be worse than others. My current Odyssey has pretty wide taillights that are decently visible, but I had a T2 with fat tire trays that totally obscured one side of the taillights on my Outback when it was folded up. Once you have a couple or a few bikes back there, you’re going to end up as the person on the road just switching lanes without a visible blinker, and nobody likes that person!
There are a few light options on the market, with Yakima even releasing a couple models as accessories for specific racks (for the Exo and the StageTwo). These can provide some pretty seamless integration, but I’ve found them to be pretty expensive for some simple lights and metal brackets. I wanted to make my own for as little as possible, while building in some versatility to use on various rack types.
I don’t intend for this to be a step-by-step how-to, but rather to show off some features and things to think about if you want to make your own. I spent $89.90 on materials in total, which admittedly is more than I wanted to, but I also incorporated features that not everyone would necessarily need.

The lights themselves are the real star of this show: Curt 53201. These have an adhesive backing that allows them to simply be stuck to whatever you need them to stick to. They can be found from that big online retailer or at Curt’s website directly. Everything else was purchased from my local big orange tool store, and it looks like they have the light kit too. Price breakdown below (as of Spring 2022):
- Curt 53201: $25.79
- Velcro straps ¾” x 12’: $9.98
- ABS pipe 1.5”x2’ (x2): $13.02
- ABS tee (x2): $6.42
- ABS cap (x4): $19.88
- Hardware (#10-32x5/8” screws, washers, and nyloc nuts): $1.28+$1.28+$2.56
- Glue (ABS Cement): $5.98
- Foam tape ¼”x1/2”x17’: $3.71
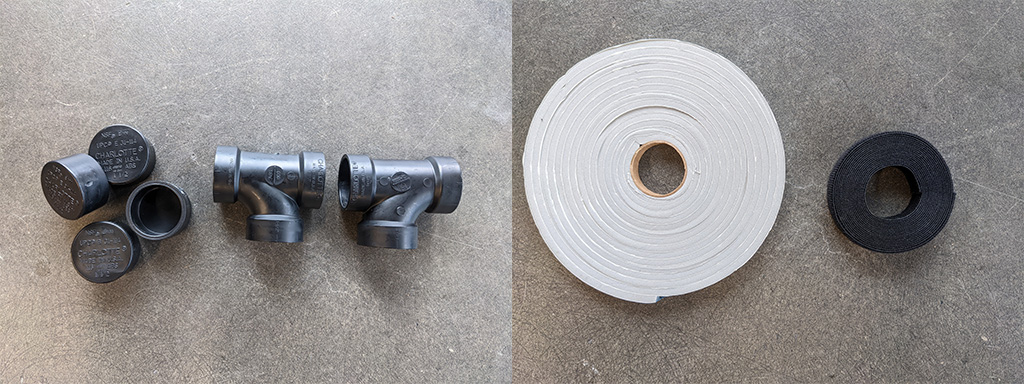

What I came up with is something that can fit in the outer cradle of a hanging style bike rack OR be attached directly to a bicycle with velcro straps. Instead of white PVC pipe, I ended up using ABS pipe because it comes in black, which I think looks better, and it can be glued together with a single compound ABS cement without an additional primer. I cut the pipes to size so that they could clear the arms of a hanging style rack, using the FullTilt as a template. The arms measure 12 1/4" outside to outside and the lights are 7 1/2" long, so I left those pieces just slightly longer than that and used the remaining lengths for the vertical supports. I drilled holes and notches for internal cable routing and velcro attachment with nuts and bolts.

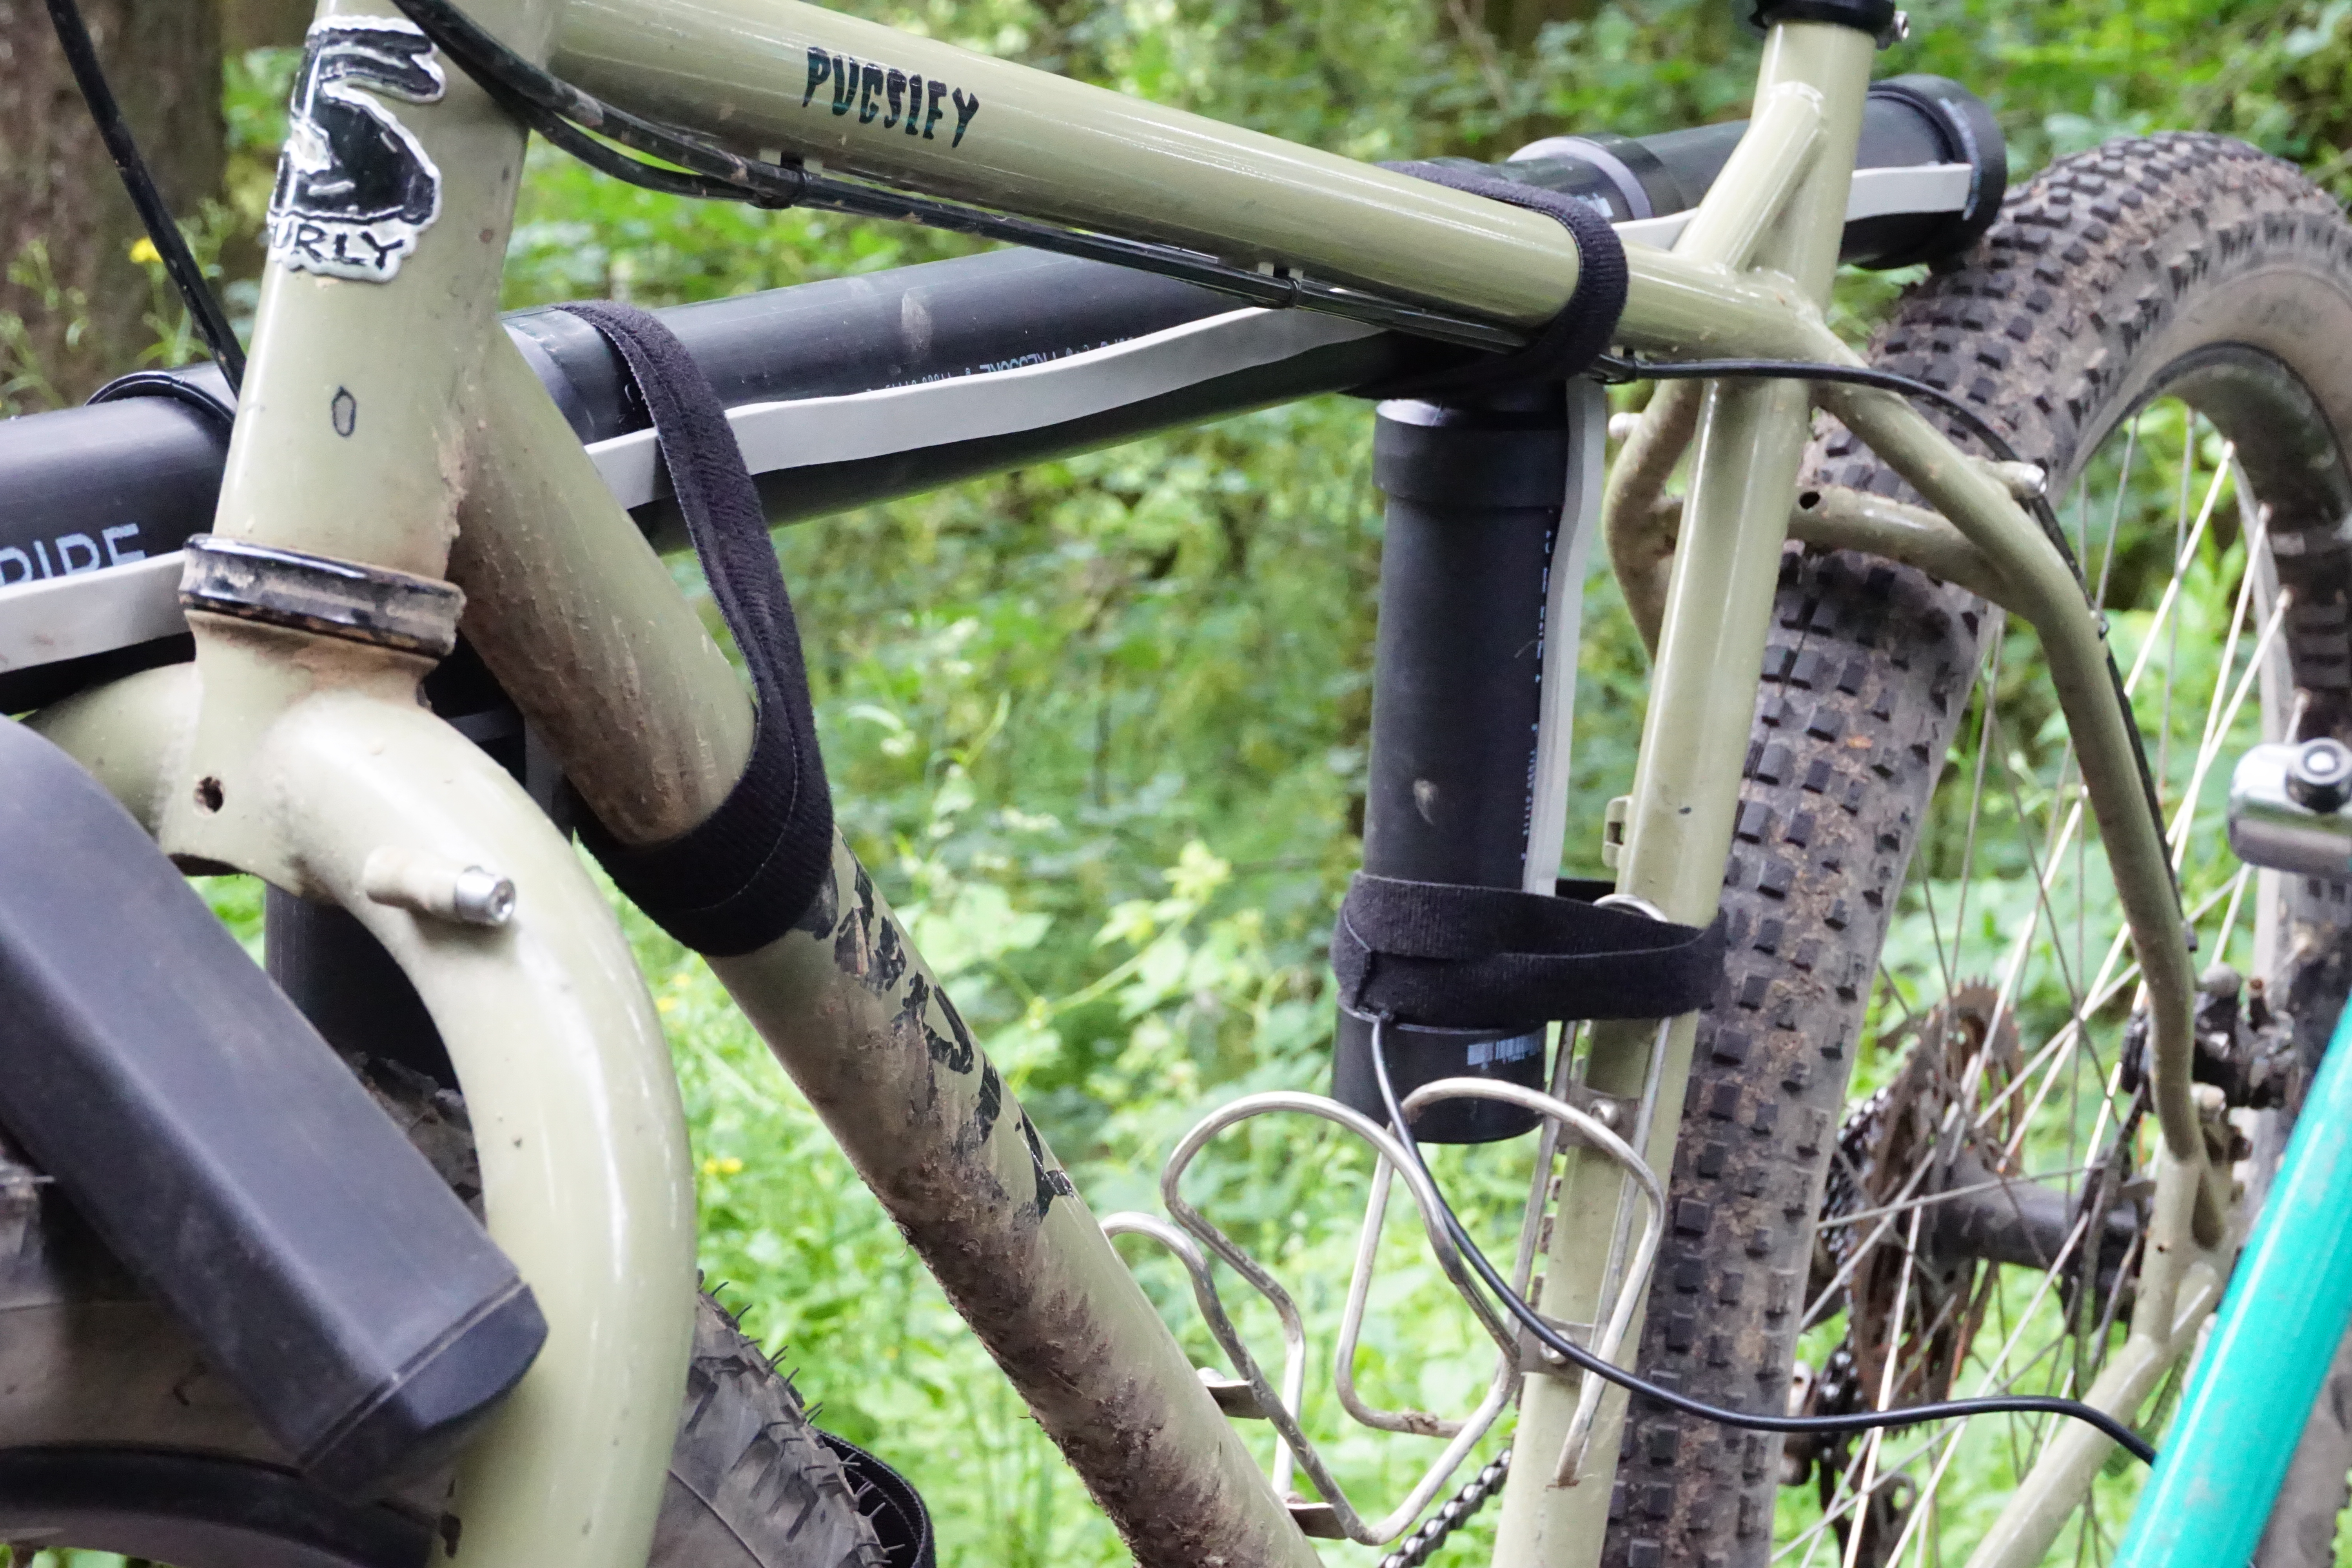
I wanted the lights to sit as wide as possible. I used T joints to create 2 vertical bars that allow a hanging style bike rack’s stabilizer cradle to hold onto it so it doesn’t rotate. These also provide more stability when attaching the light bar directly to a bicycle.

Double sided velcro straps hold the light bar to a bicycle, and foam window tape provides some cushion and helps prevent rattling. I left each velcro strip really long (2 feet). I’ll probably cut it at some point, but it wraps up around itself out of the way. It’s attached via screws on the front side of the pipes with the nut inside so that they don’t scratch the bikes.
Some of these features can be skipped in order to make it cheaper and simpler if you know you’ll only use it on one specific rack. If you’re using a platform rack, you could just stick the lights directly to the rack and call it a day. If you’re gluing multiple pieces of ABS or PVC together, make sure you mock it up and check it for fit before gluing it all together. You could also add holes in the top bar for a license plate holder if you wanted to.
I hope this provides some ideas for assembling your own. If you end up making something, make sure to send us a picture because I’d love to see what you come up with!
