When Yakima discontinued the Whispbar product line in 2016, the FlushBar system was kept alive under the Yakima brand name. However, they are packaged a little bit differently than the outgoing Whispbar FlushBars. Most notably, they are sold as individual bars rather than sets (and therefore do not include locks), and the towers come mostly stripped instead of set up for bare roof or clips fits like the Whispbars.
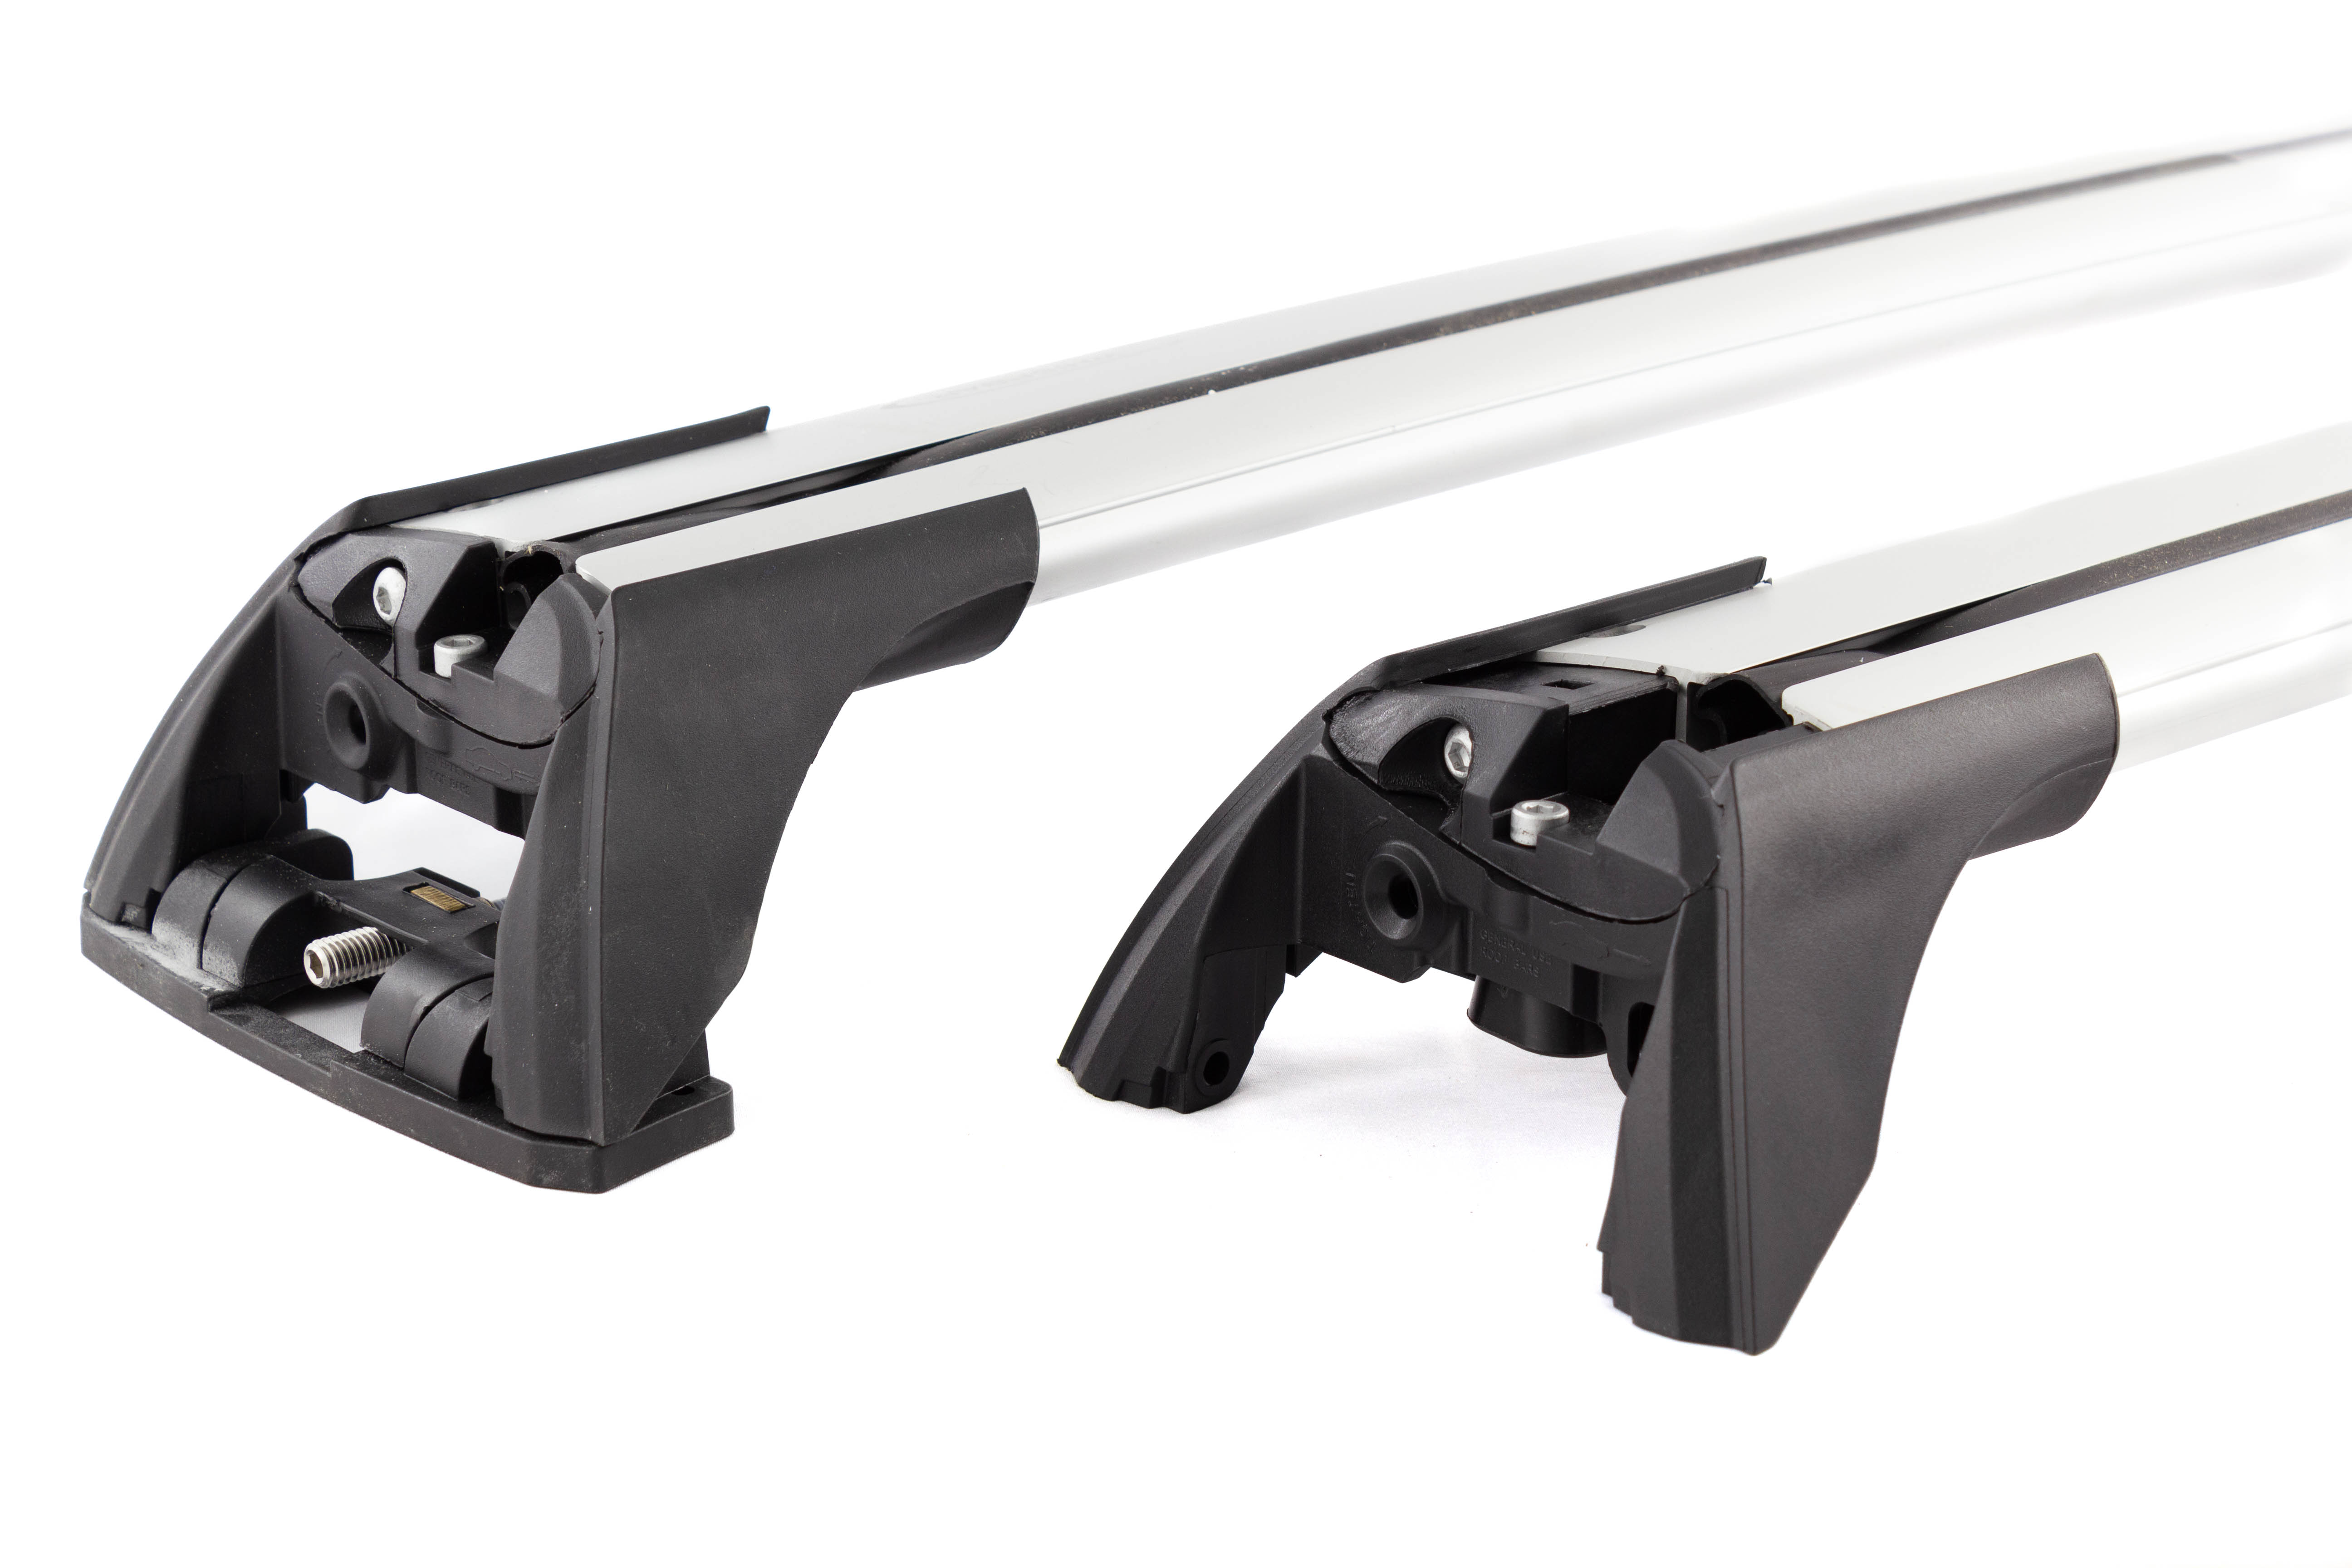
Whispbar FlushBar tower pictured on the left, Yakima FlushBar tower pictured on the right.
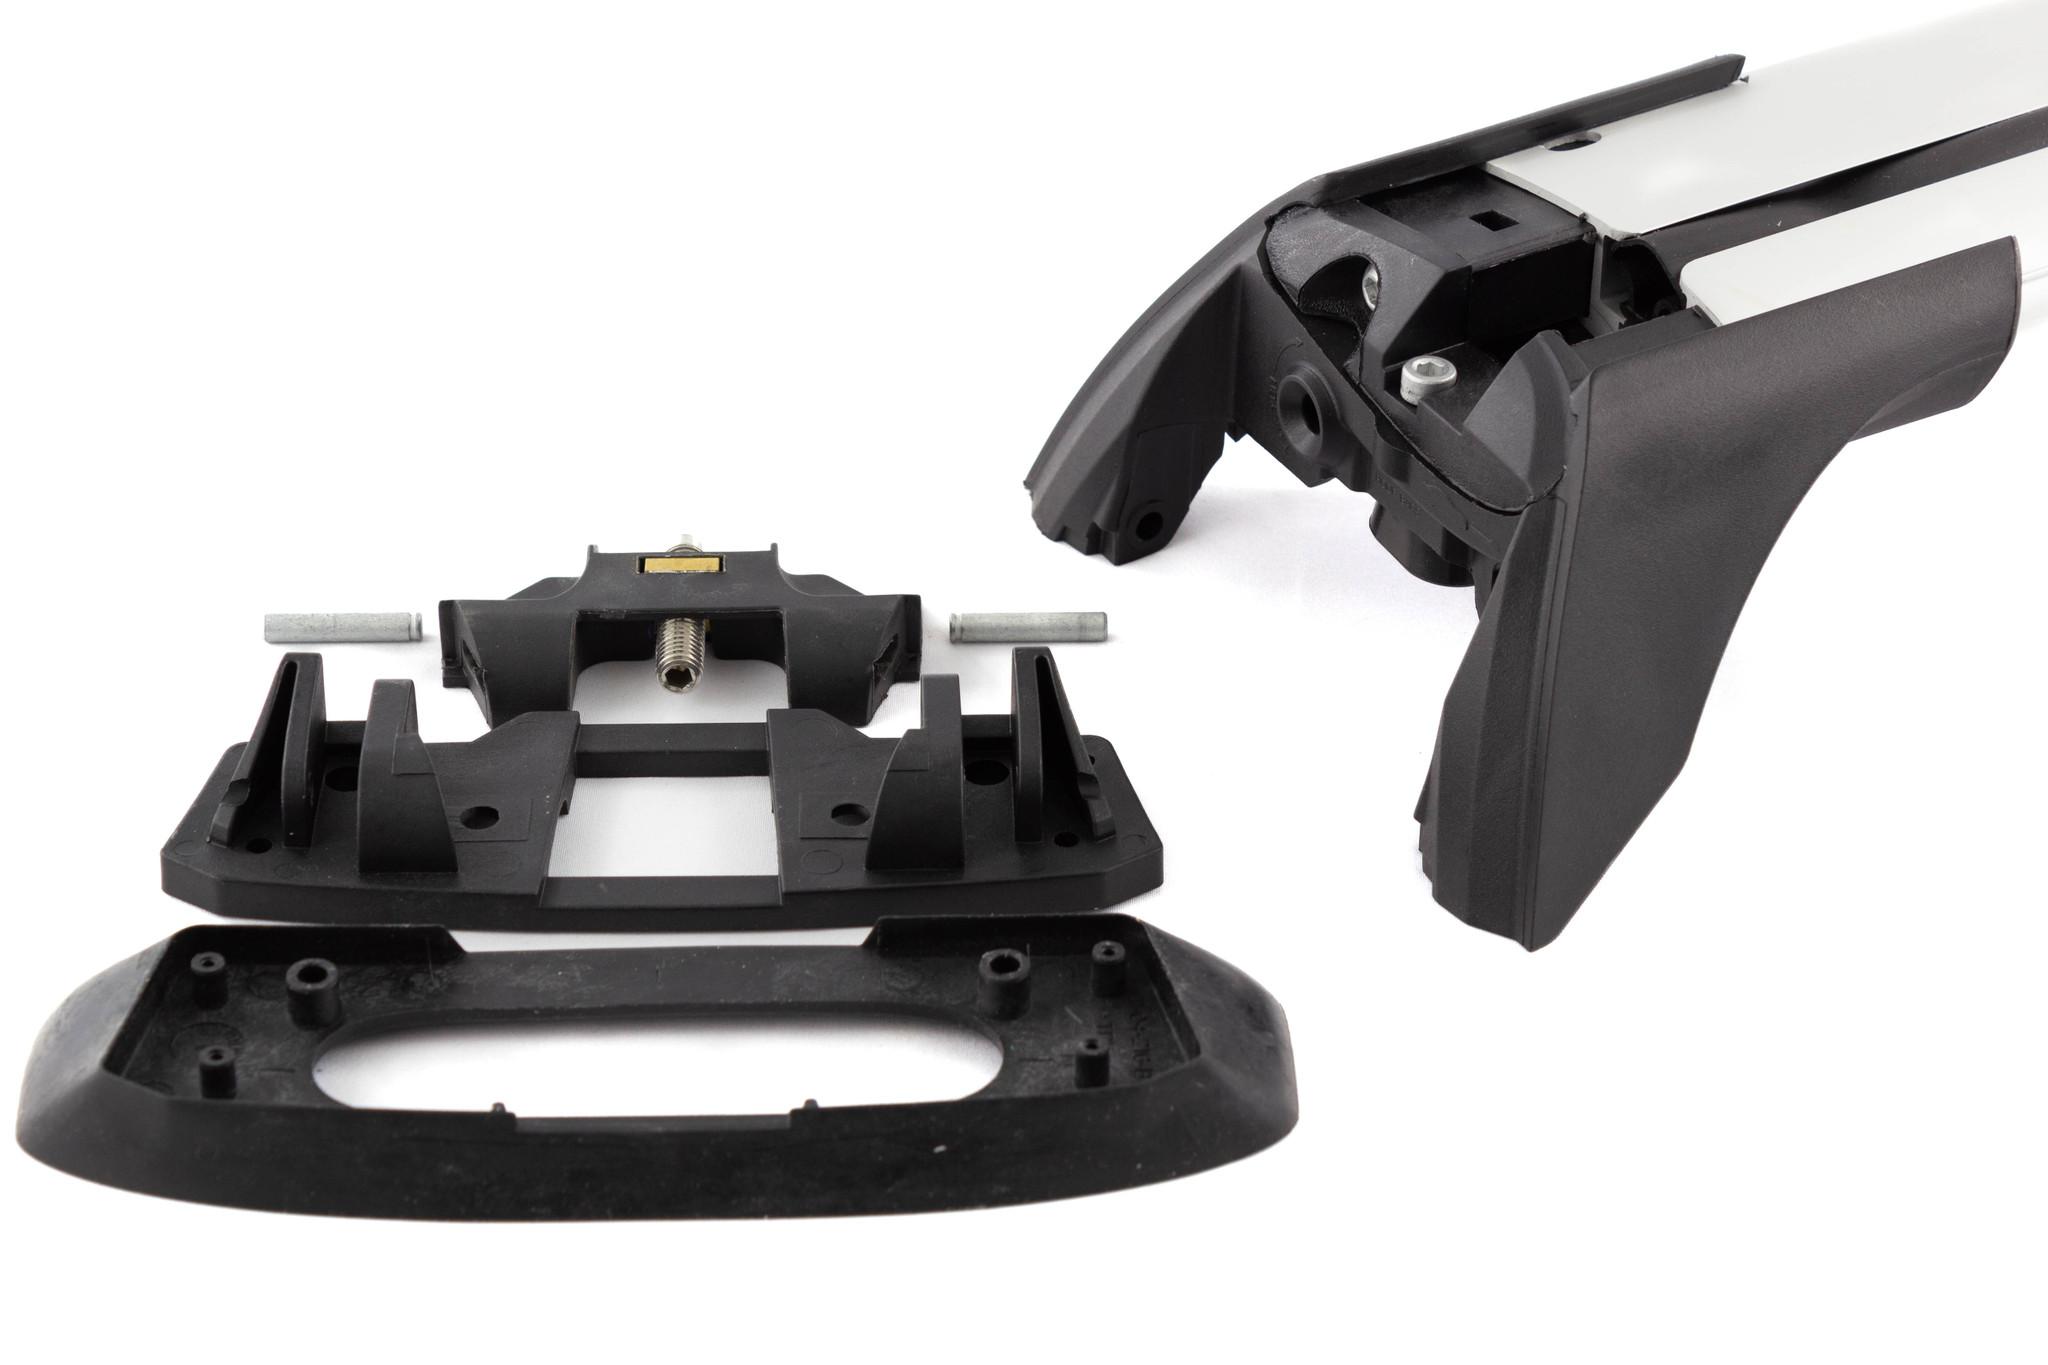
Yakima continued to make only 3 fit kits for their FlushBars: K328 for raised siderails, K450 for tracks, and K323 for custom fixed point installations. In a Whispbar system, the first step of installation of these kits is to remove the hardware already in the tower so it can be replaced with different attachment hardware. So, the Yakima FlushBars simply come with the towers already disassembled, without this hardware altogether. But if you have a Whispbar fit kit for a bare roof or fixed point system, you need these parts. They are now sold as a separate part called the FlushBar Conversion Kit.
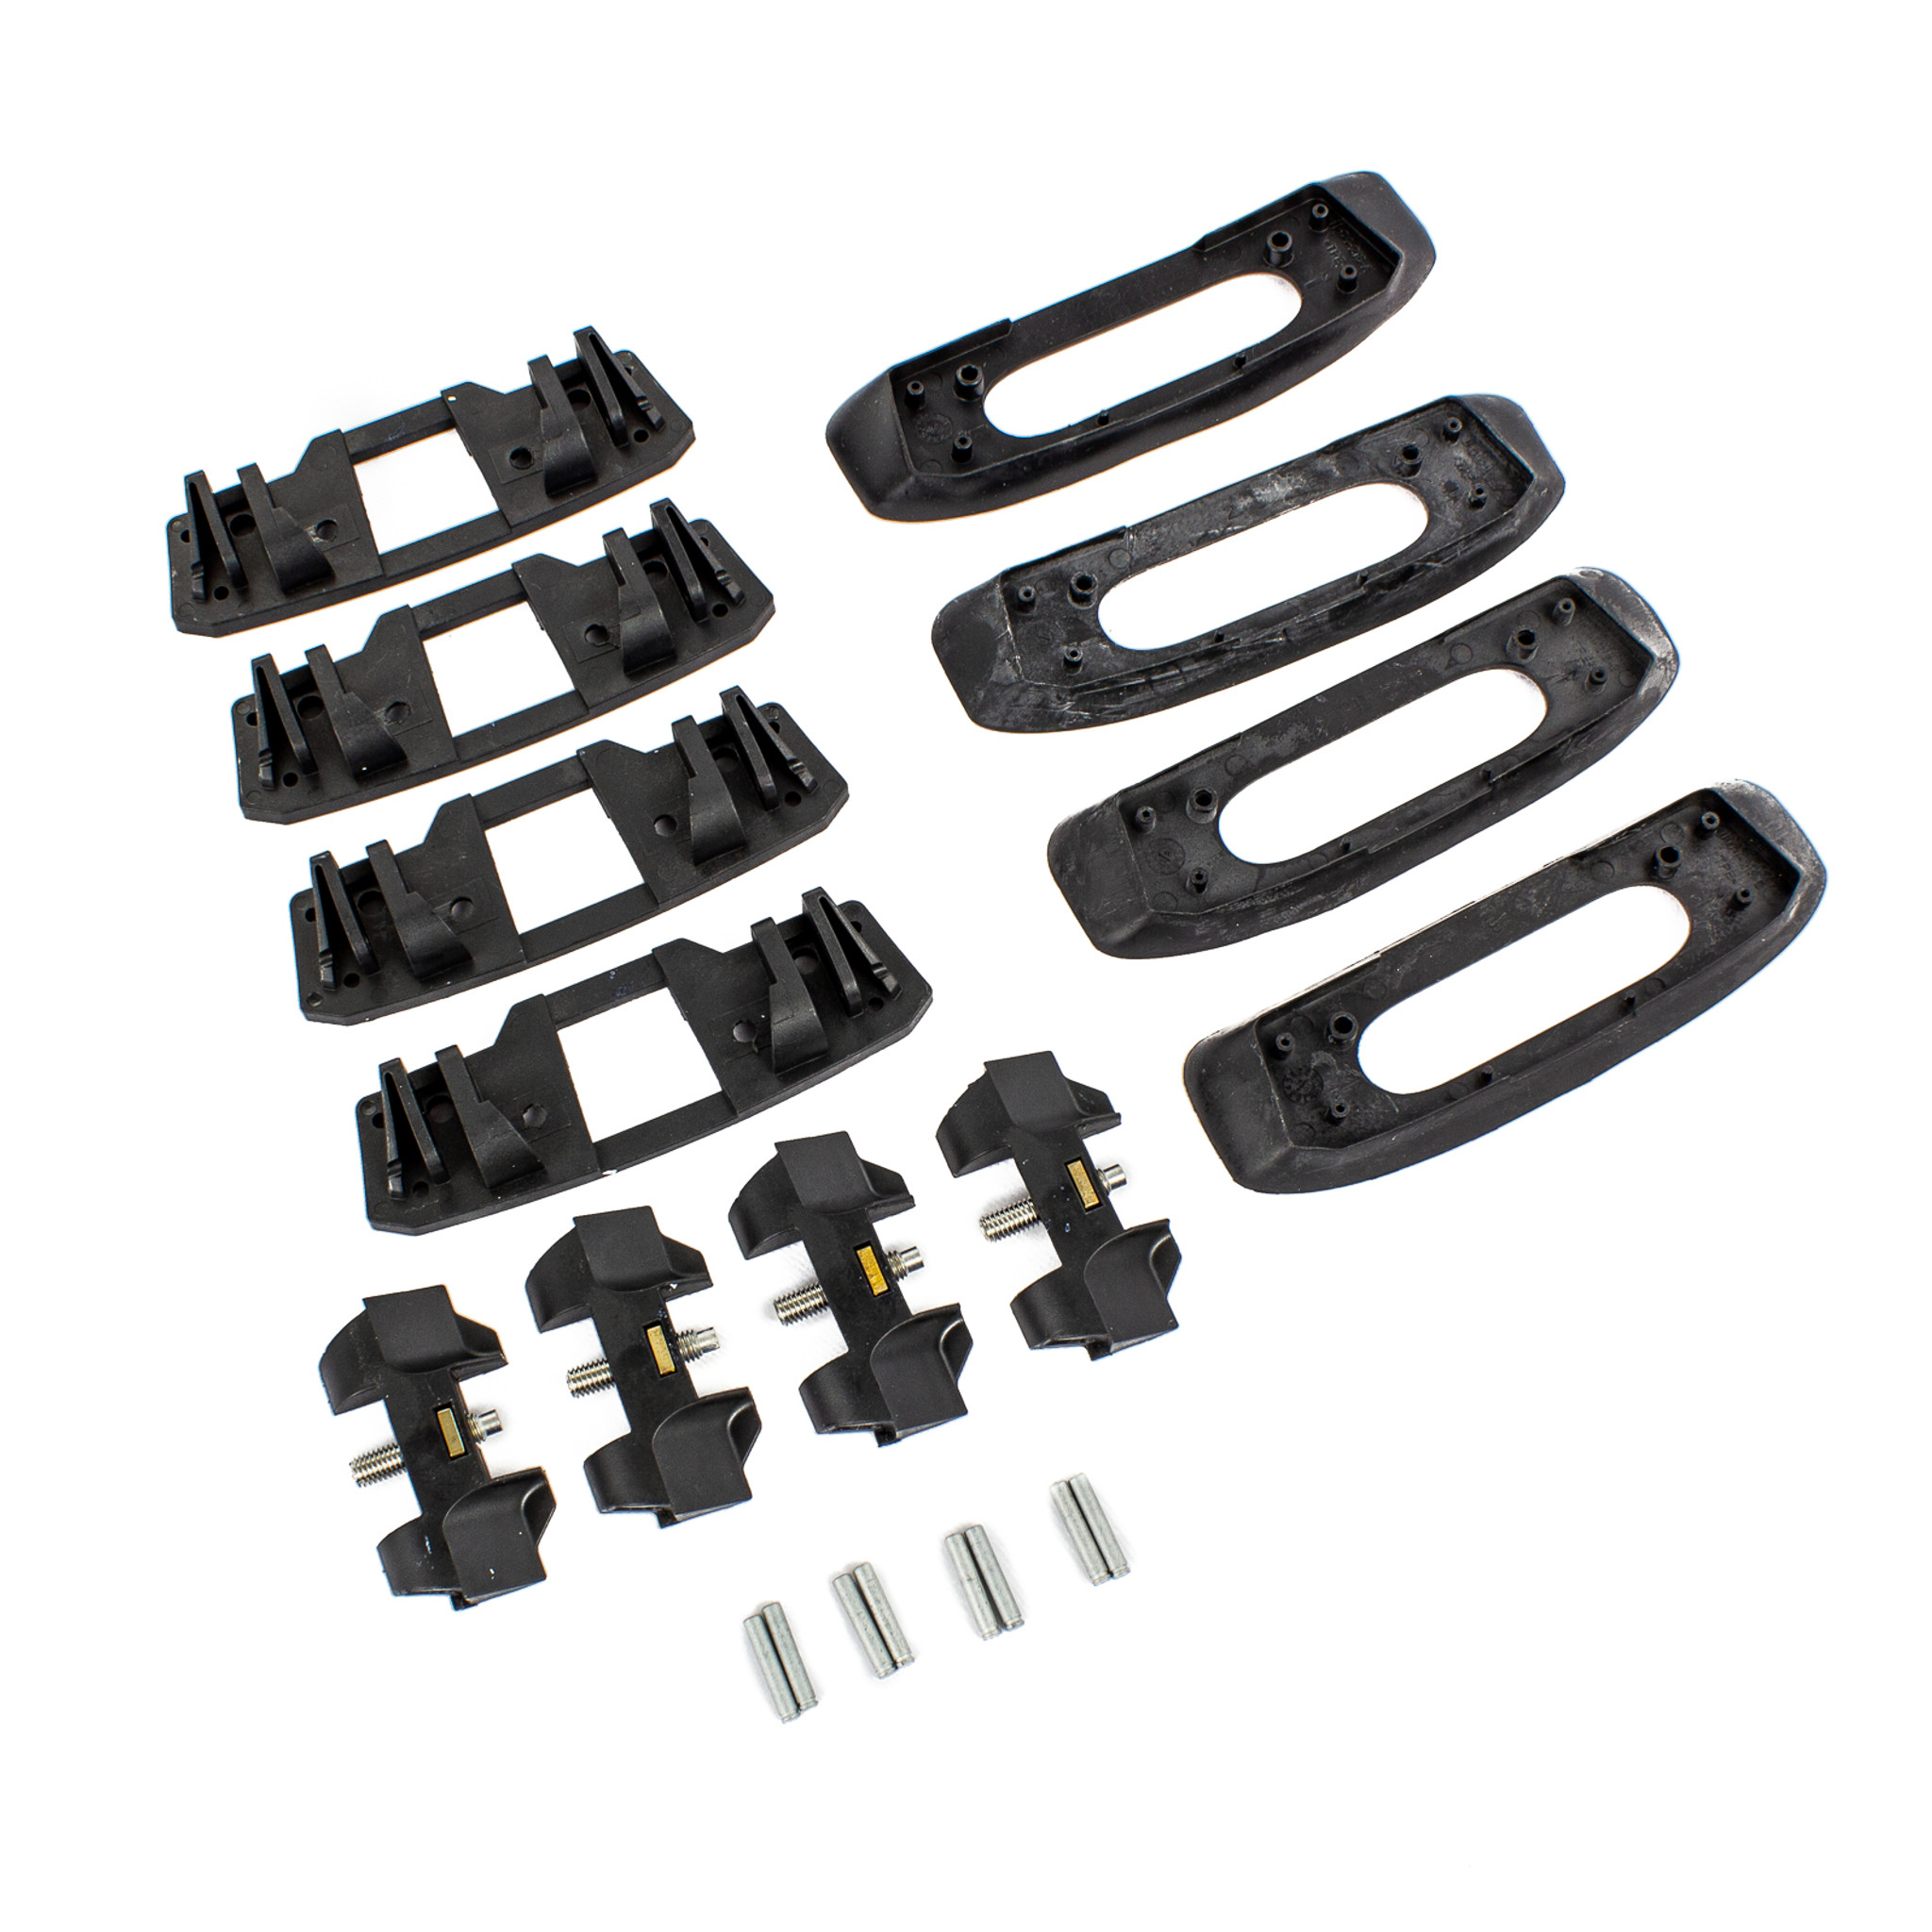
The FlushBar Conversion Kit includes the following parts:
Standard Pivot Foot x 4 (replacement part 8880244 SP060)
Standard Pads 11-04-216 x 4 (replacement part 8880247 SP080)
Block with Grub Screw x 4 (replacement part 8880249 SP085)
Pivot Foot Pins x 8 (replacement part 8880251 SP101)
The FlushBar Conversion Kit is required for fitting most Whispbar fit kits to Yakima FlushBars. Some raised and flush siderail fit kits do not need it, since the parts would be replaced anyway. Every bare roof fit and most fixed point fits will need it. Sometimes you may not use all of the parts that come with it if the fit kit comes with vehicle-specific replacements. If you’re not sure if you need it or not, you can reference the Whispbar fit kit instruction sheets on Yakima’s tech page to see if these parts are removed or not, and you can always contact us with any questions.
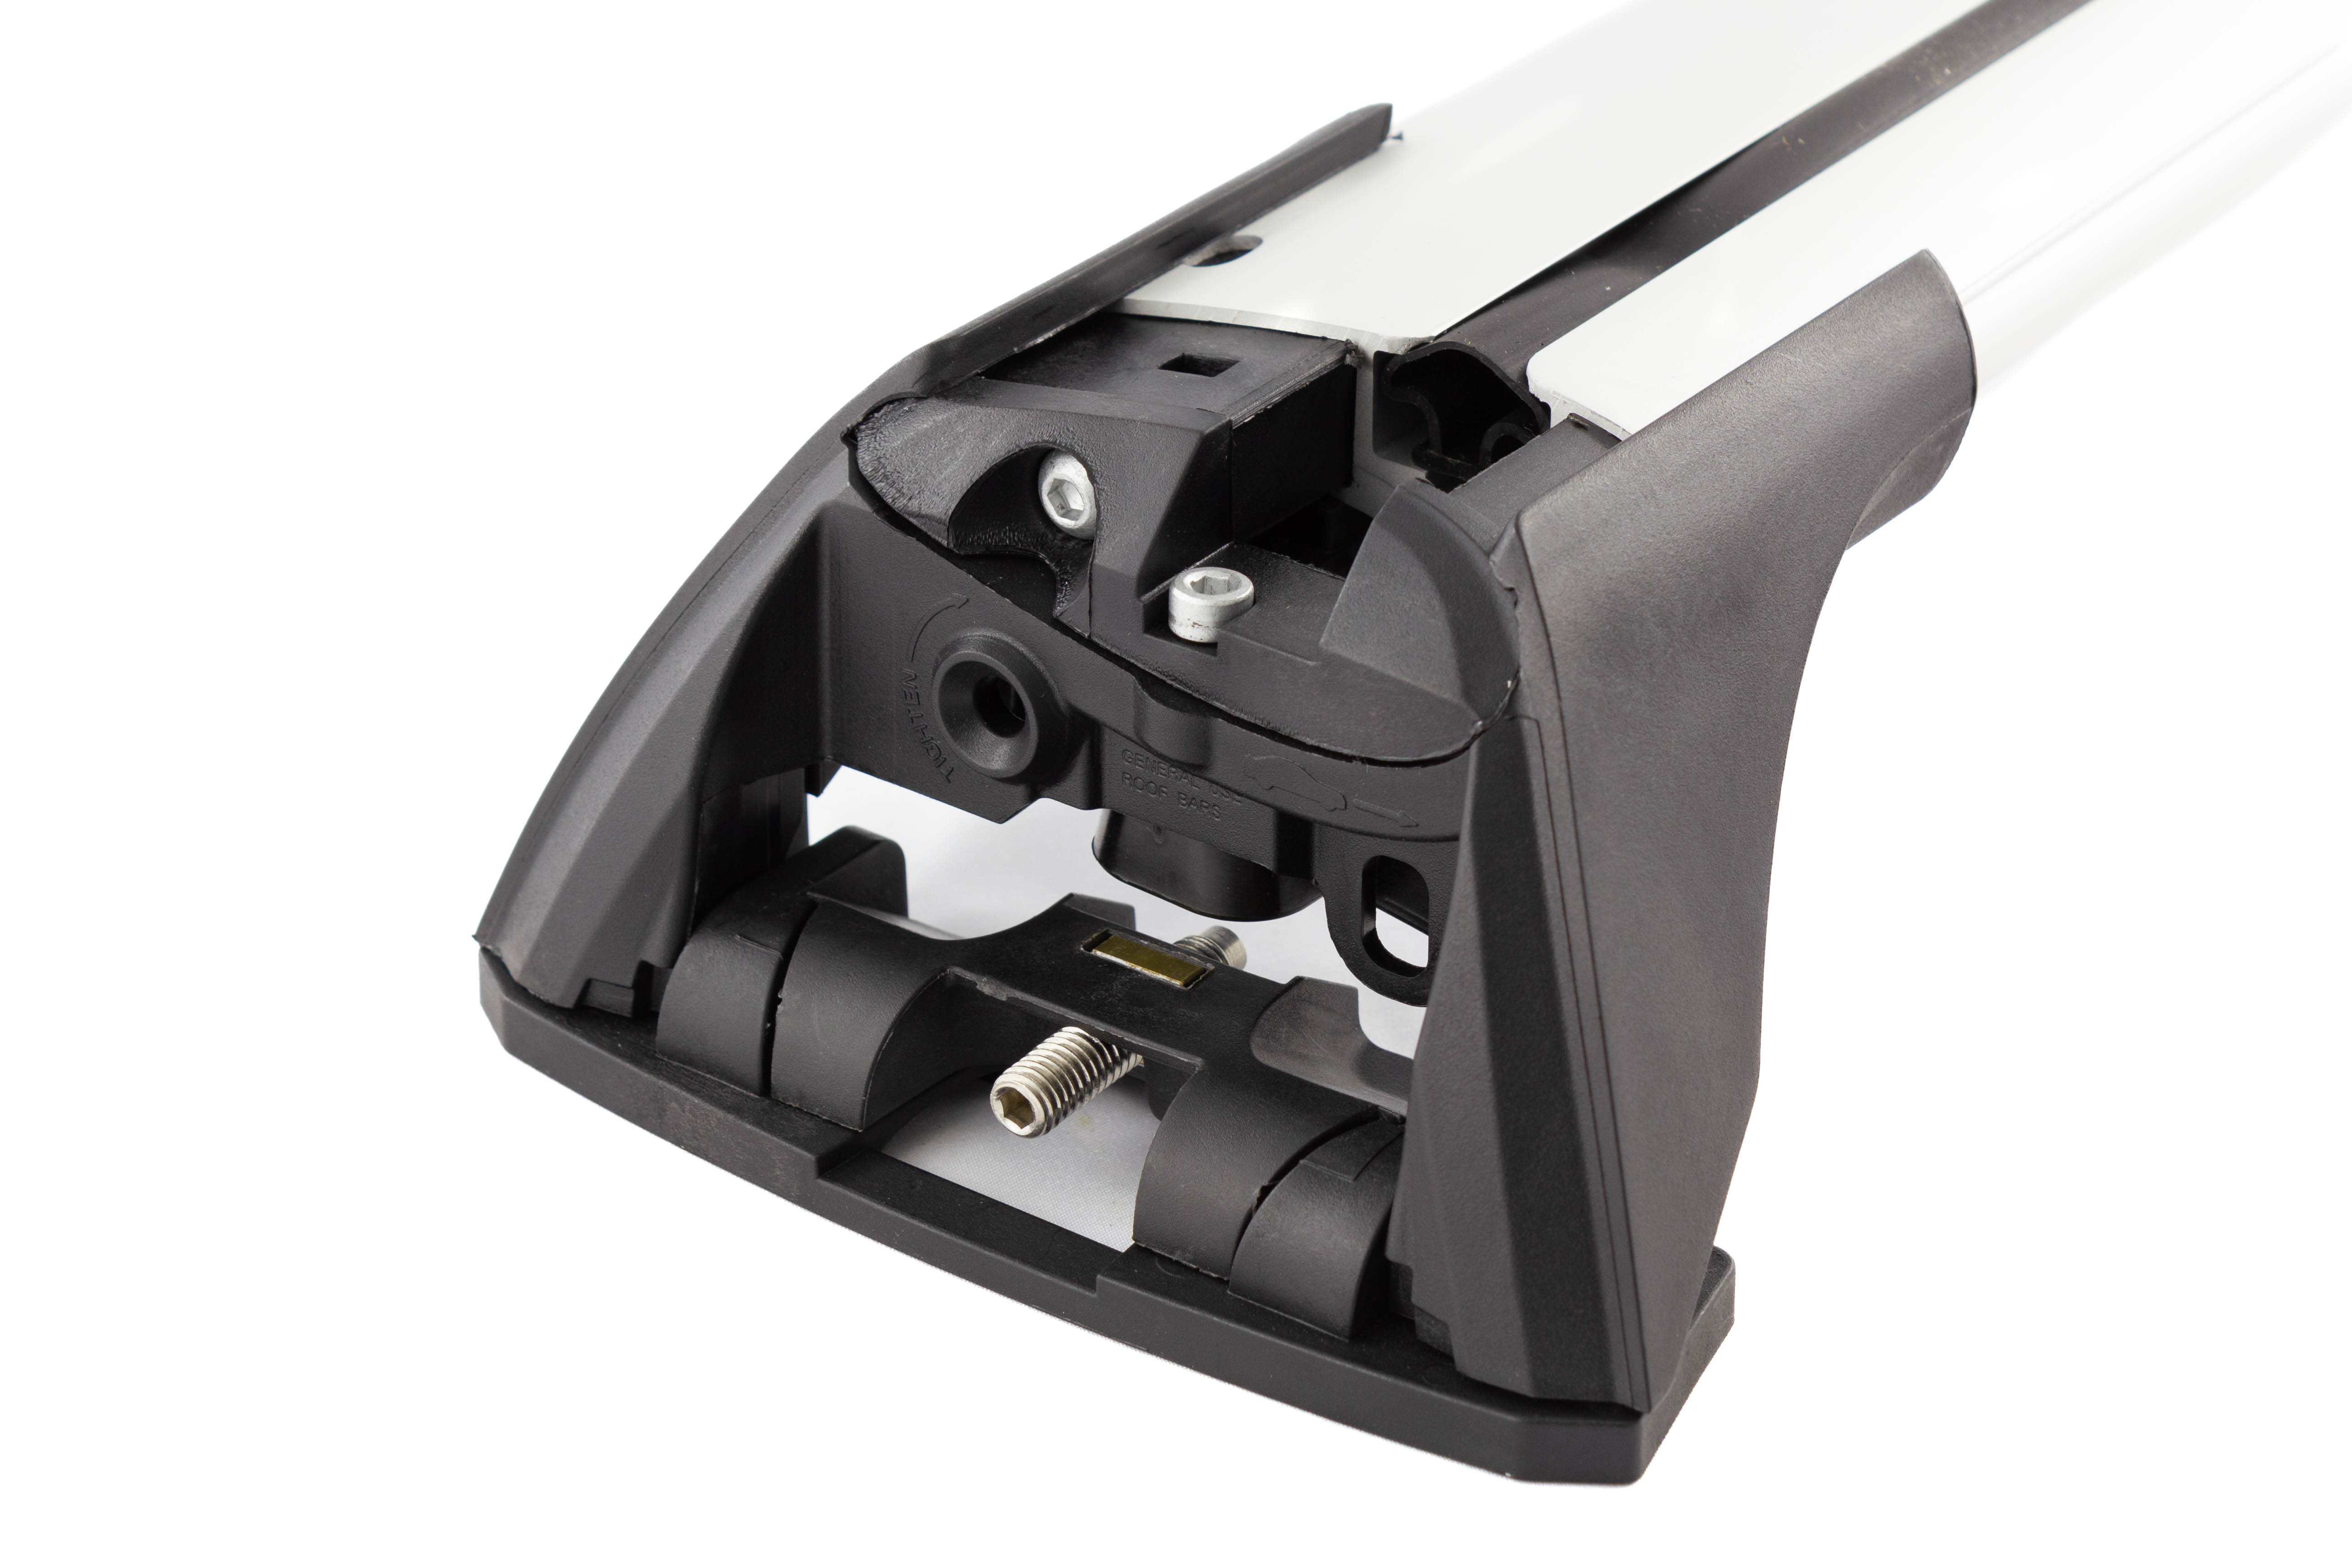
Once you’ve determined that you need the FlushBar Conversion Kit, you’ll need to install it. Begin by placing the tower onto the foot. The angled surfaces should fit neatly together.
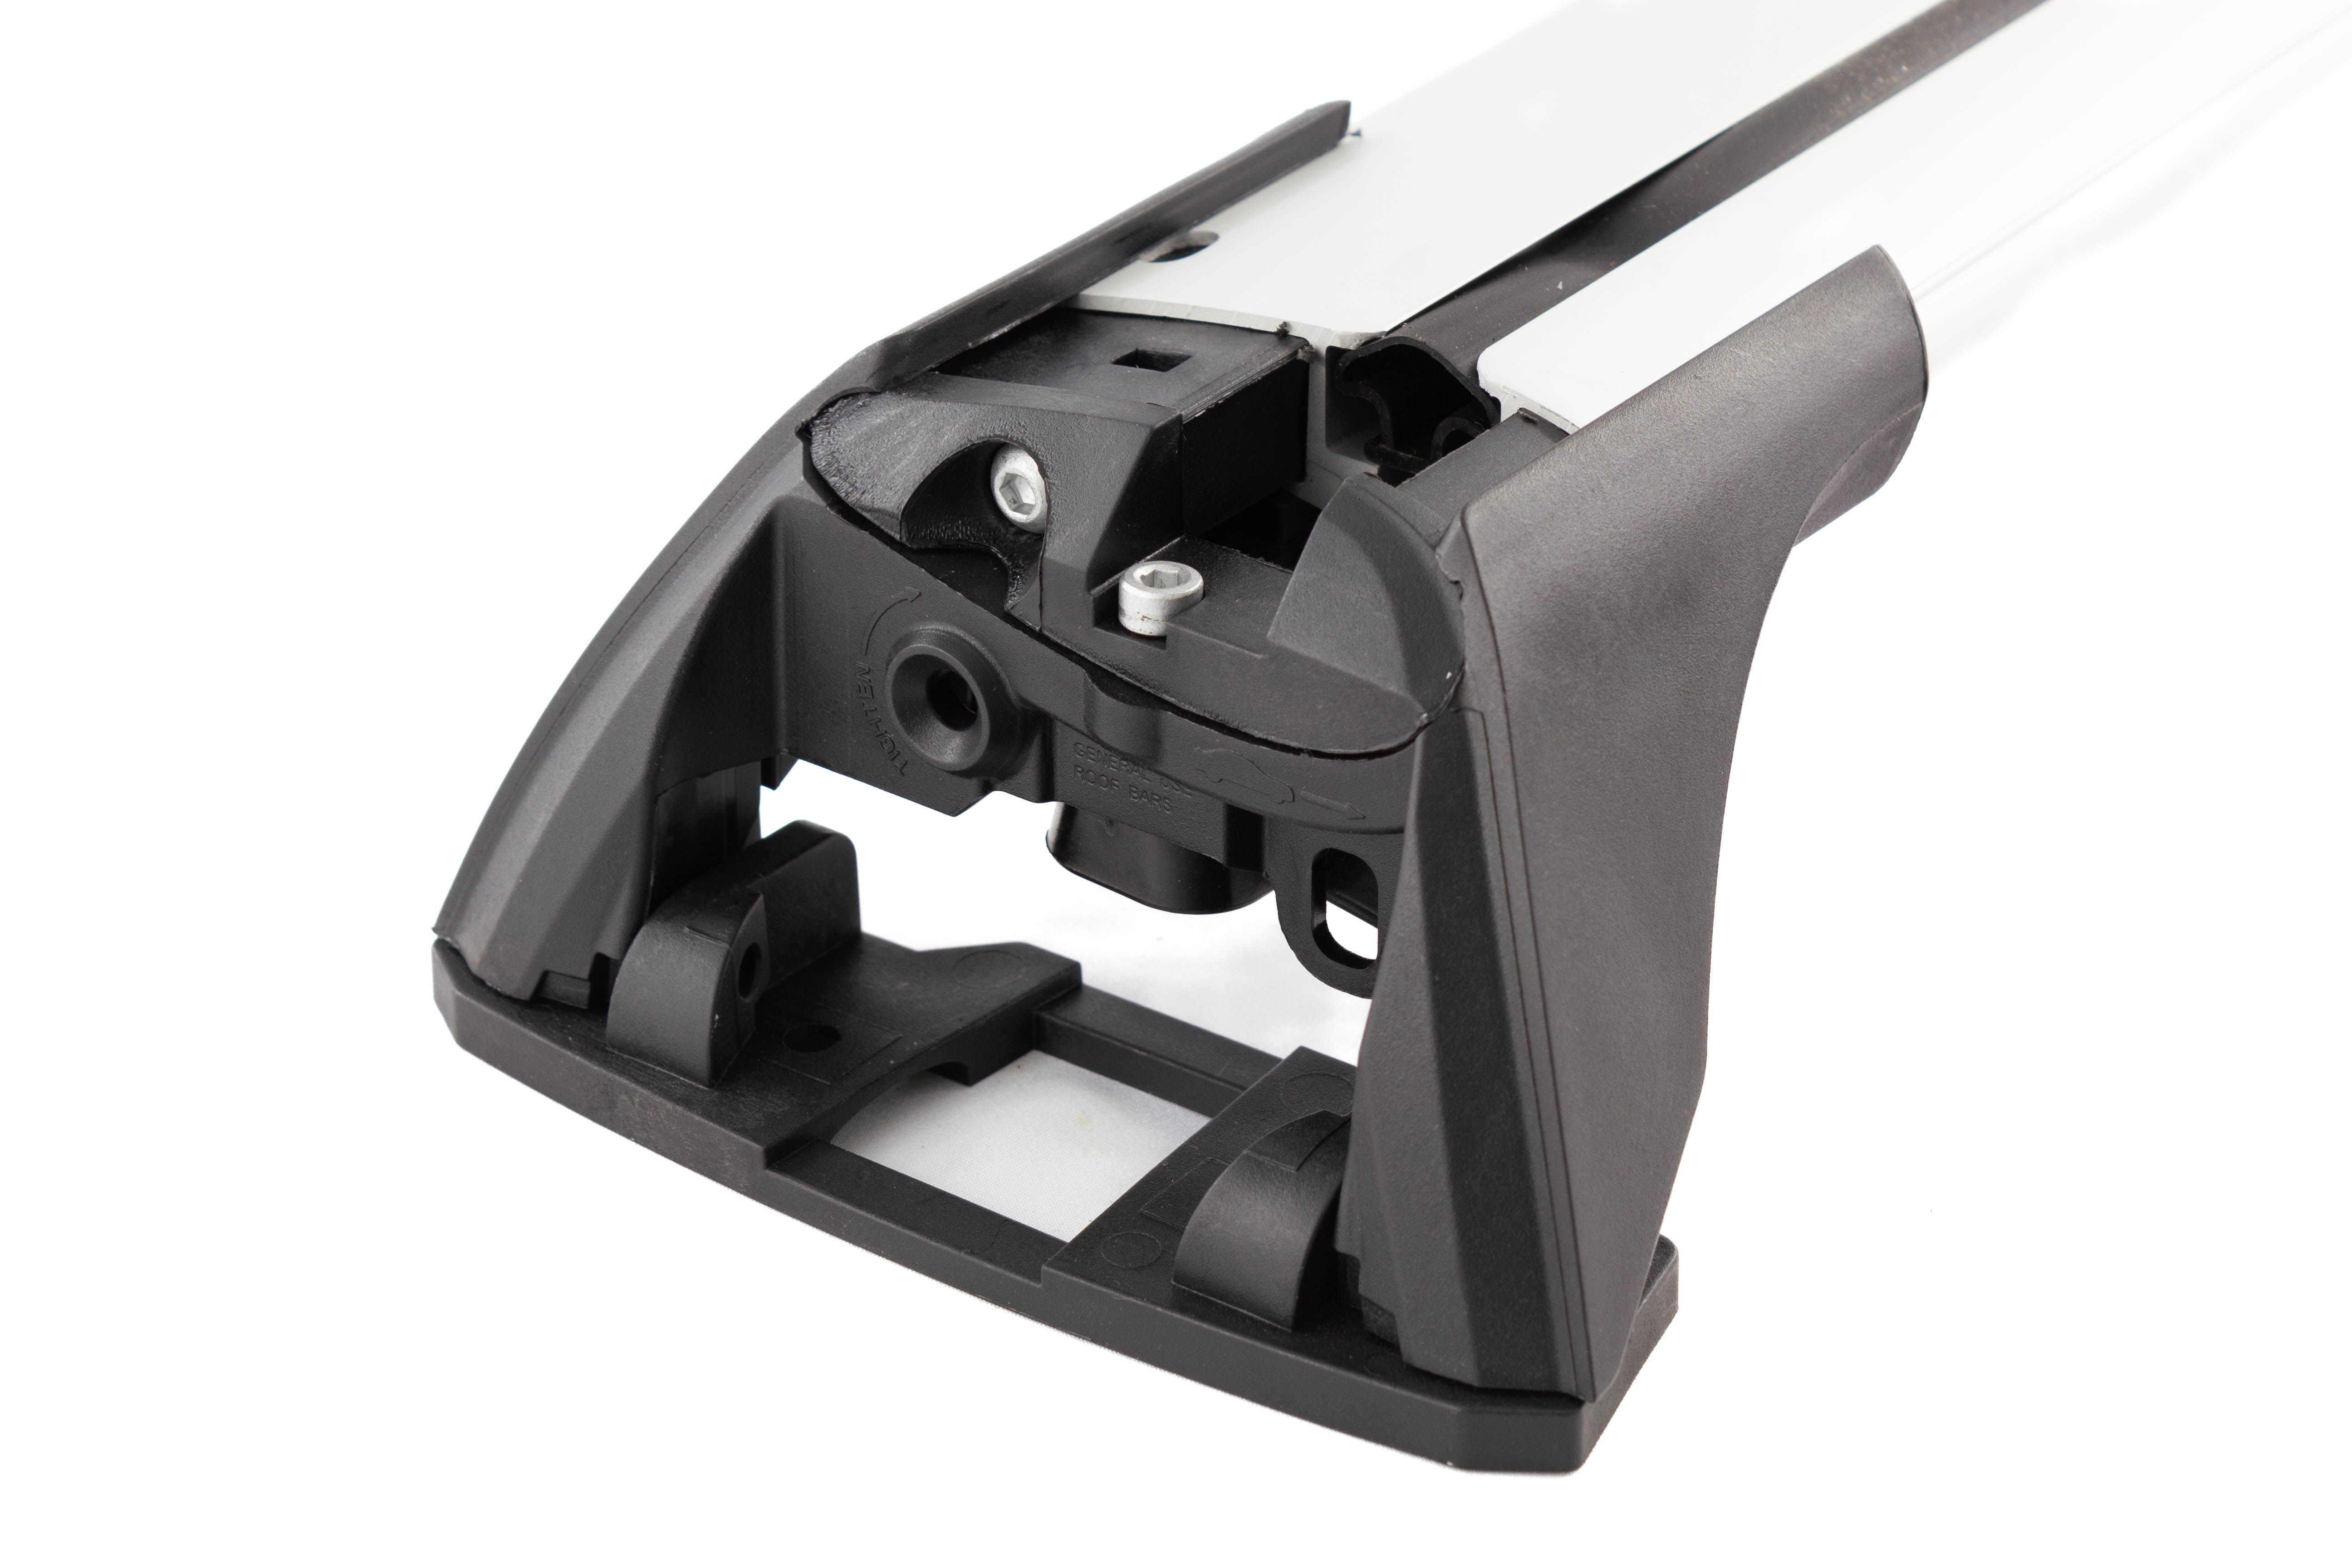
Install the pivot pins which hold the foot to the tower. The notch on the pin should still be visible - it is for removing the pivot pin should you need to.
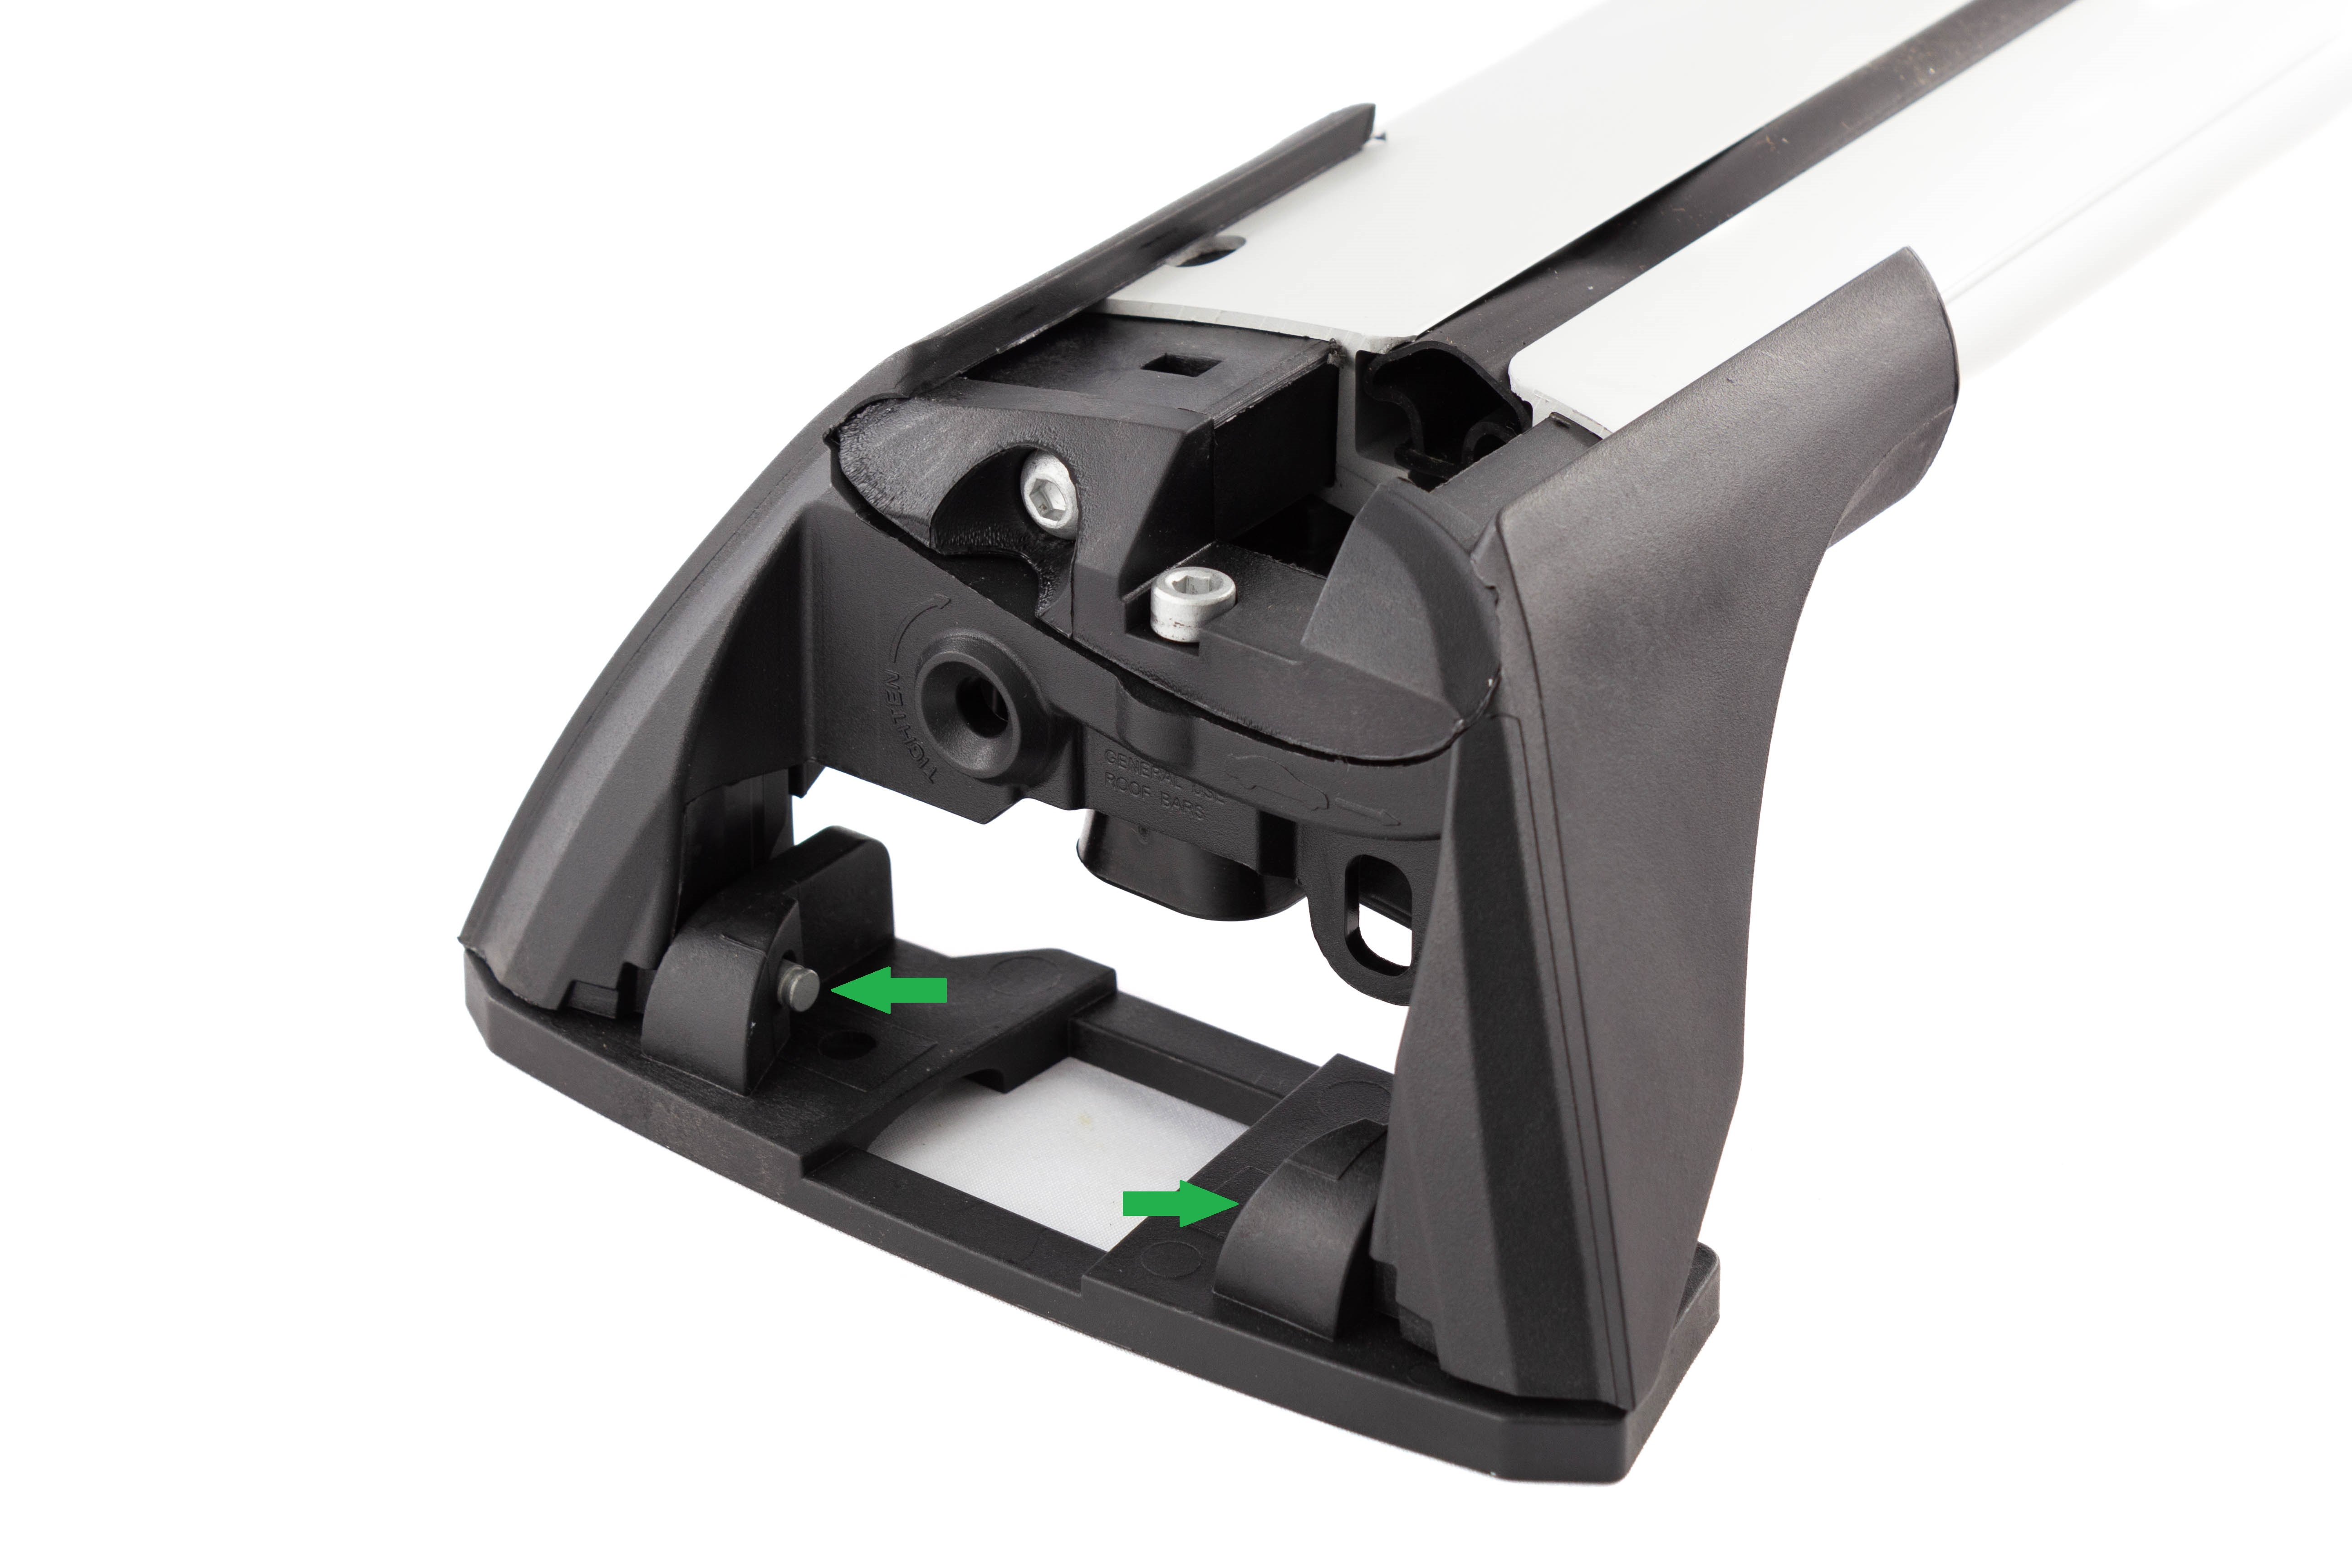
Slide the clamp block into place from the inside of the tower onto the pivot pins. If your fit kit instructions depict removal of this part, install the part that takes its place.
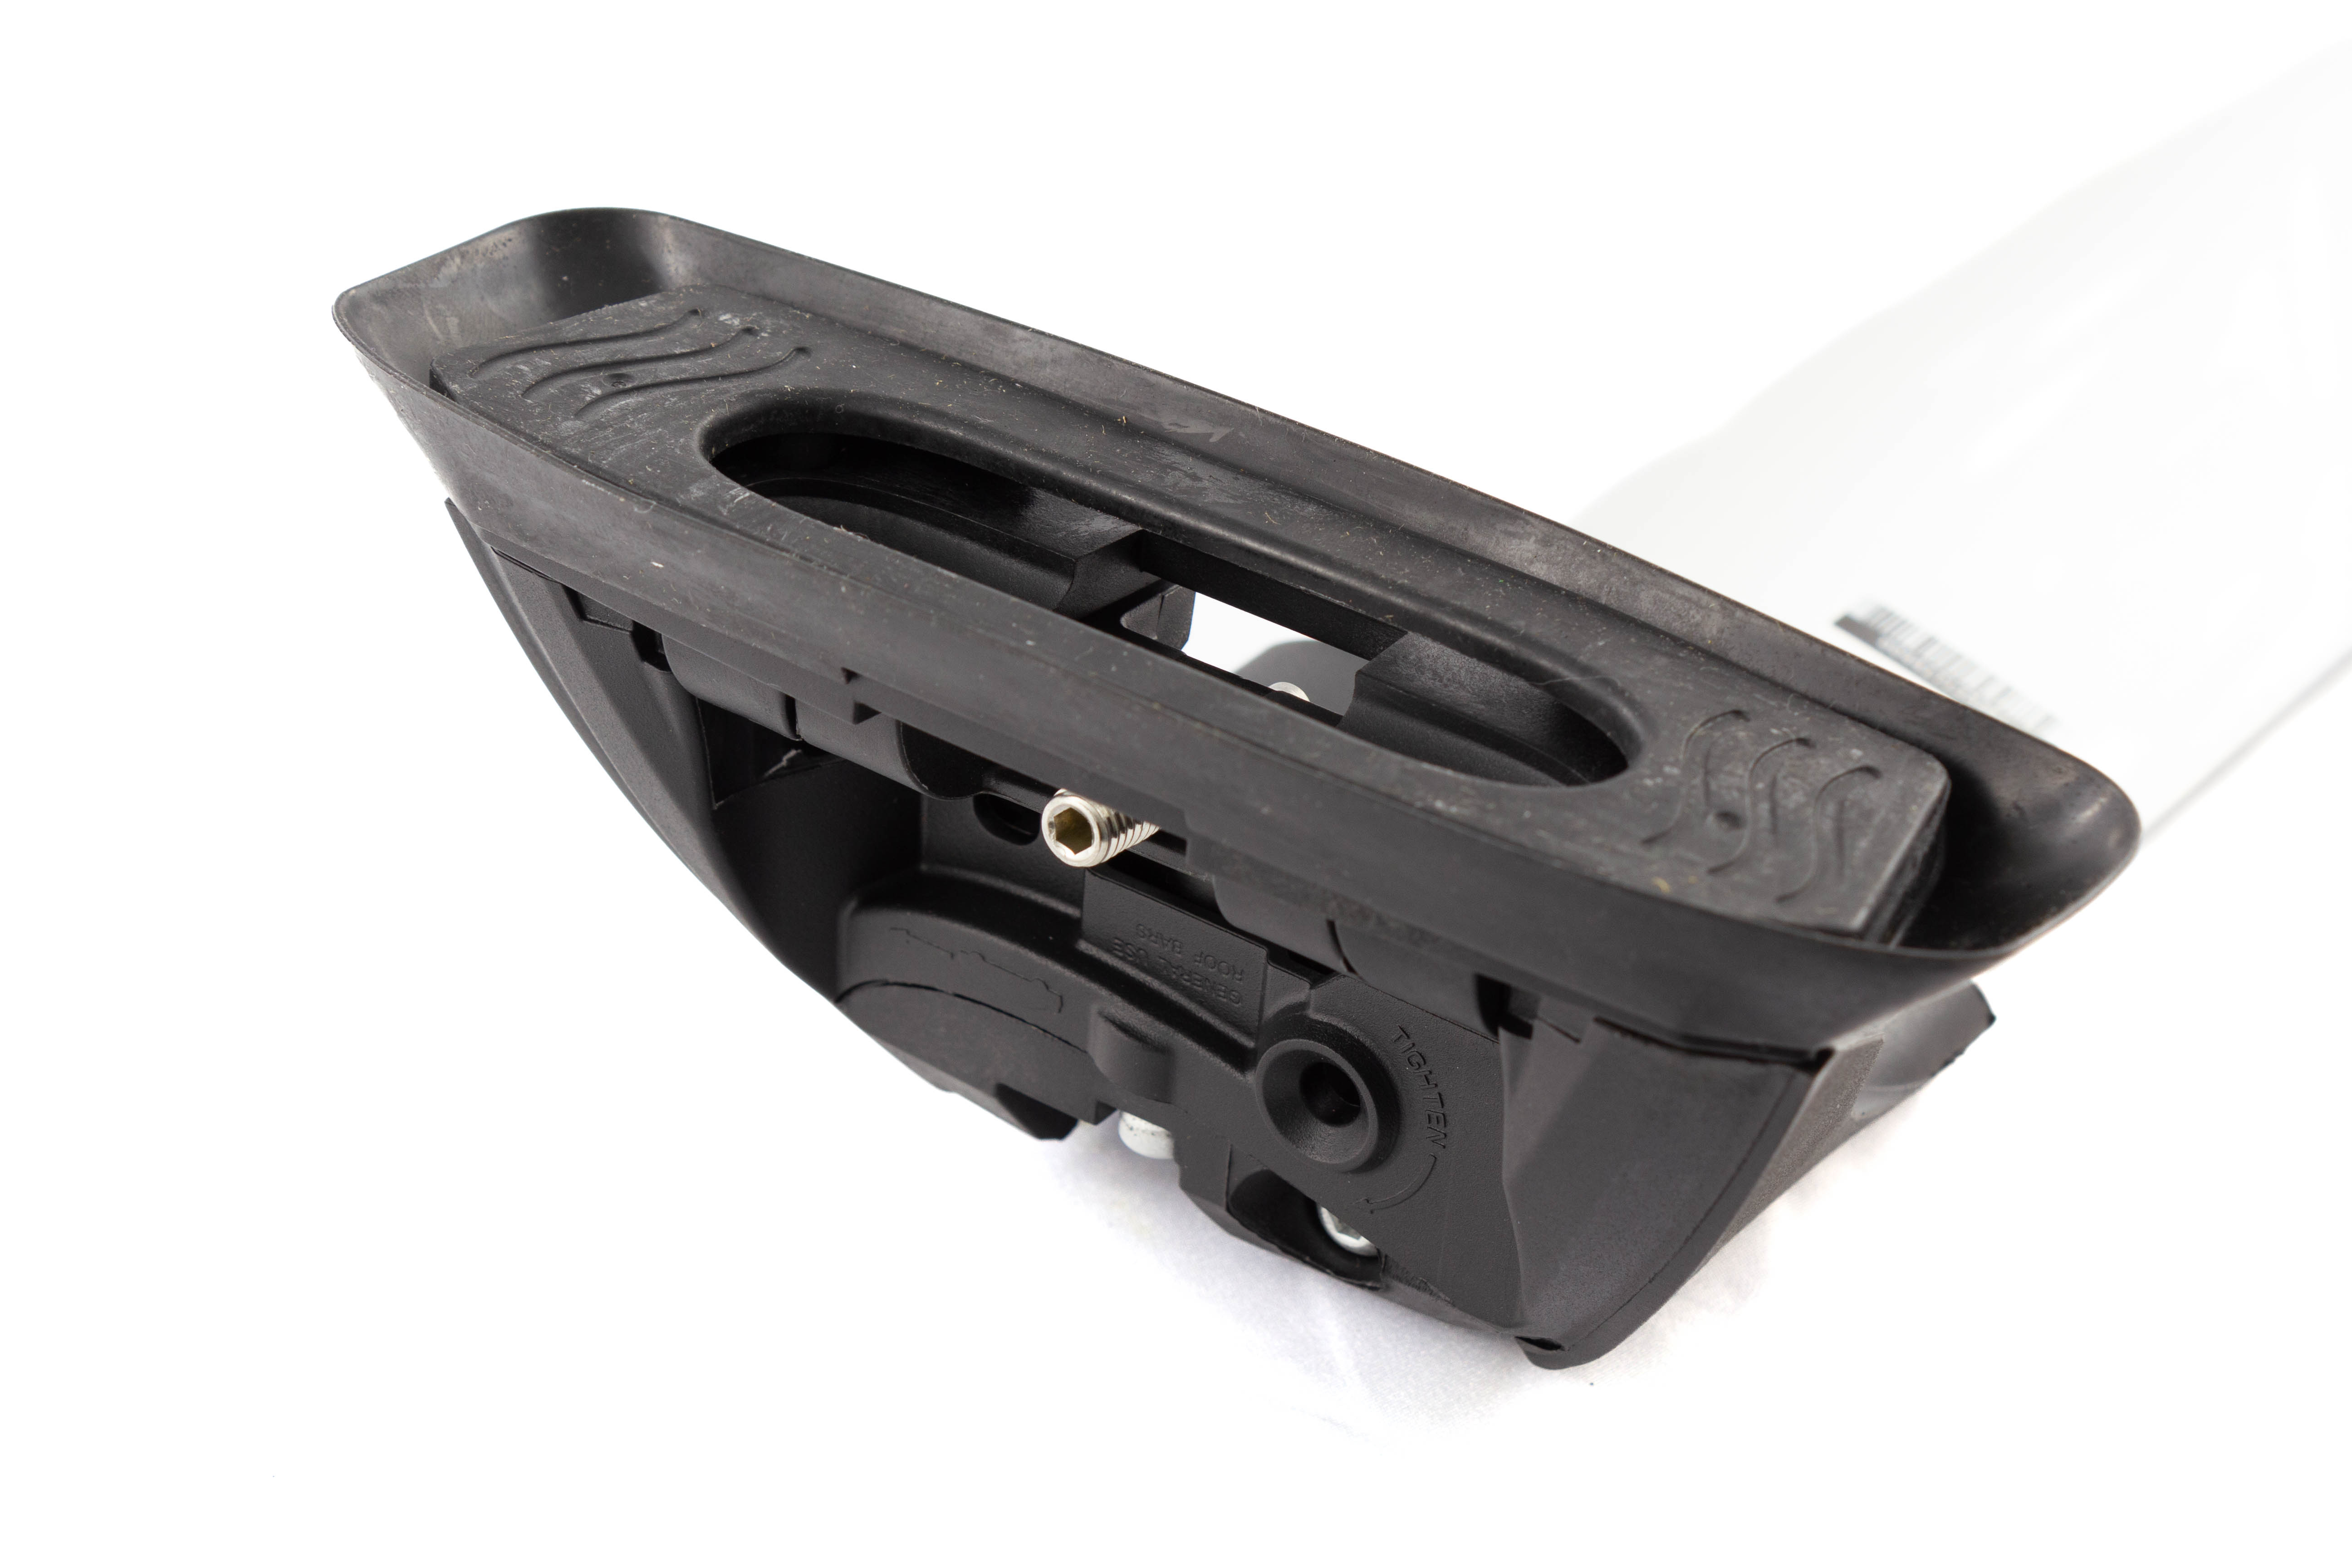
Lastly, the rubber pad can go on the bottom of the foot, but only if your fit kit does not include its own pads.
Your tower is now configured the way a stock Whispbar tower is configured, so you can continue with your Whispbar fit kit instructions for the rest of the installation.
The FlushBar Conversion Kit can also be used as a way to procure these parts if you have a used Whispbar Through Bar, FlushBar, or HD Bar that had these parts removed.
Pair the FlushBar Conversion Kit with a set of Yakima FlushBars and the appropriate Whispbar fit kit for your car!