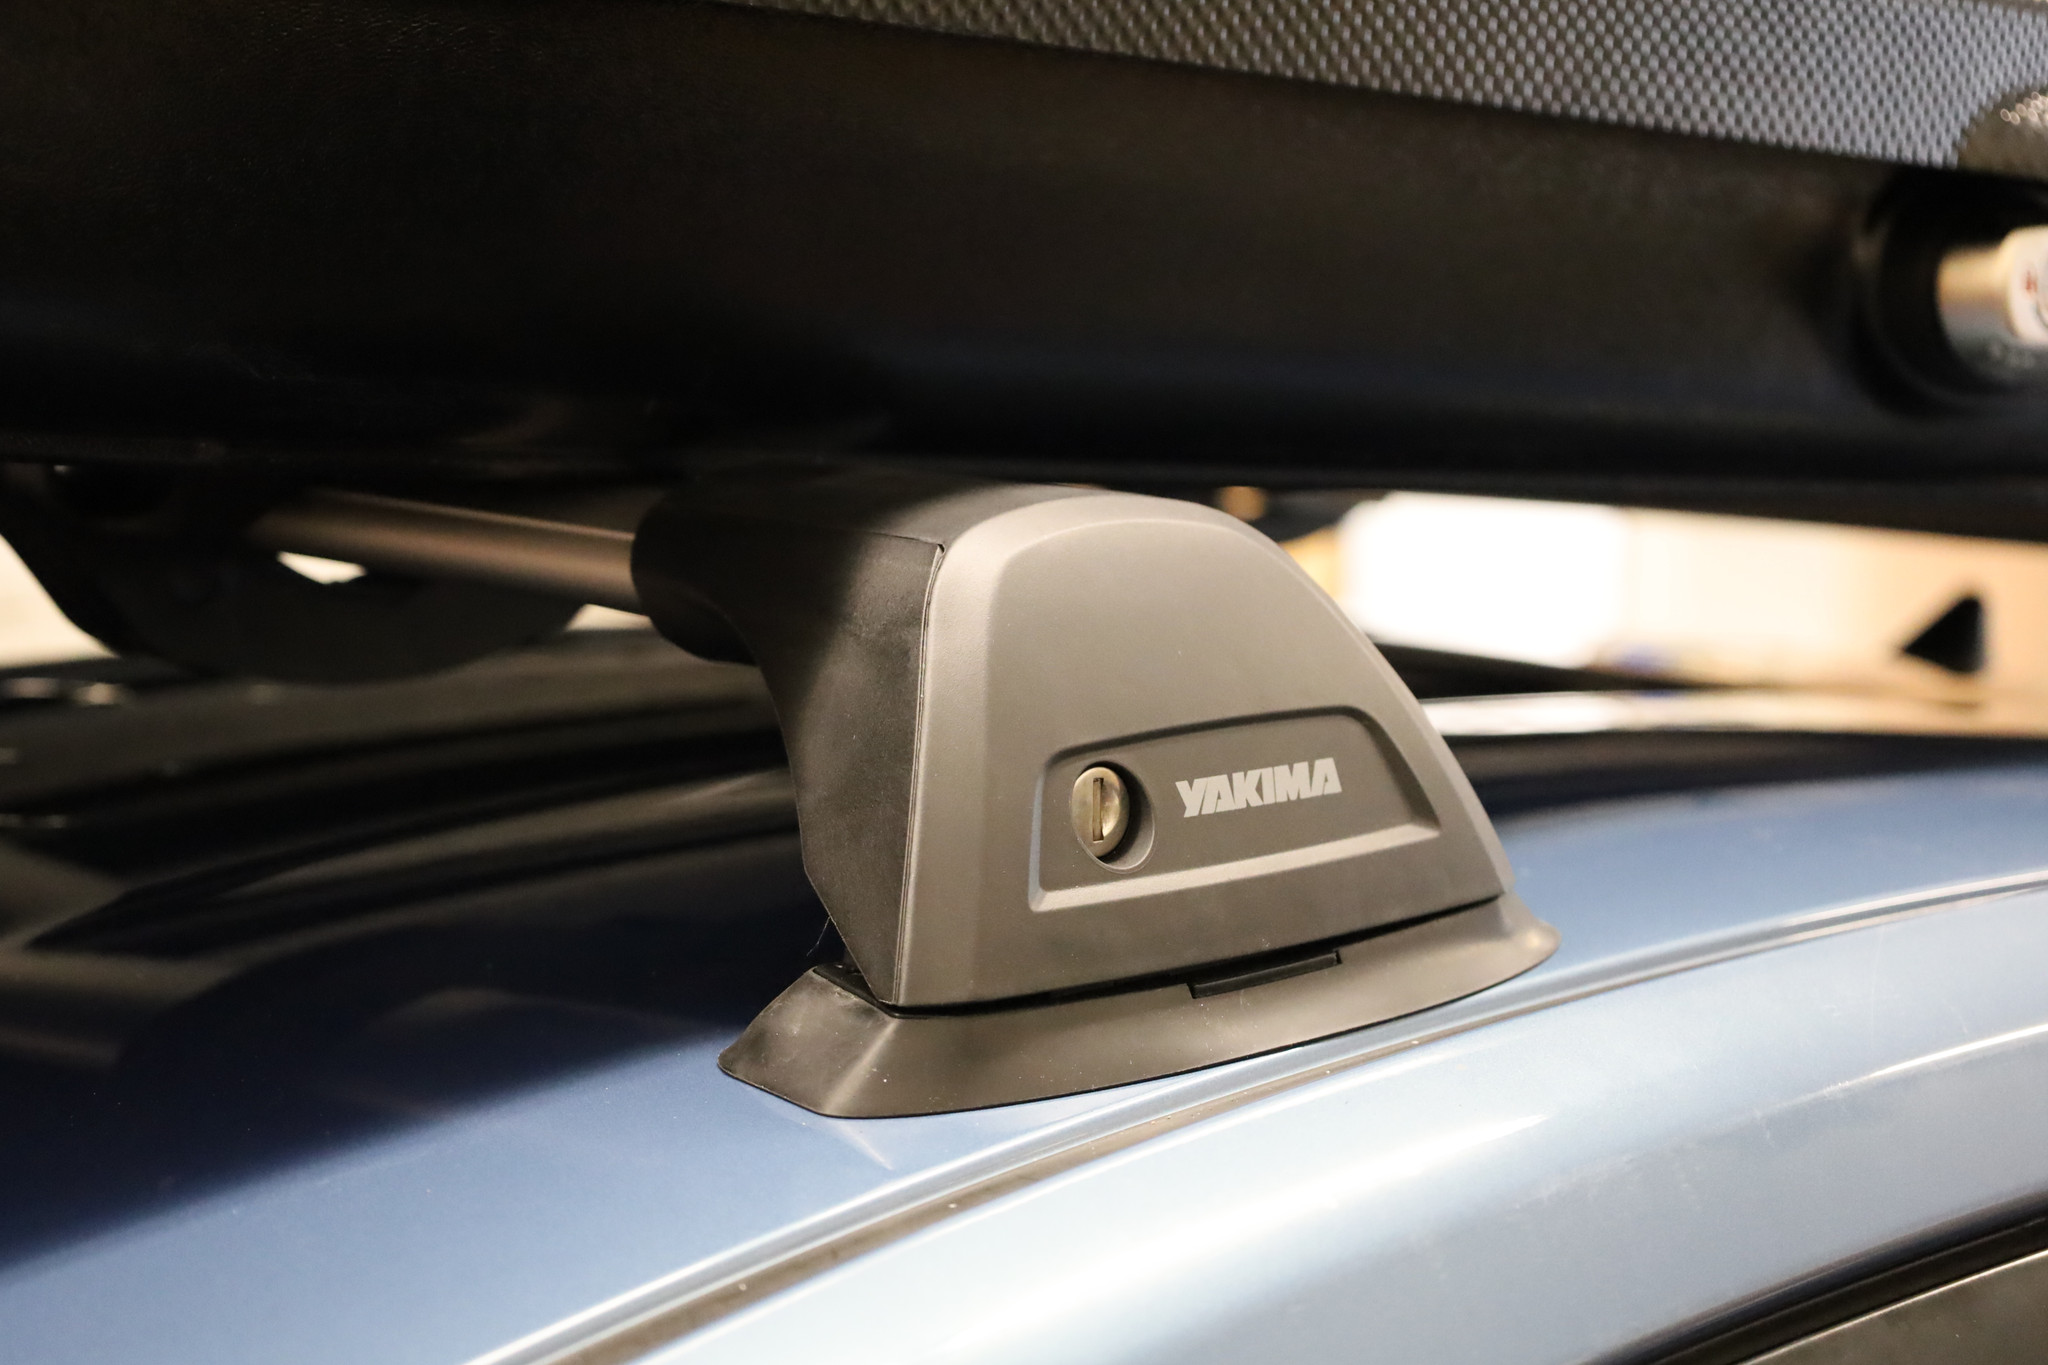
The Yakima K323 fit kit in combination with Yakima or Whispbar FlushBars provides a sleek, aerodynamic base rack crossbar system with a strong riveted connection to your roof. We have packages available as complete kits ready to ship, as well as installation services at our Portland and Seattle/Renton retail shops!
If installing the K323 is something you’d like to attempt yourself, there are some key points you’ll want to keep in mind. Note that this install requires drilling into the roof of your vehicle and riveting some pieces permanently in place. Yakima K323 and Whispbar K323 installation instructions are available online for reference. If this is not something you’re comfortable with, our retail shops are happy to perform the installation, or we can guide you towards a clip-on style fit instead that does not require putting holes in the roof.
When configuring your roof rack, make sure you select all of the components required! You will need a front crossbar, a rear crossbar, the K323 fit kit, and, optionally, lock cores. Additionally, there are some specific tools required for K323 installation:
- Masking tape (optional, but helpful for mocking up placement)
- Tape measure
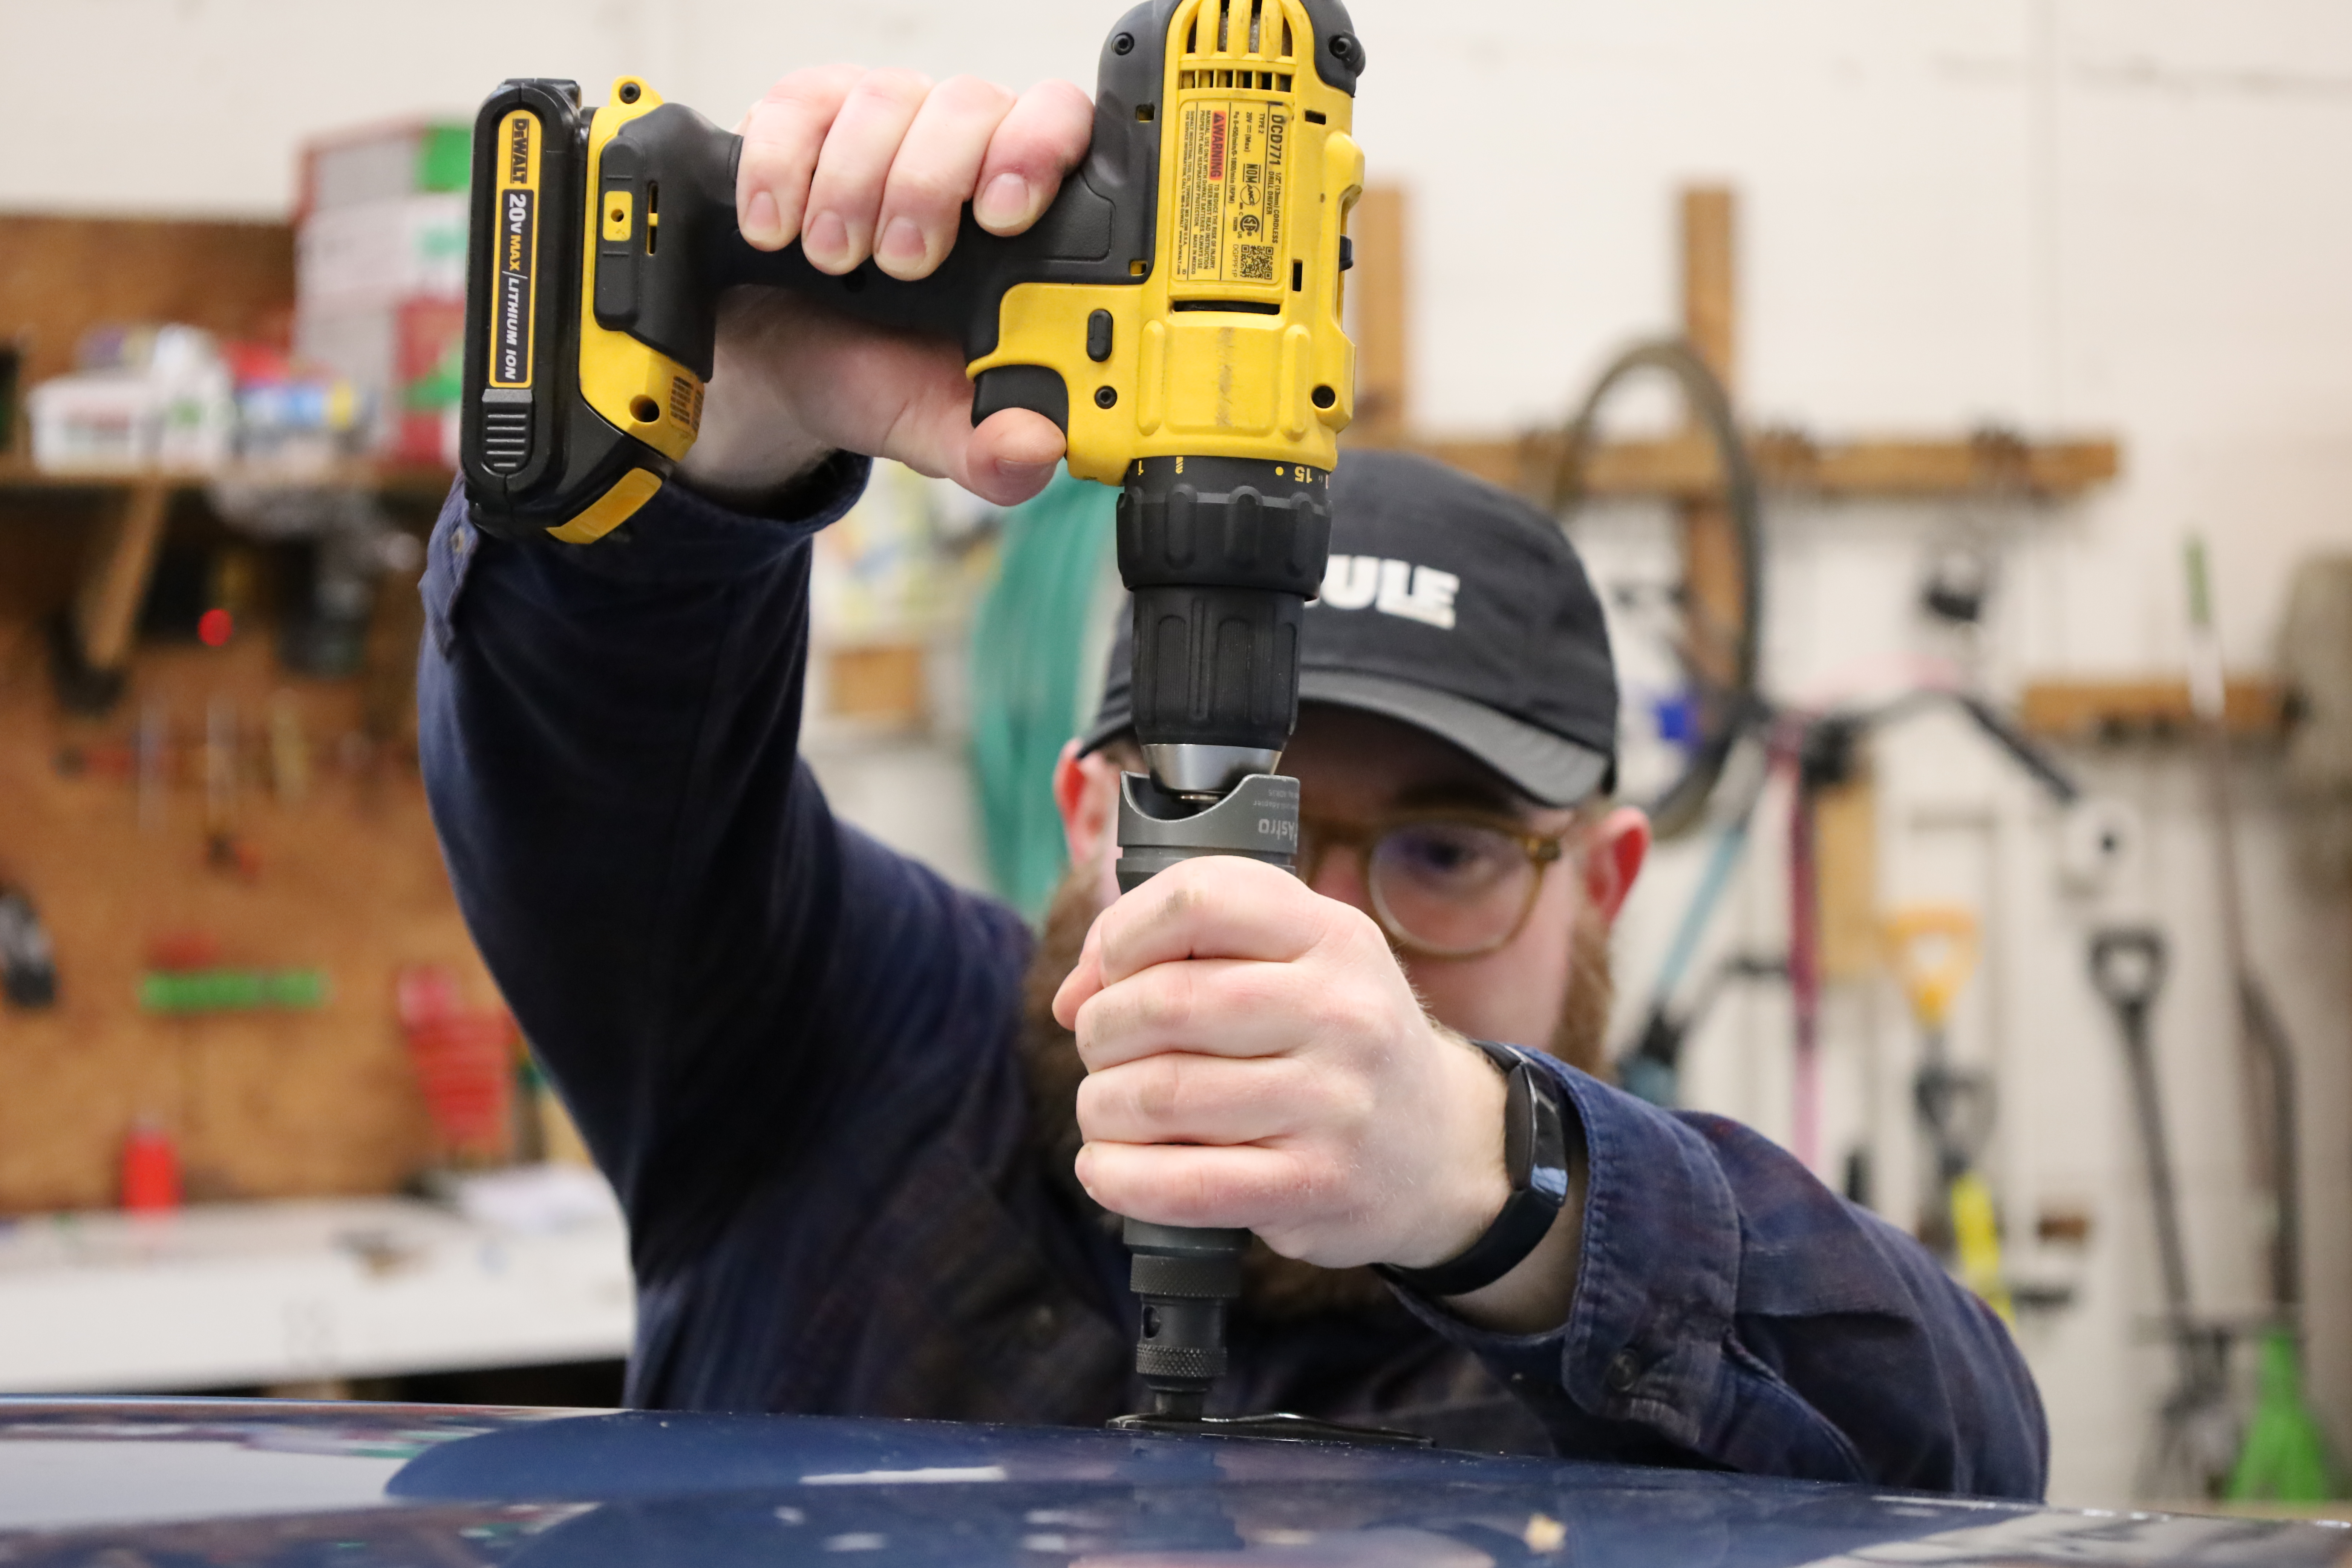
- Drill (a drill bit is included in the kit, but a smaller bit for pilot holes or a punch can be helpful)
- Silicone sealant
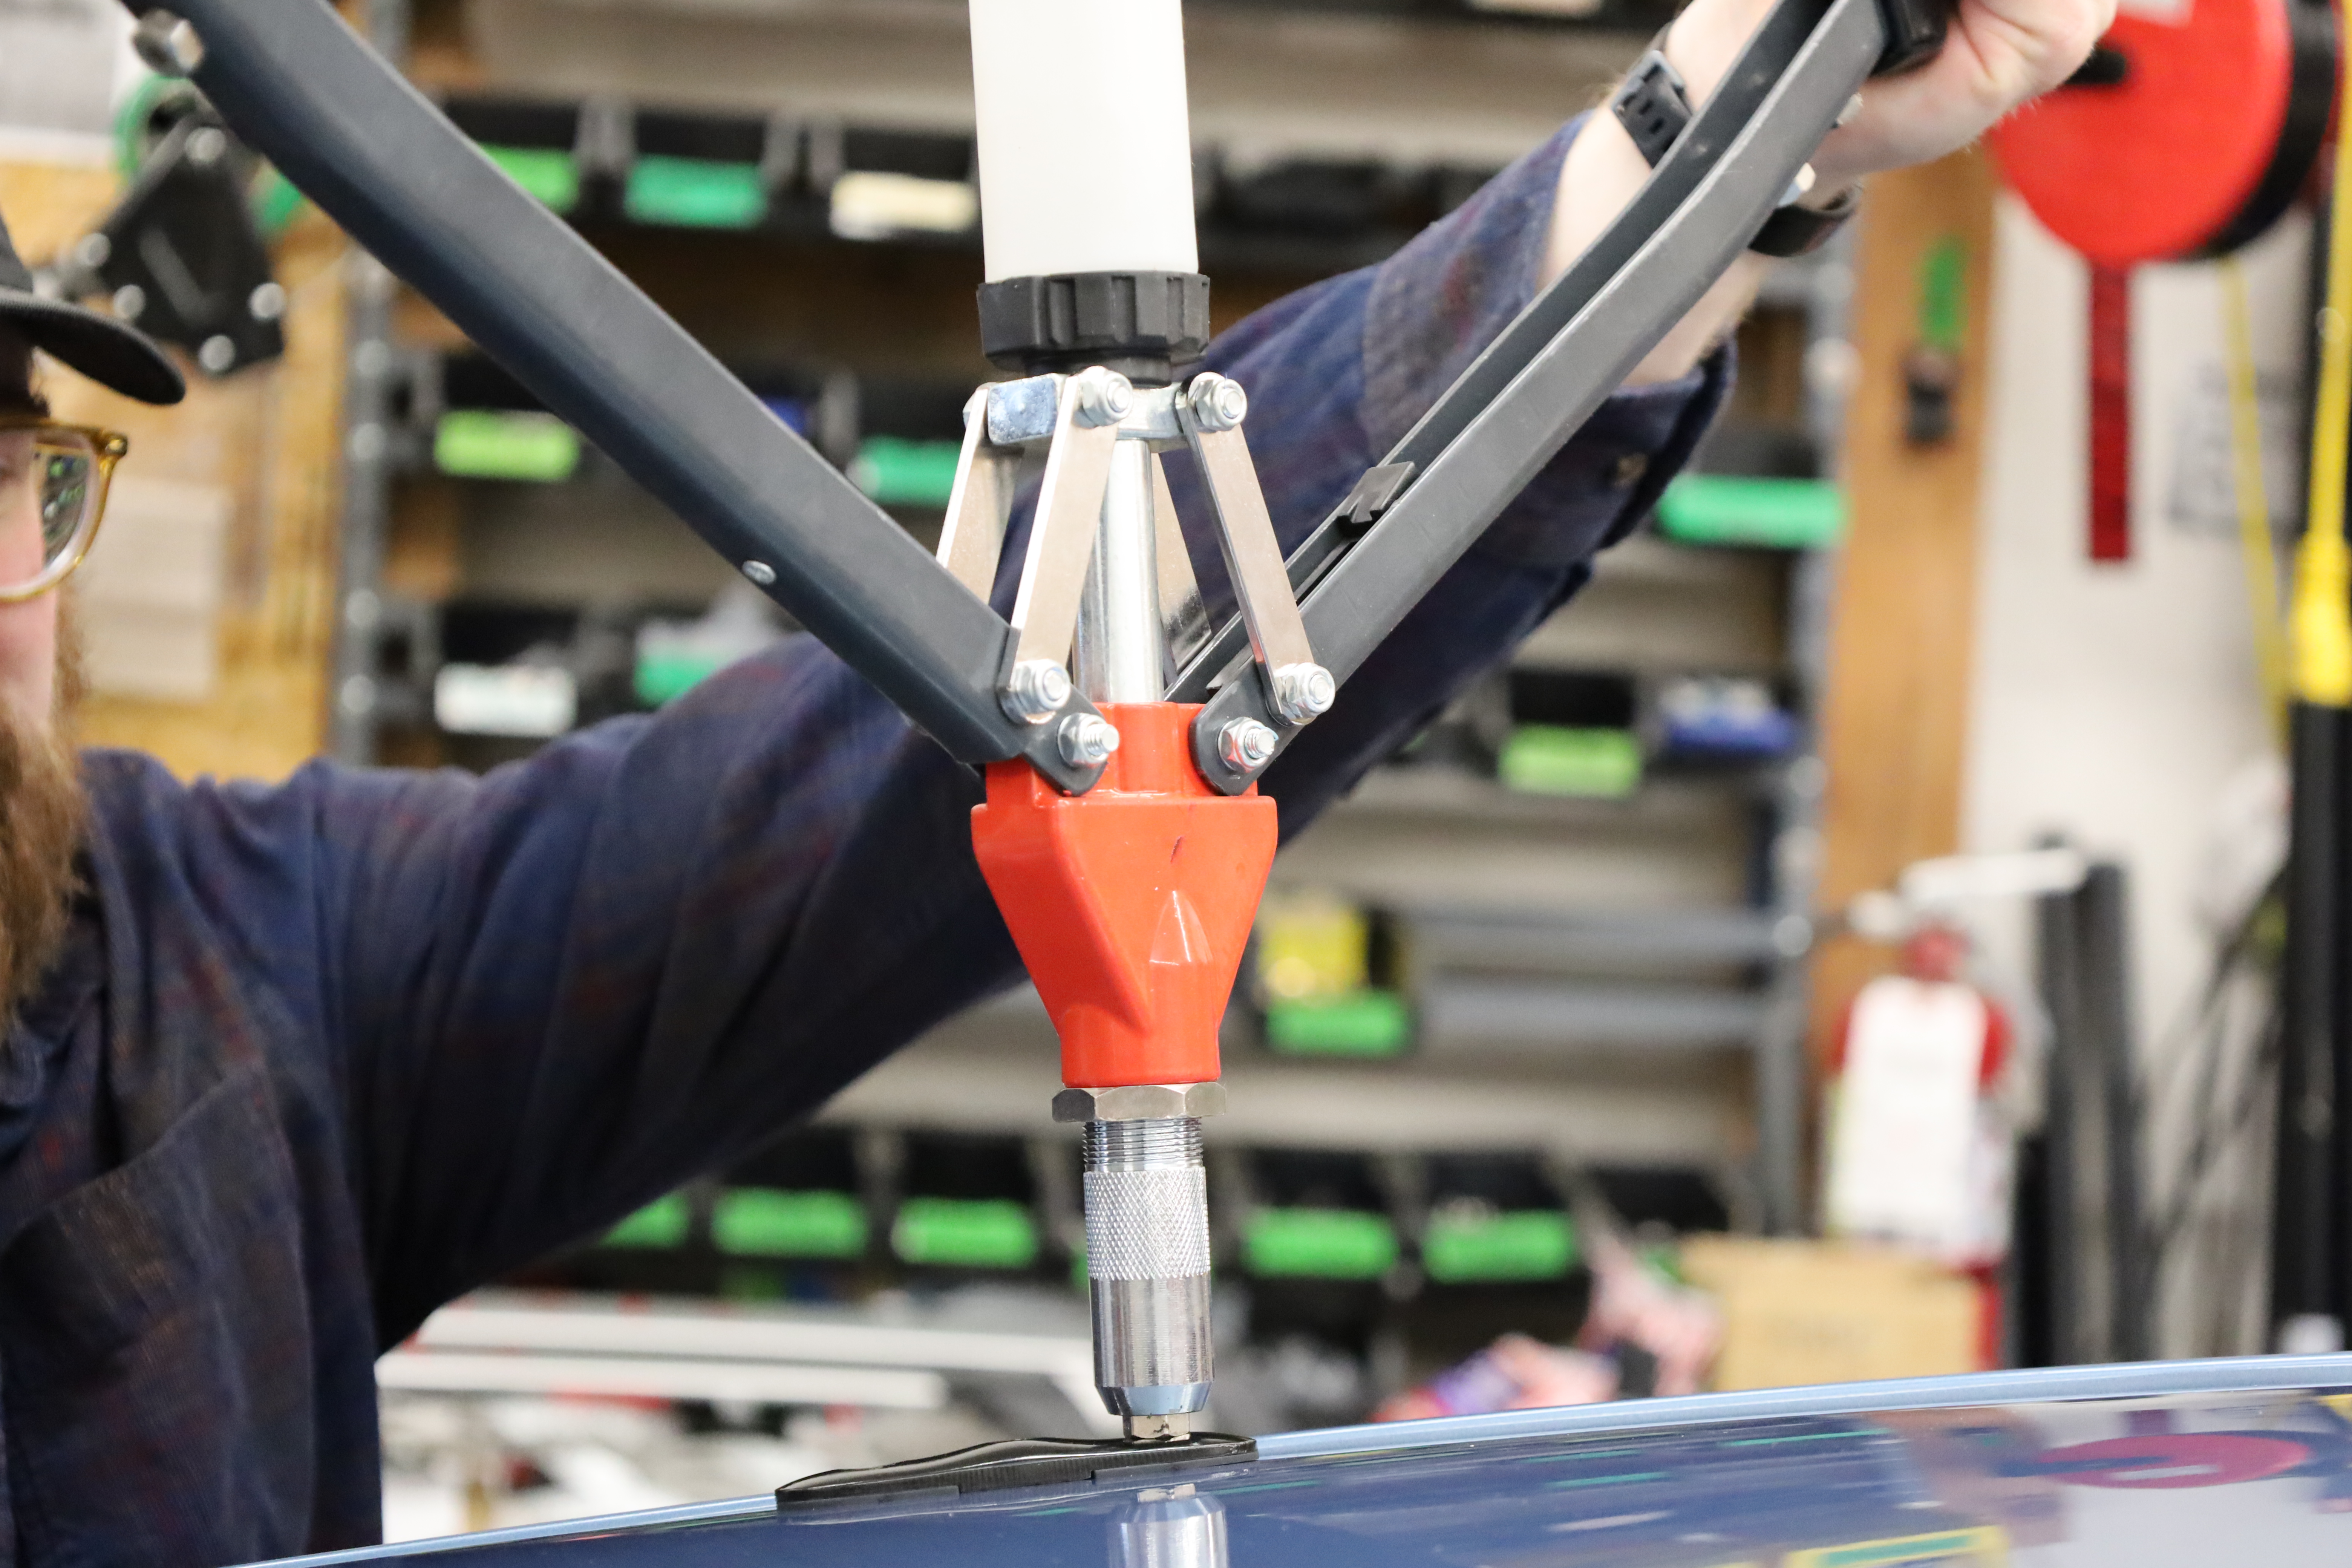
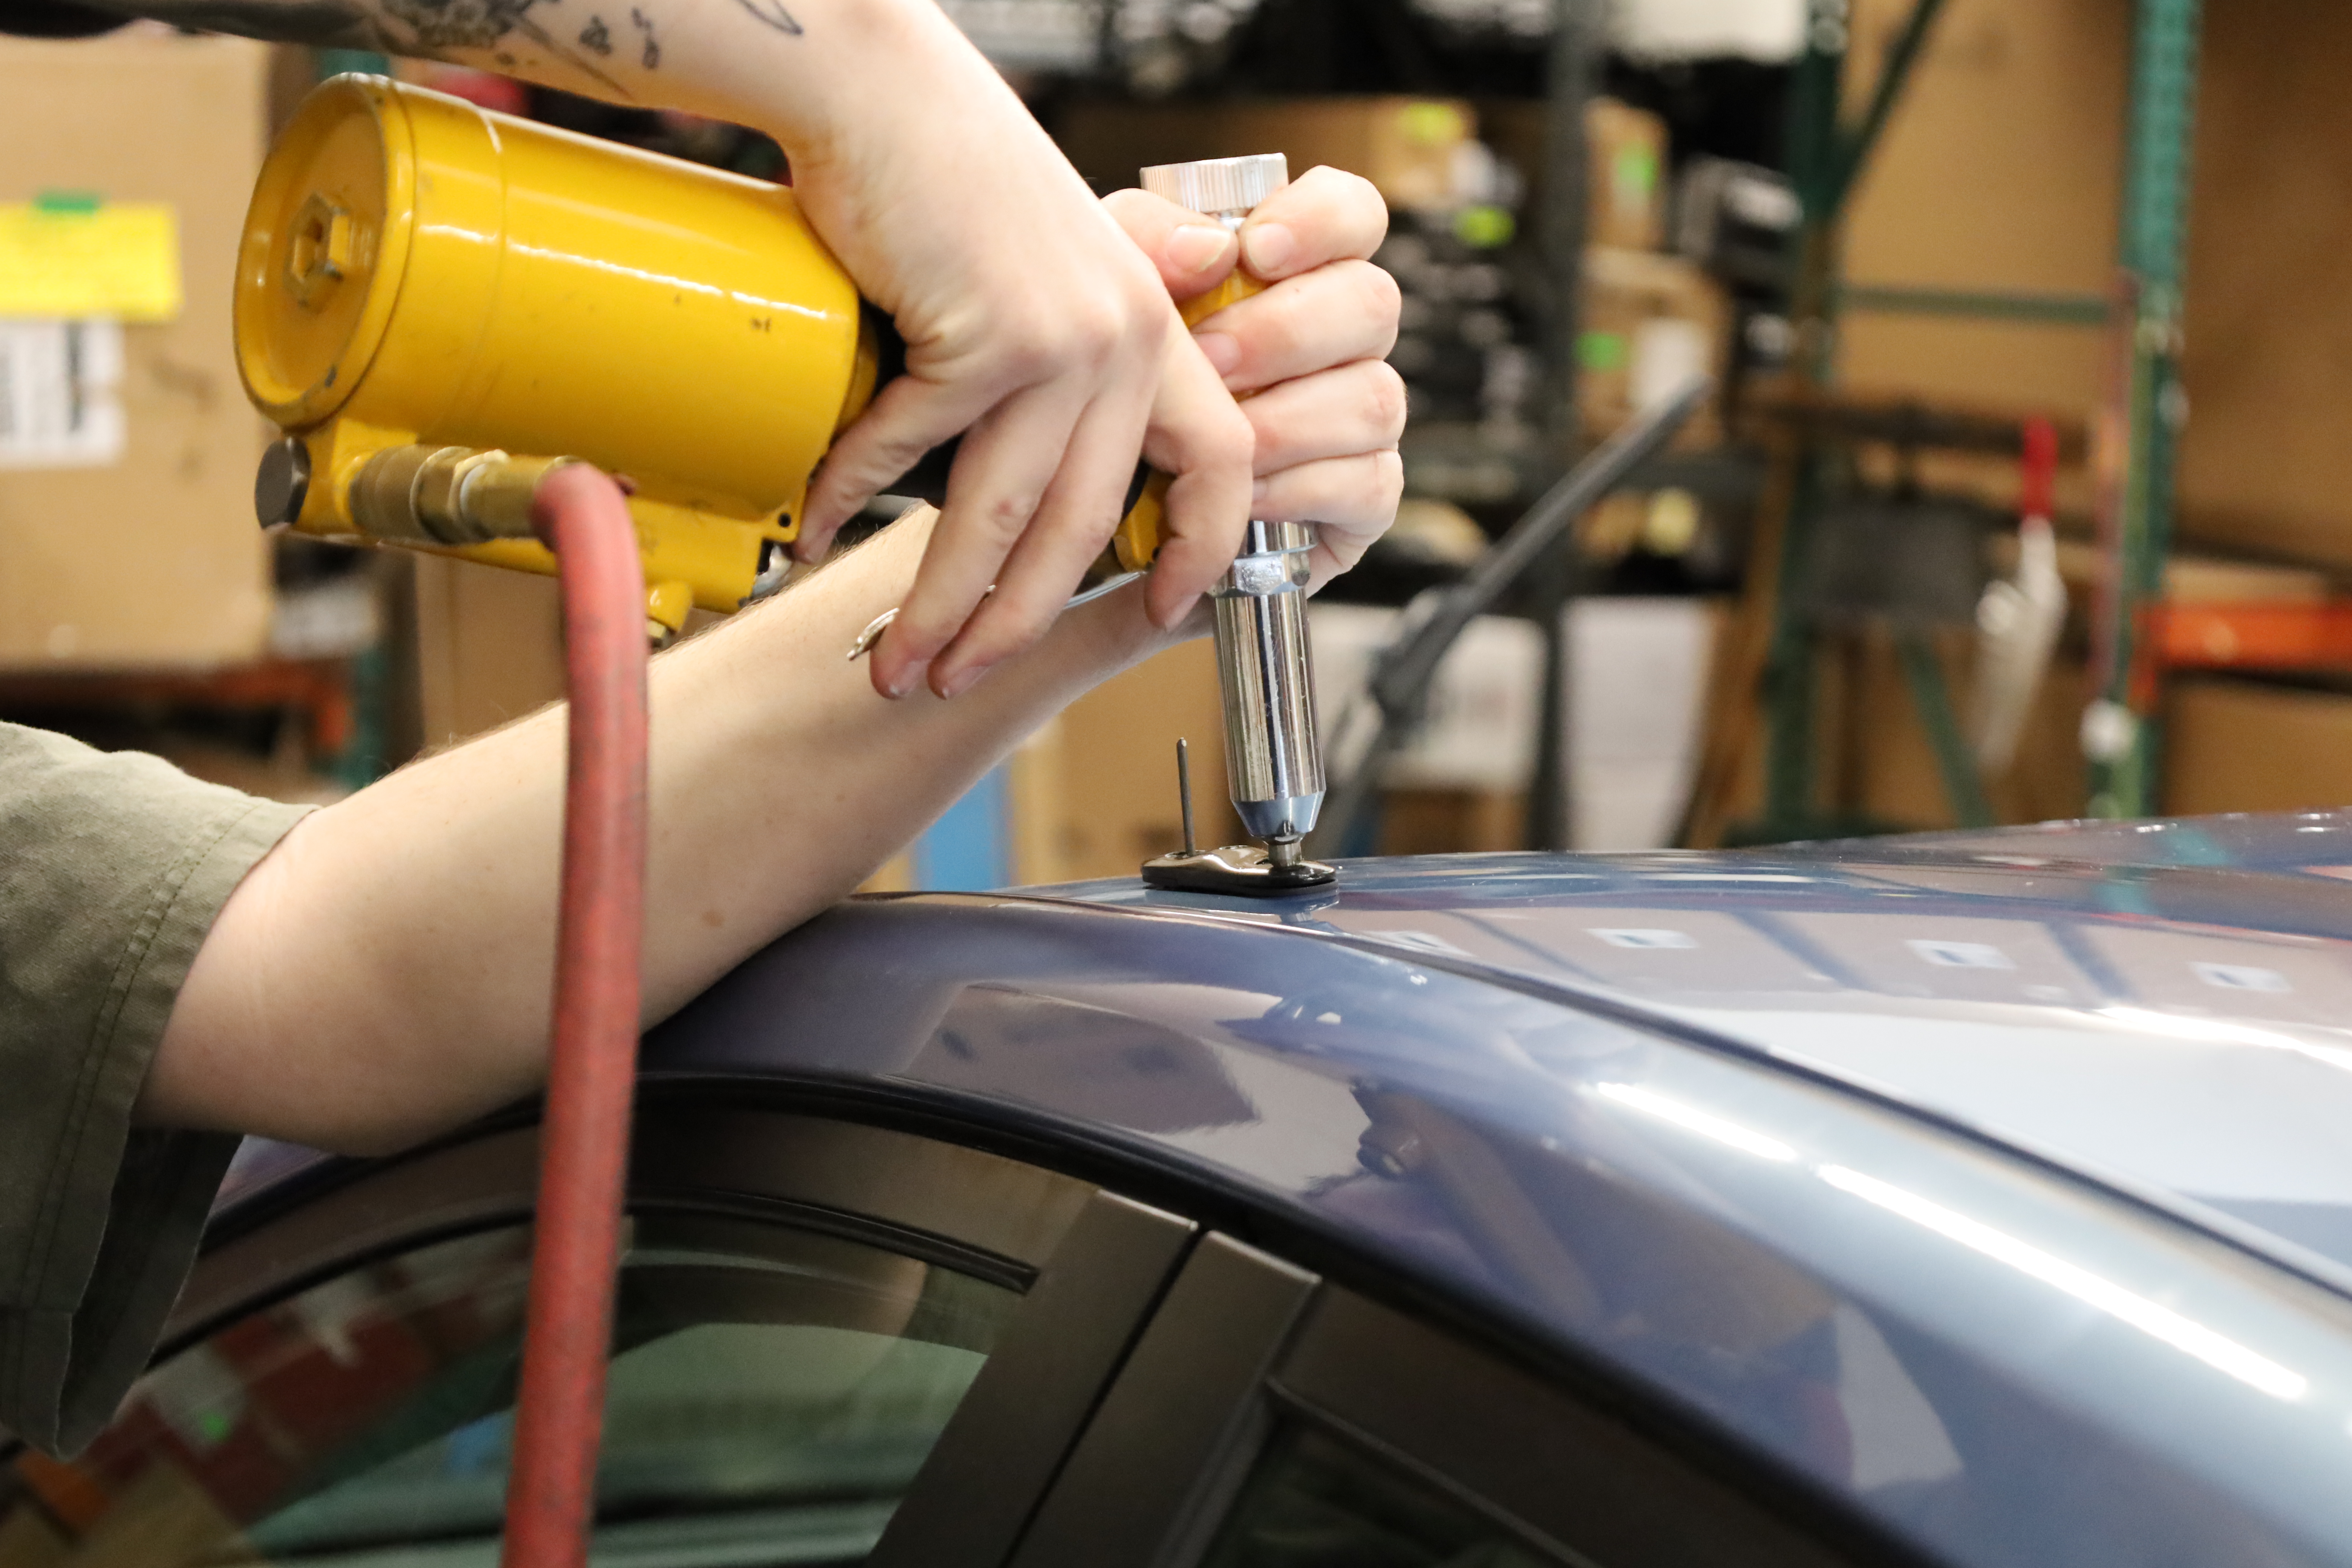
- Rivet tool (we’ve tried a few different types as pictured that all worked well)
|
|
|
|
First, determine if your vehicle is a good candidate for a K323 permanent install. The fit kit includes a base piece that is attached to the vehicle with rivets. This will require a sheet metal roof; the K323 is not for fiberglass applications, such as truck shell canopies or camper tops. A large panoramic sunroof will often be in the way, but a standard sunroof or moonroof with sheet metal around it can typically have the towers mounted straddling it.
Determining fixed point placement will coincide with selecting crossbar size. In general, spacing the towers as wide as possible will ensure that they are on a part of the roof that is least likely to flex under load. If your vehicle has a ditch, placing the tower with the skirt of the rubber base pad right up to the edge of the ditch will be the strongest place to avoid flex. If there is not a ditch, a flat surface as wide as possible without going over the round edge or interfering with any other feature of the roof will be best.
The distance between the front and rear crossbars can vary, but typically 30-32” is a good range to aim for. If you have specific needs or carriers in mind, this measurement can be adjusted as needed. There are a couple other important considerations when selecting crossbar placement. If you plan to mount a cargo box or other long items, you will want to take hatch clearance into account - the measurement from the front crossbar to the open trunk door. Additionally, the bars should be as level as possible. Some vehicles may have a particularly rounded roof, so it might take a few mock-ups to get the bars in a position that balances hatch clearance, a level platform, and an appropriate crossbar spread. Referencing Yakima’s measurements with their Fit Lookup tool for their clip fits for your vehicle can be a good place to get started.
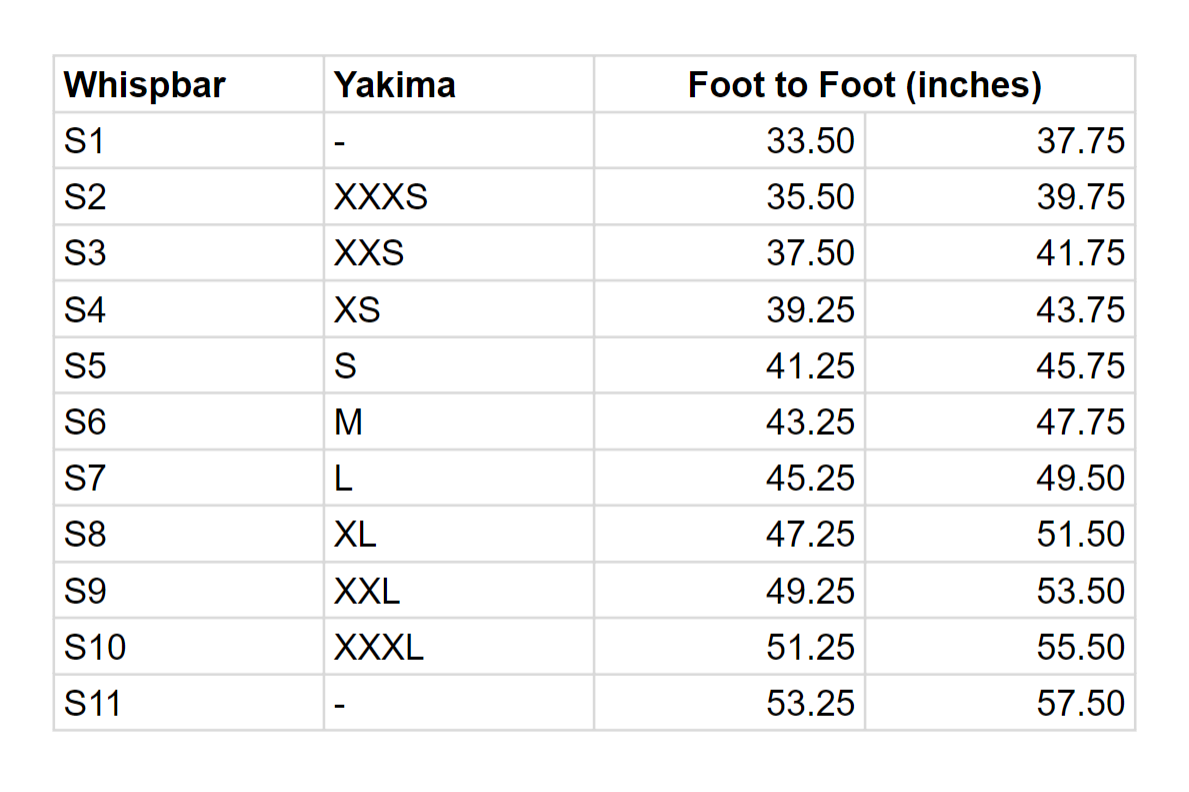
FlushBars have some adjustability from tower to tower built in, but you’ll need to make sure you select the sizes that align correctly with your vehicle’s measurements. Keep in mind that the front and rear crossbar may not be the same length, and that the measurement may get wider as the bars are pushed forward or narrower as the bars are pushed rearward on the vehicle. Below is a measurement chart to determine crossbar sizing.
Measurements are provided from the outside edges of the towers. It is best to choose a size that your measurement falls within without being right on the cusp in order to provide some adjustability and margin for error.
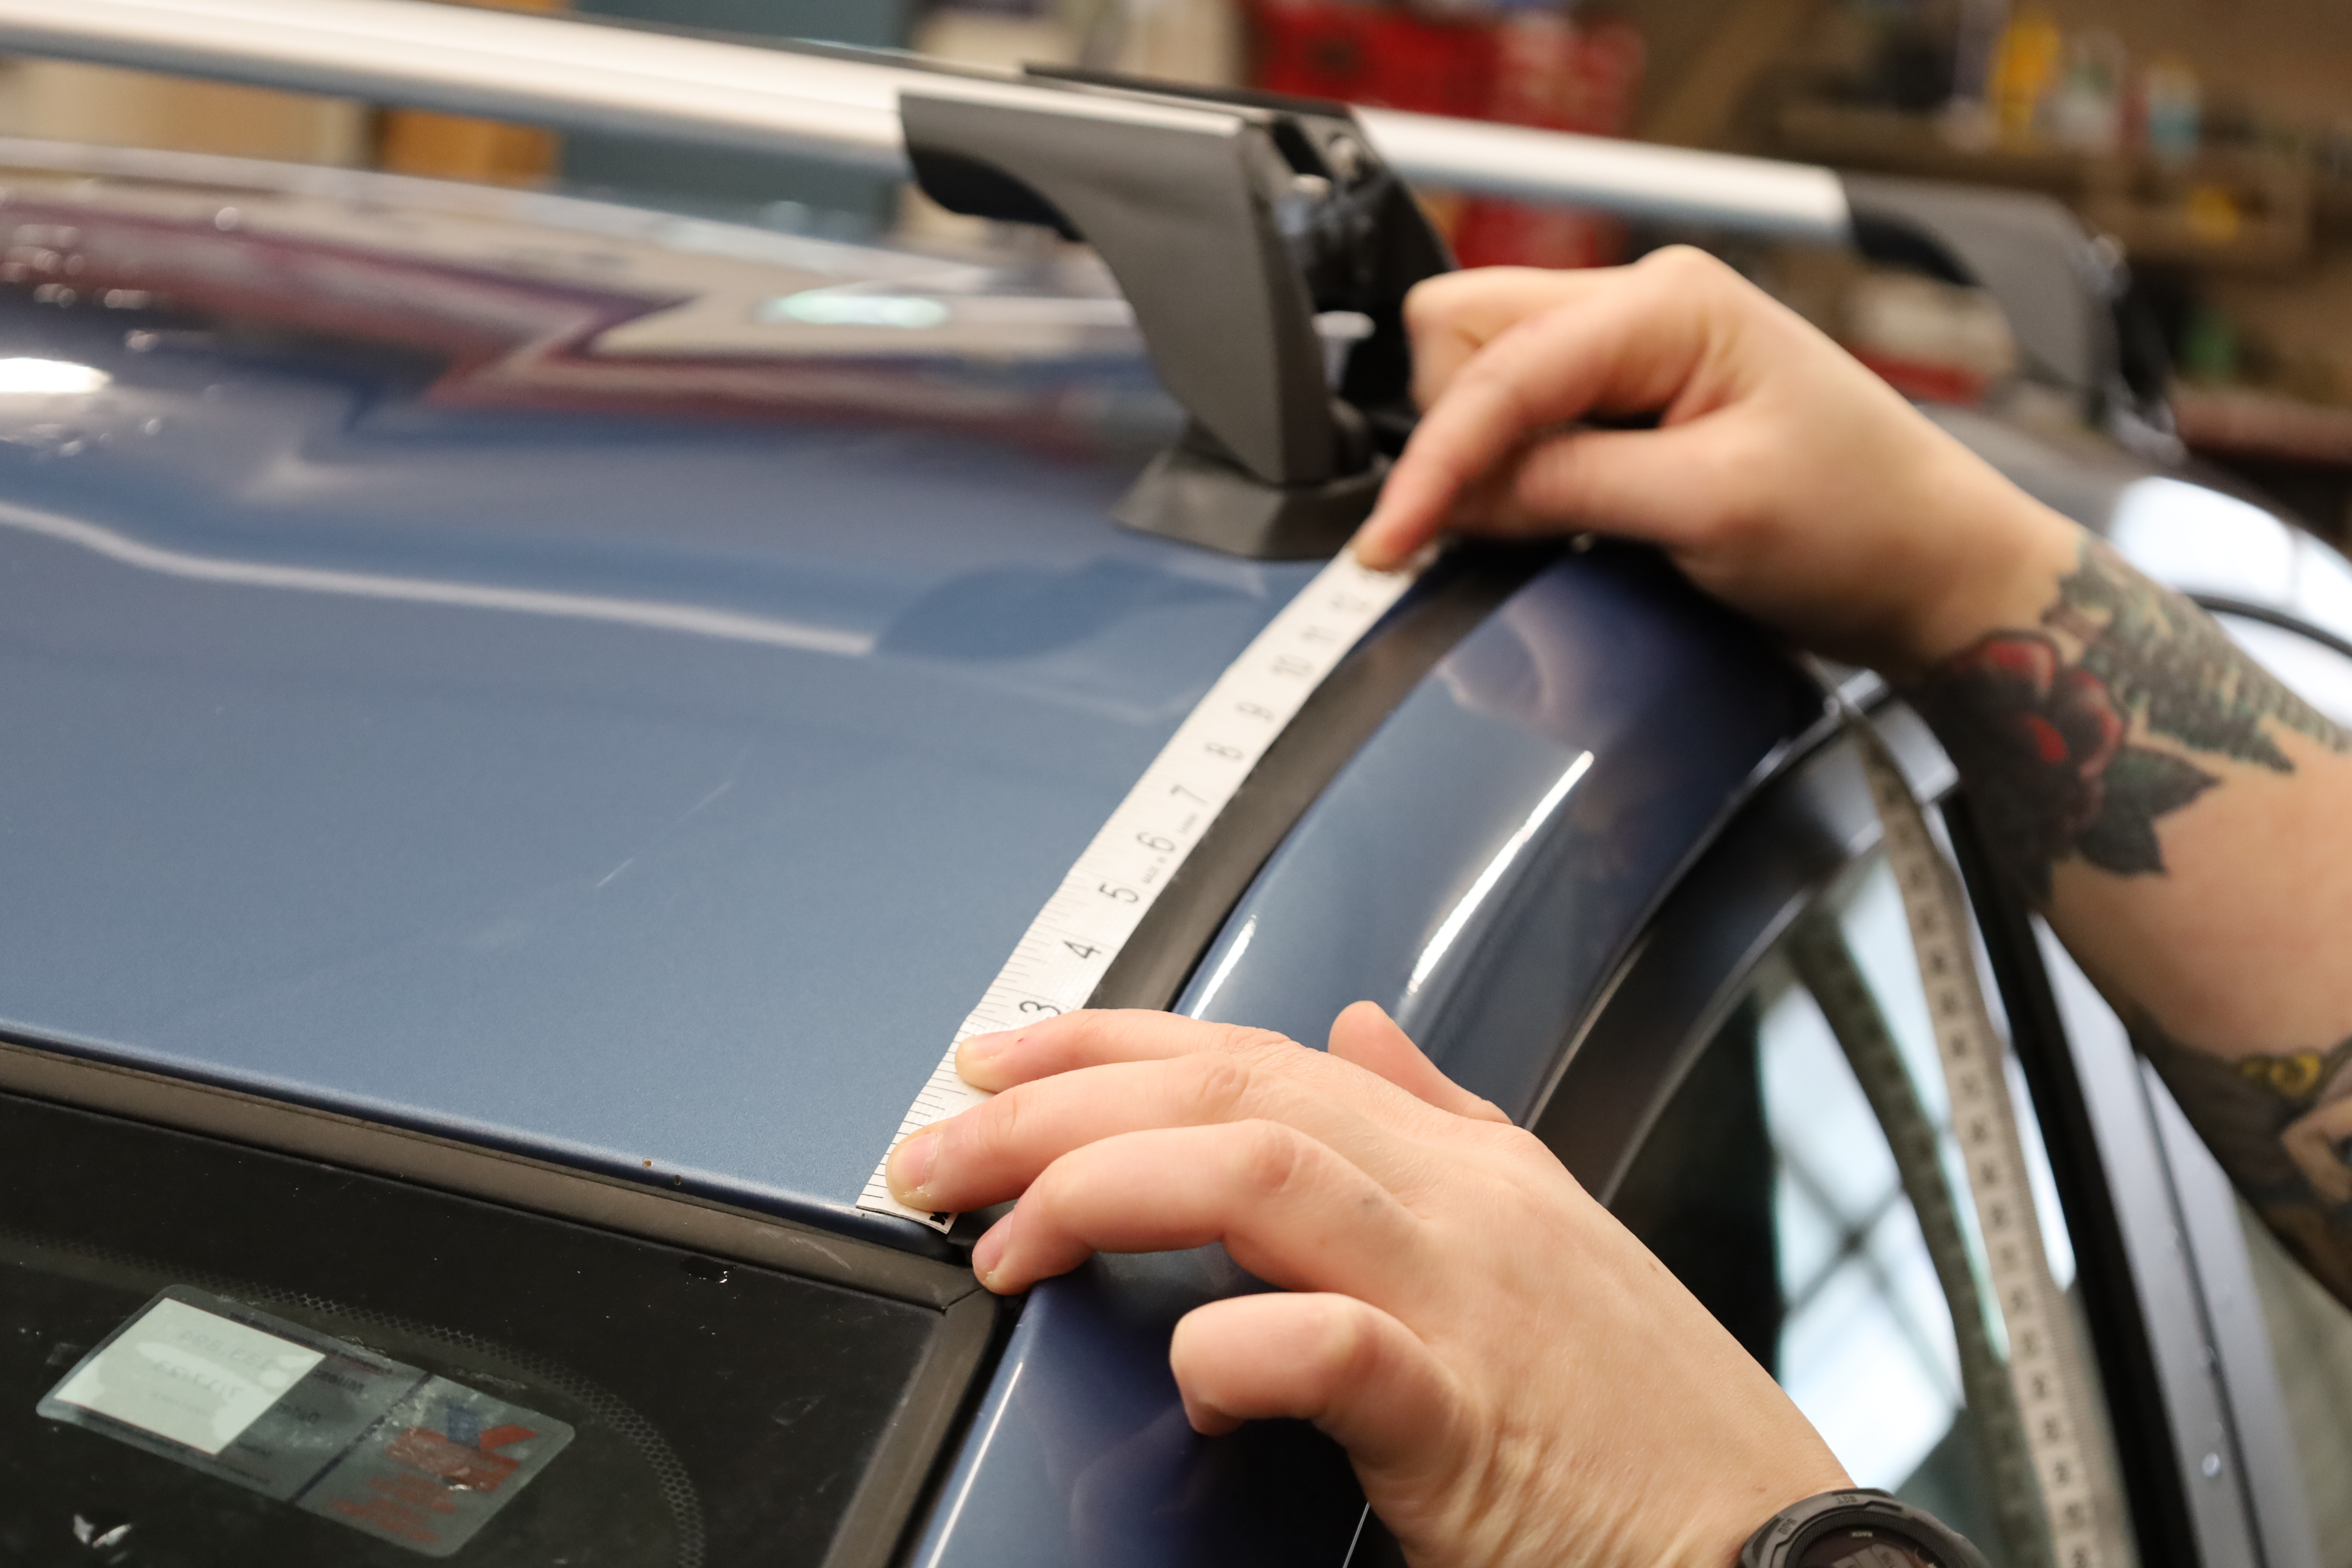
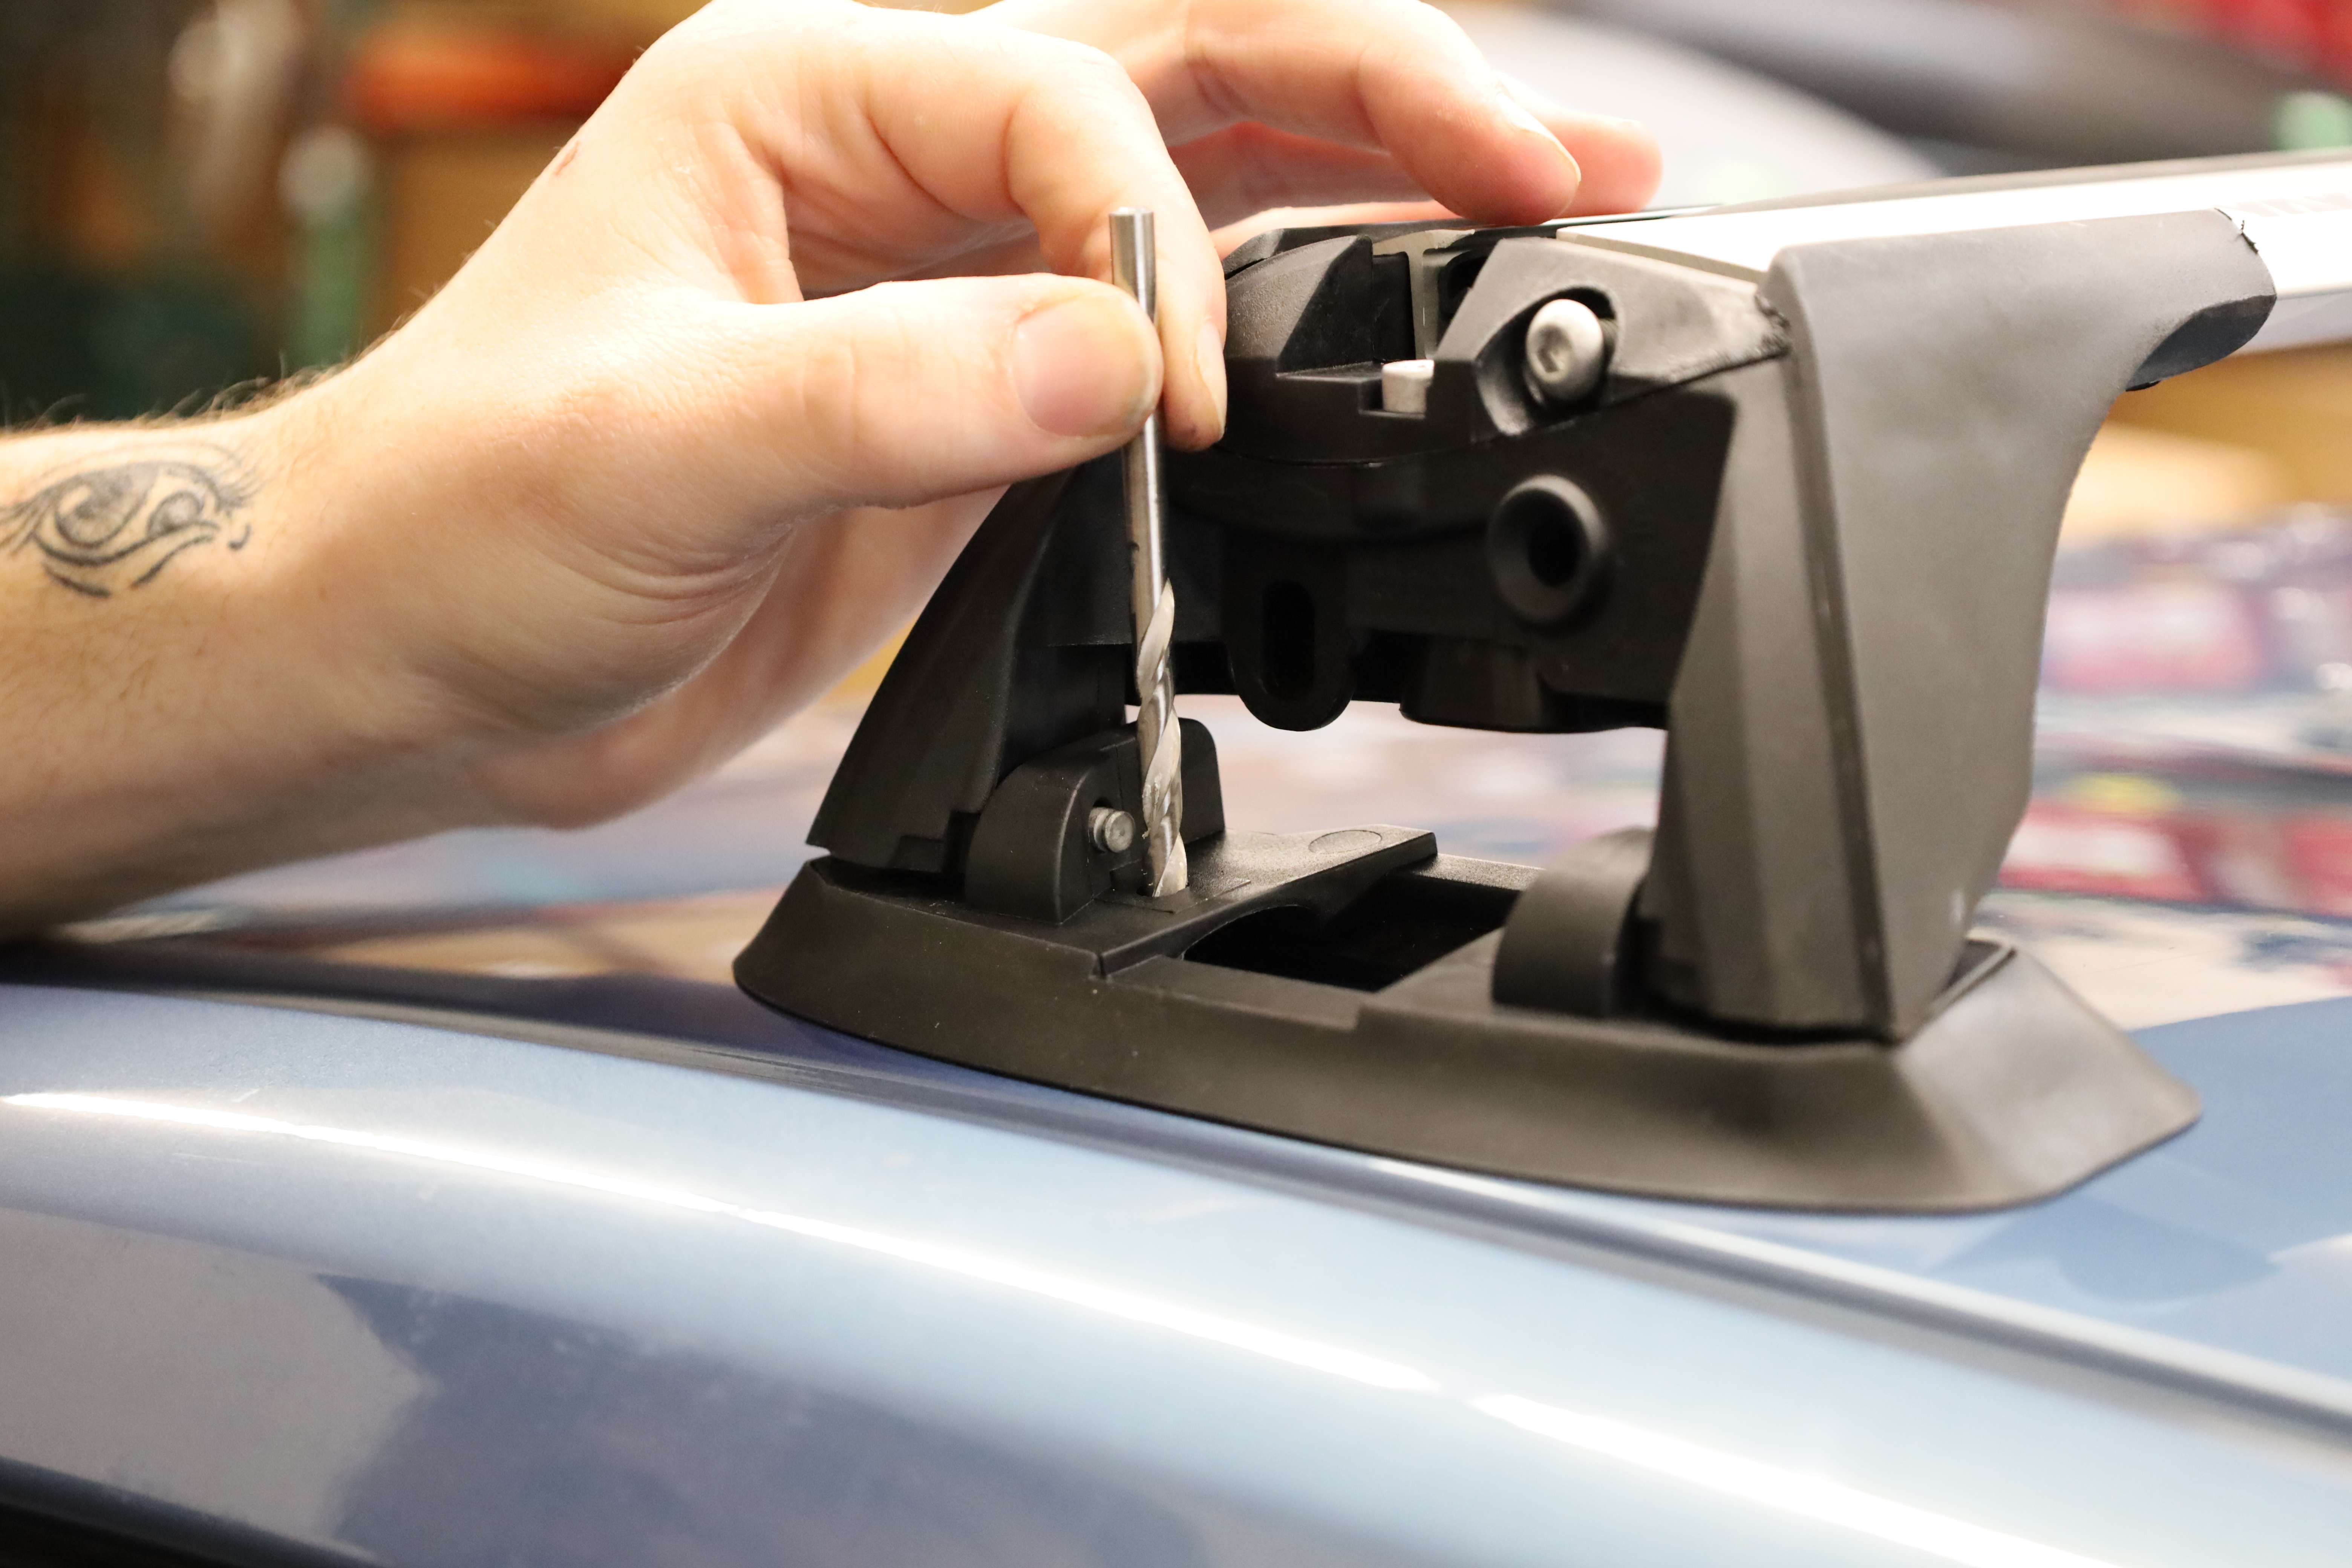
 When you have all of the parts and tools and are ready to start the install, the initial mock-up is often the hardest part. Measure again and again, anytime you make a small movement, to make sure everything is lined up. We measure from the corner of the roof to the tower pad to make sure the towers are even with each other. Measuring from the same point on the front and rear crossbars on the left and right sides makes sure they are parallel with each other. Go slow and take your time!
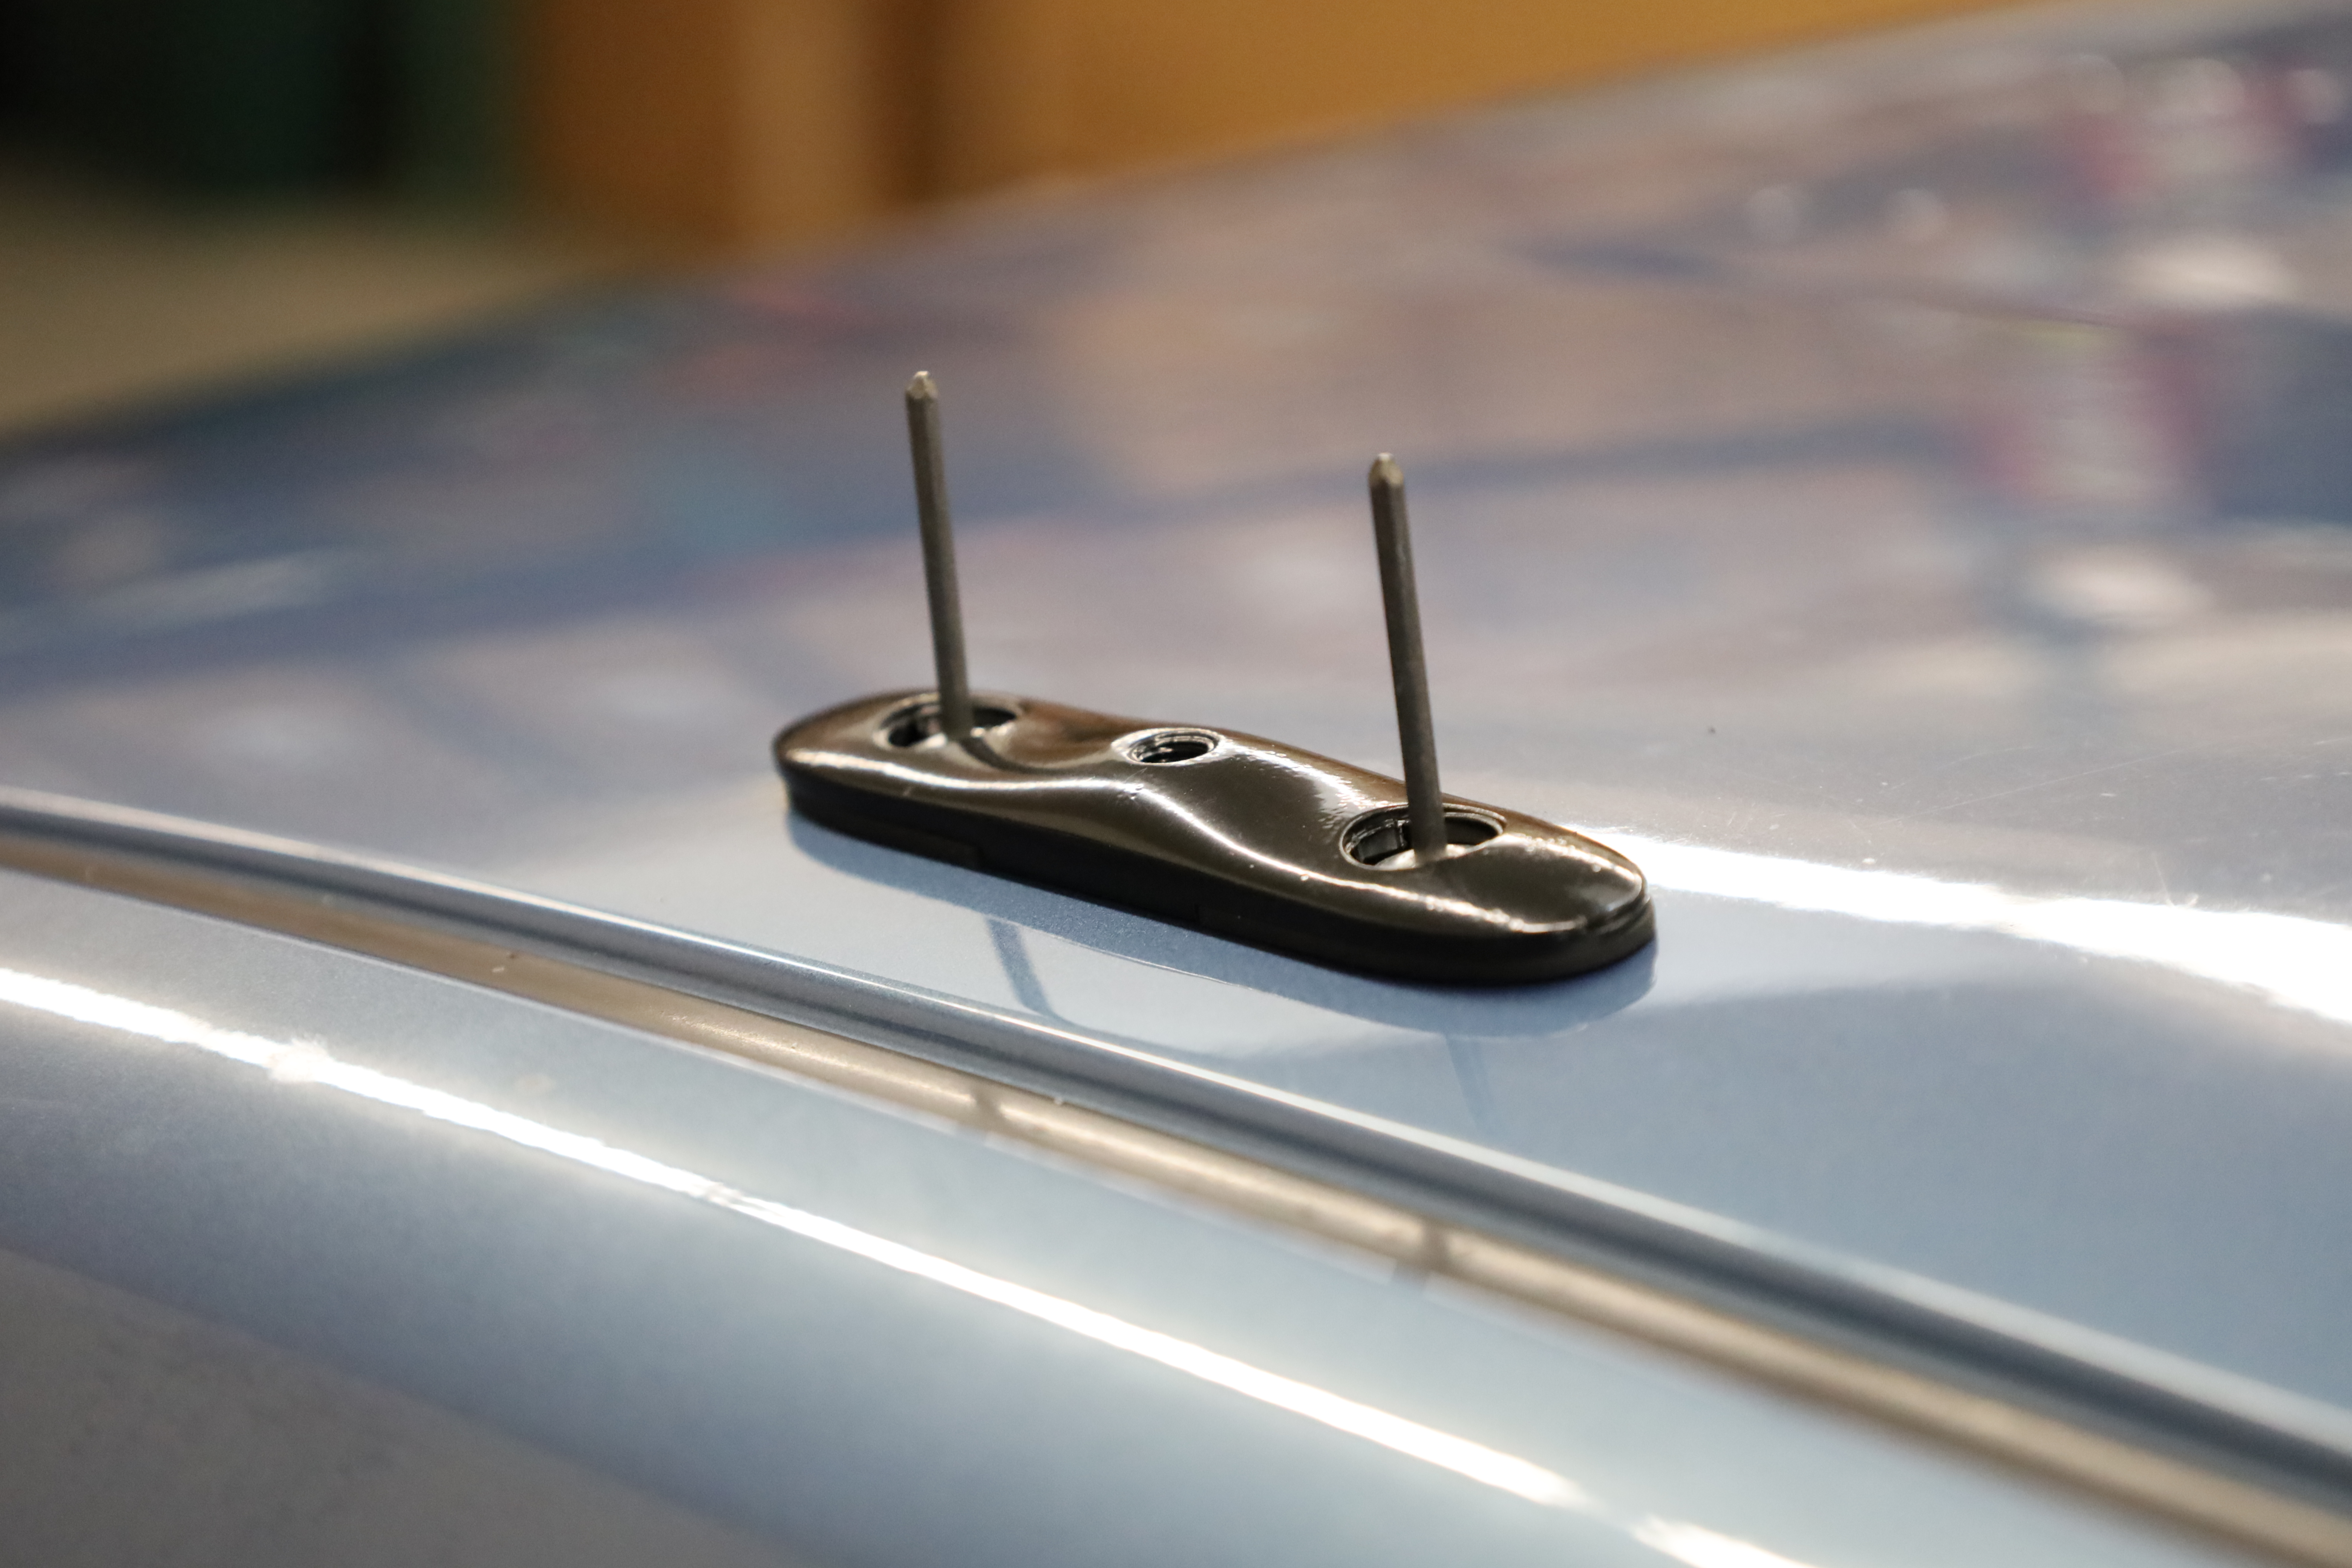
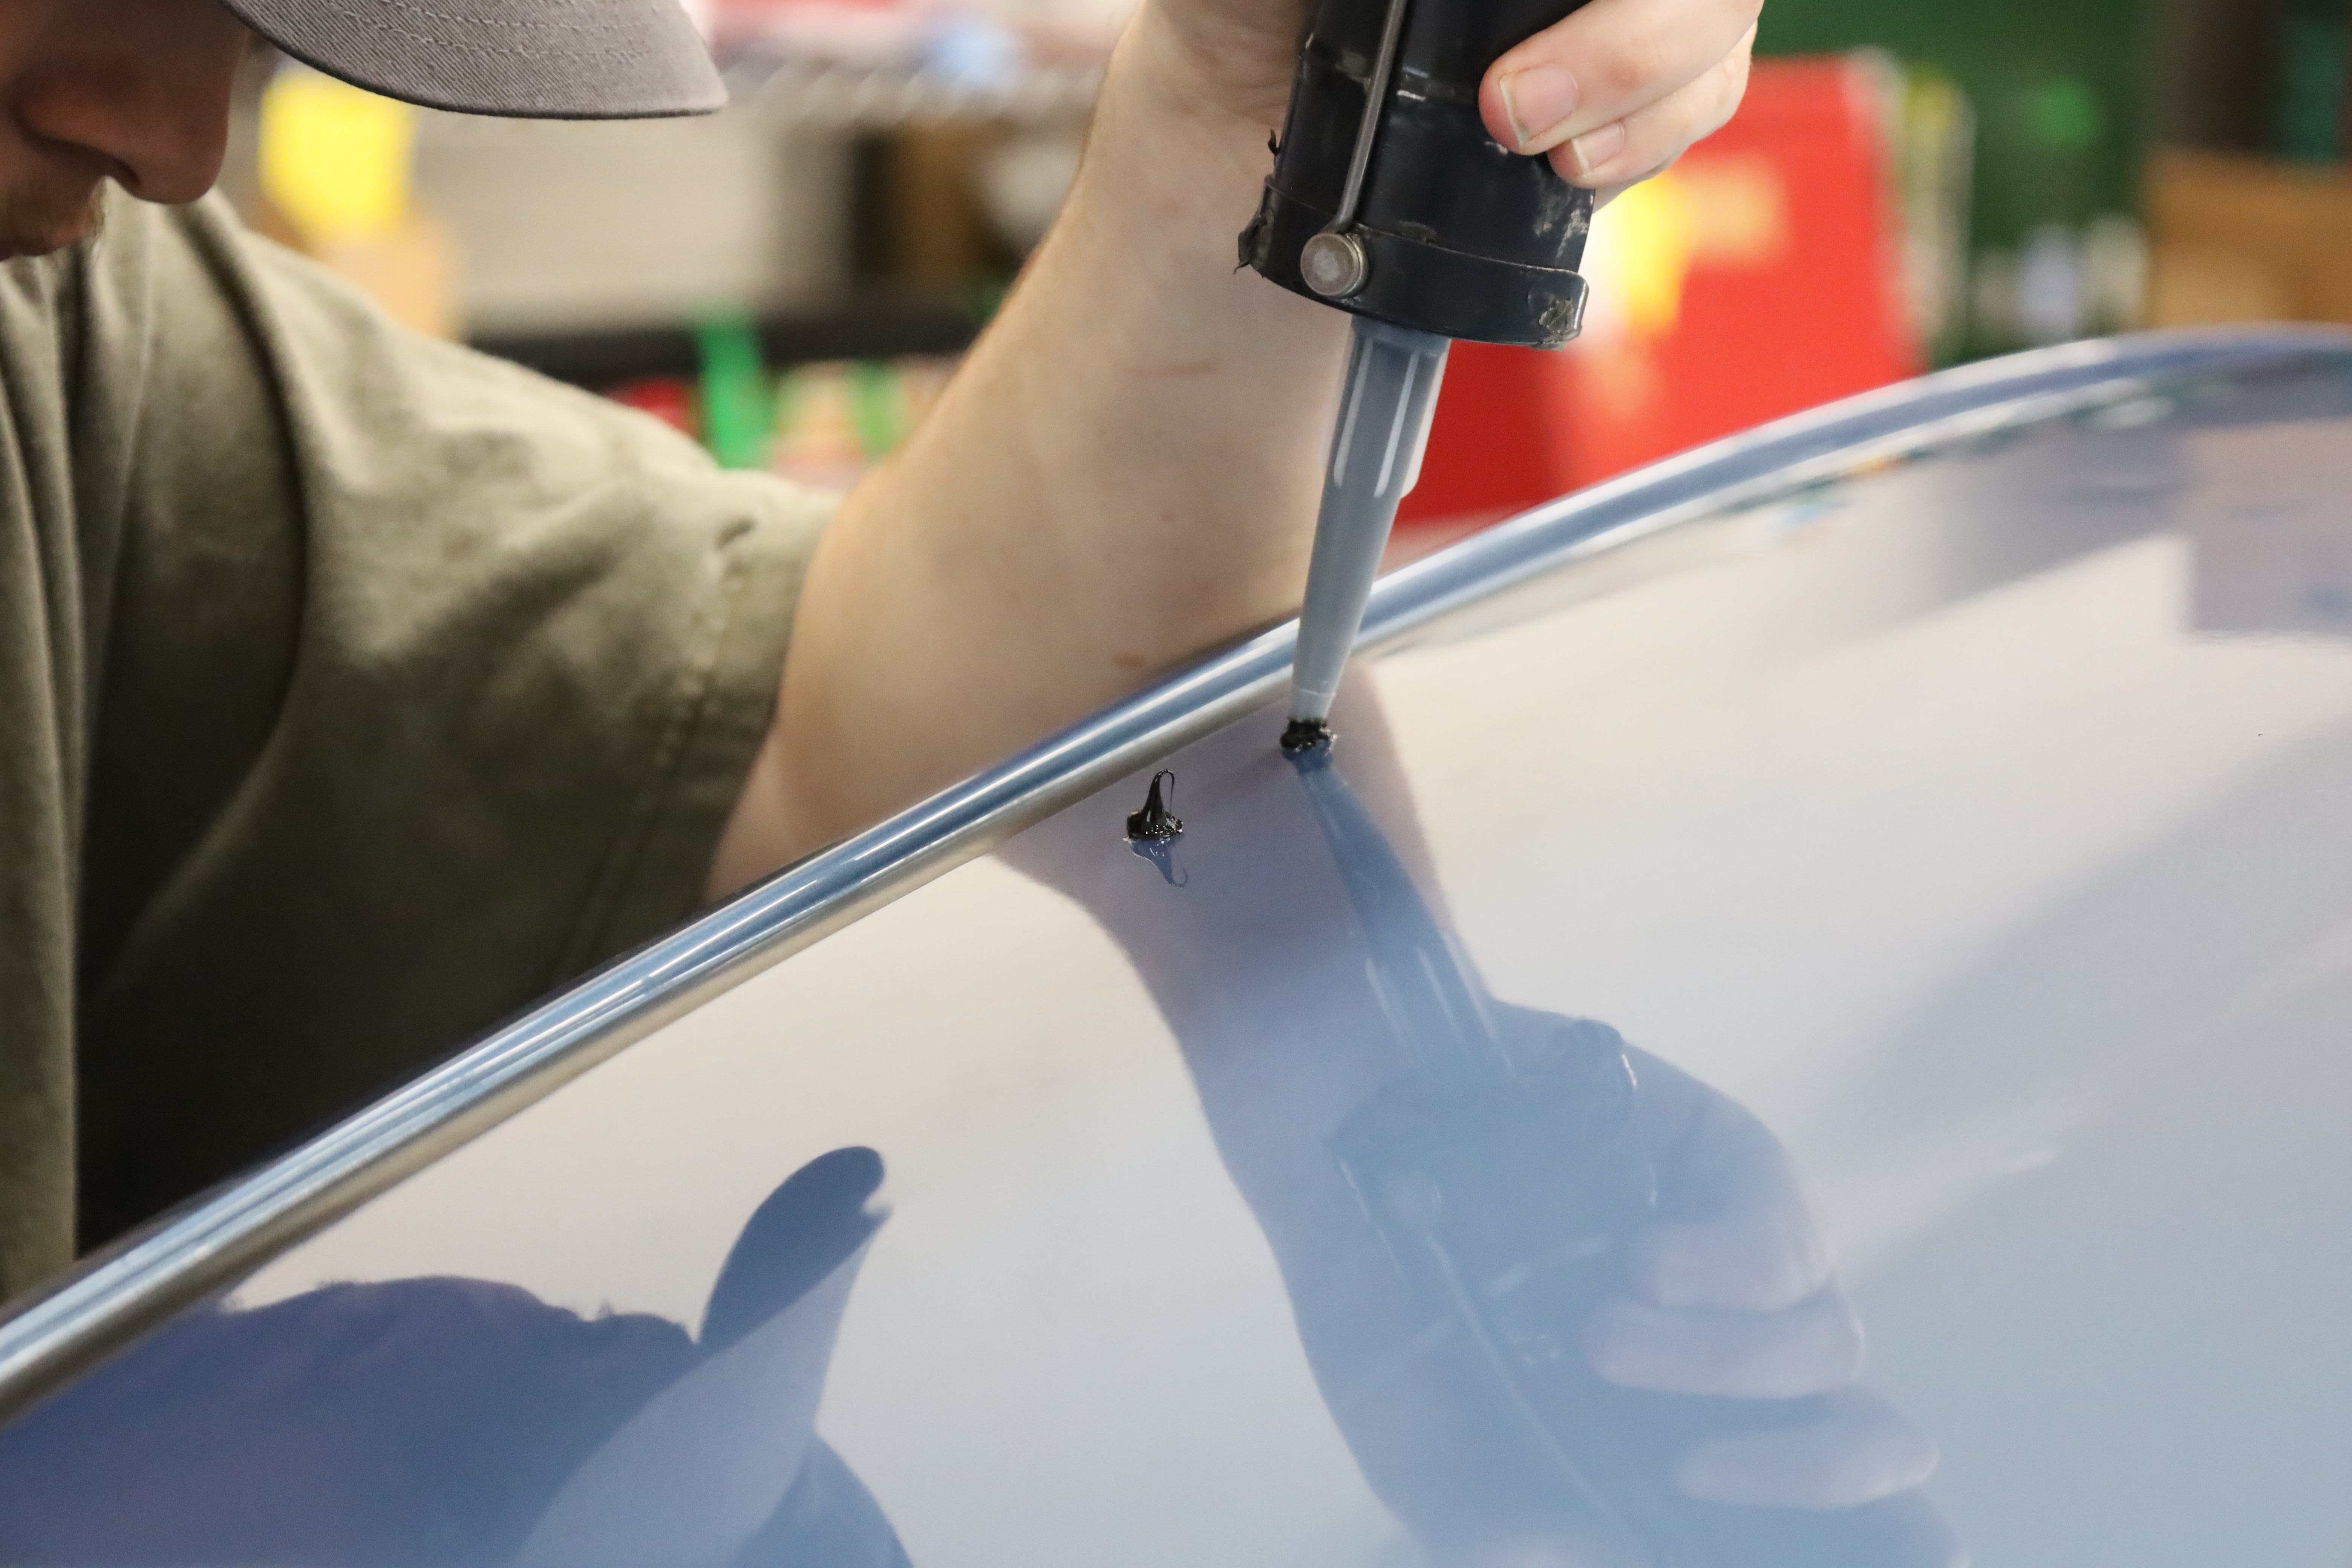
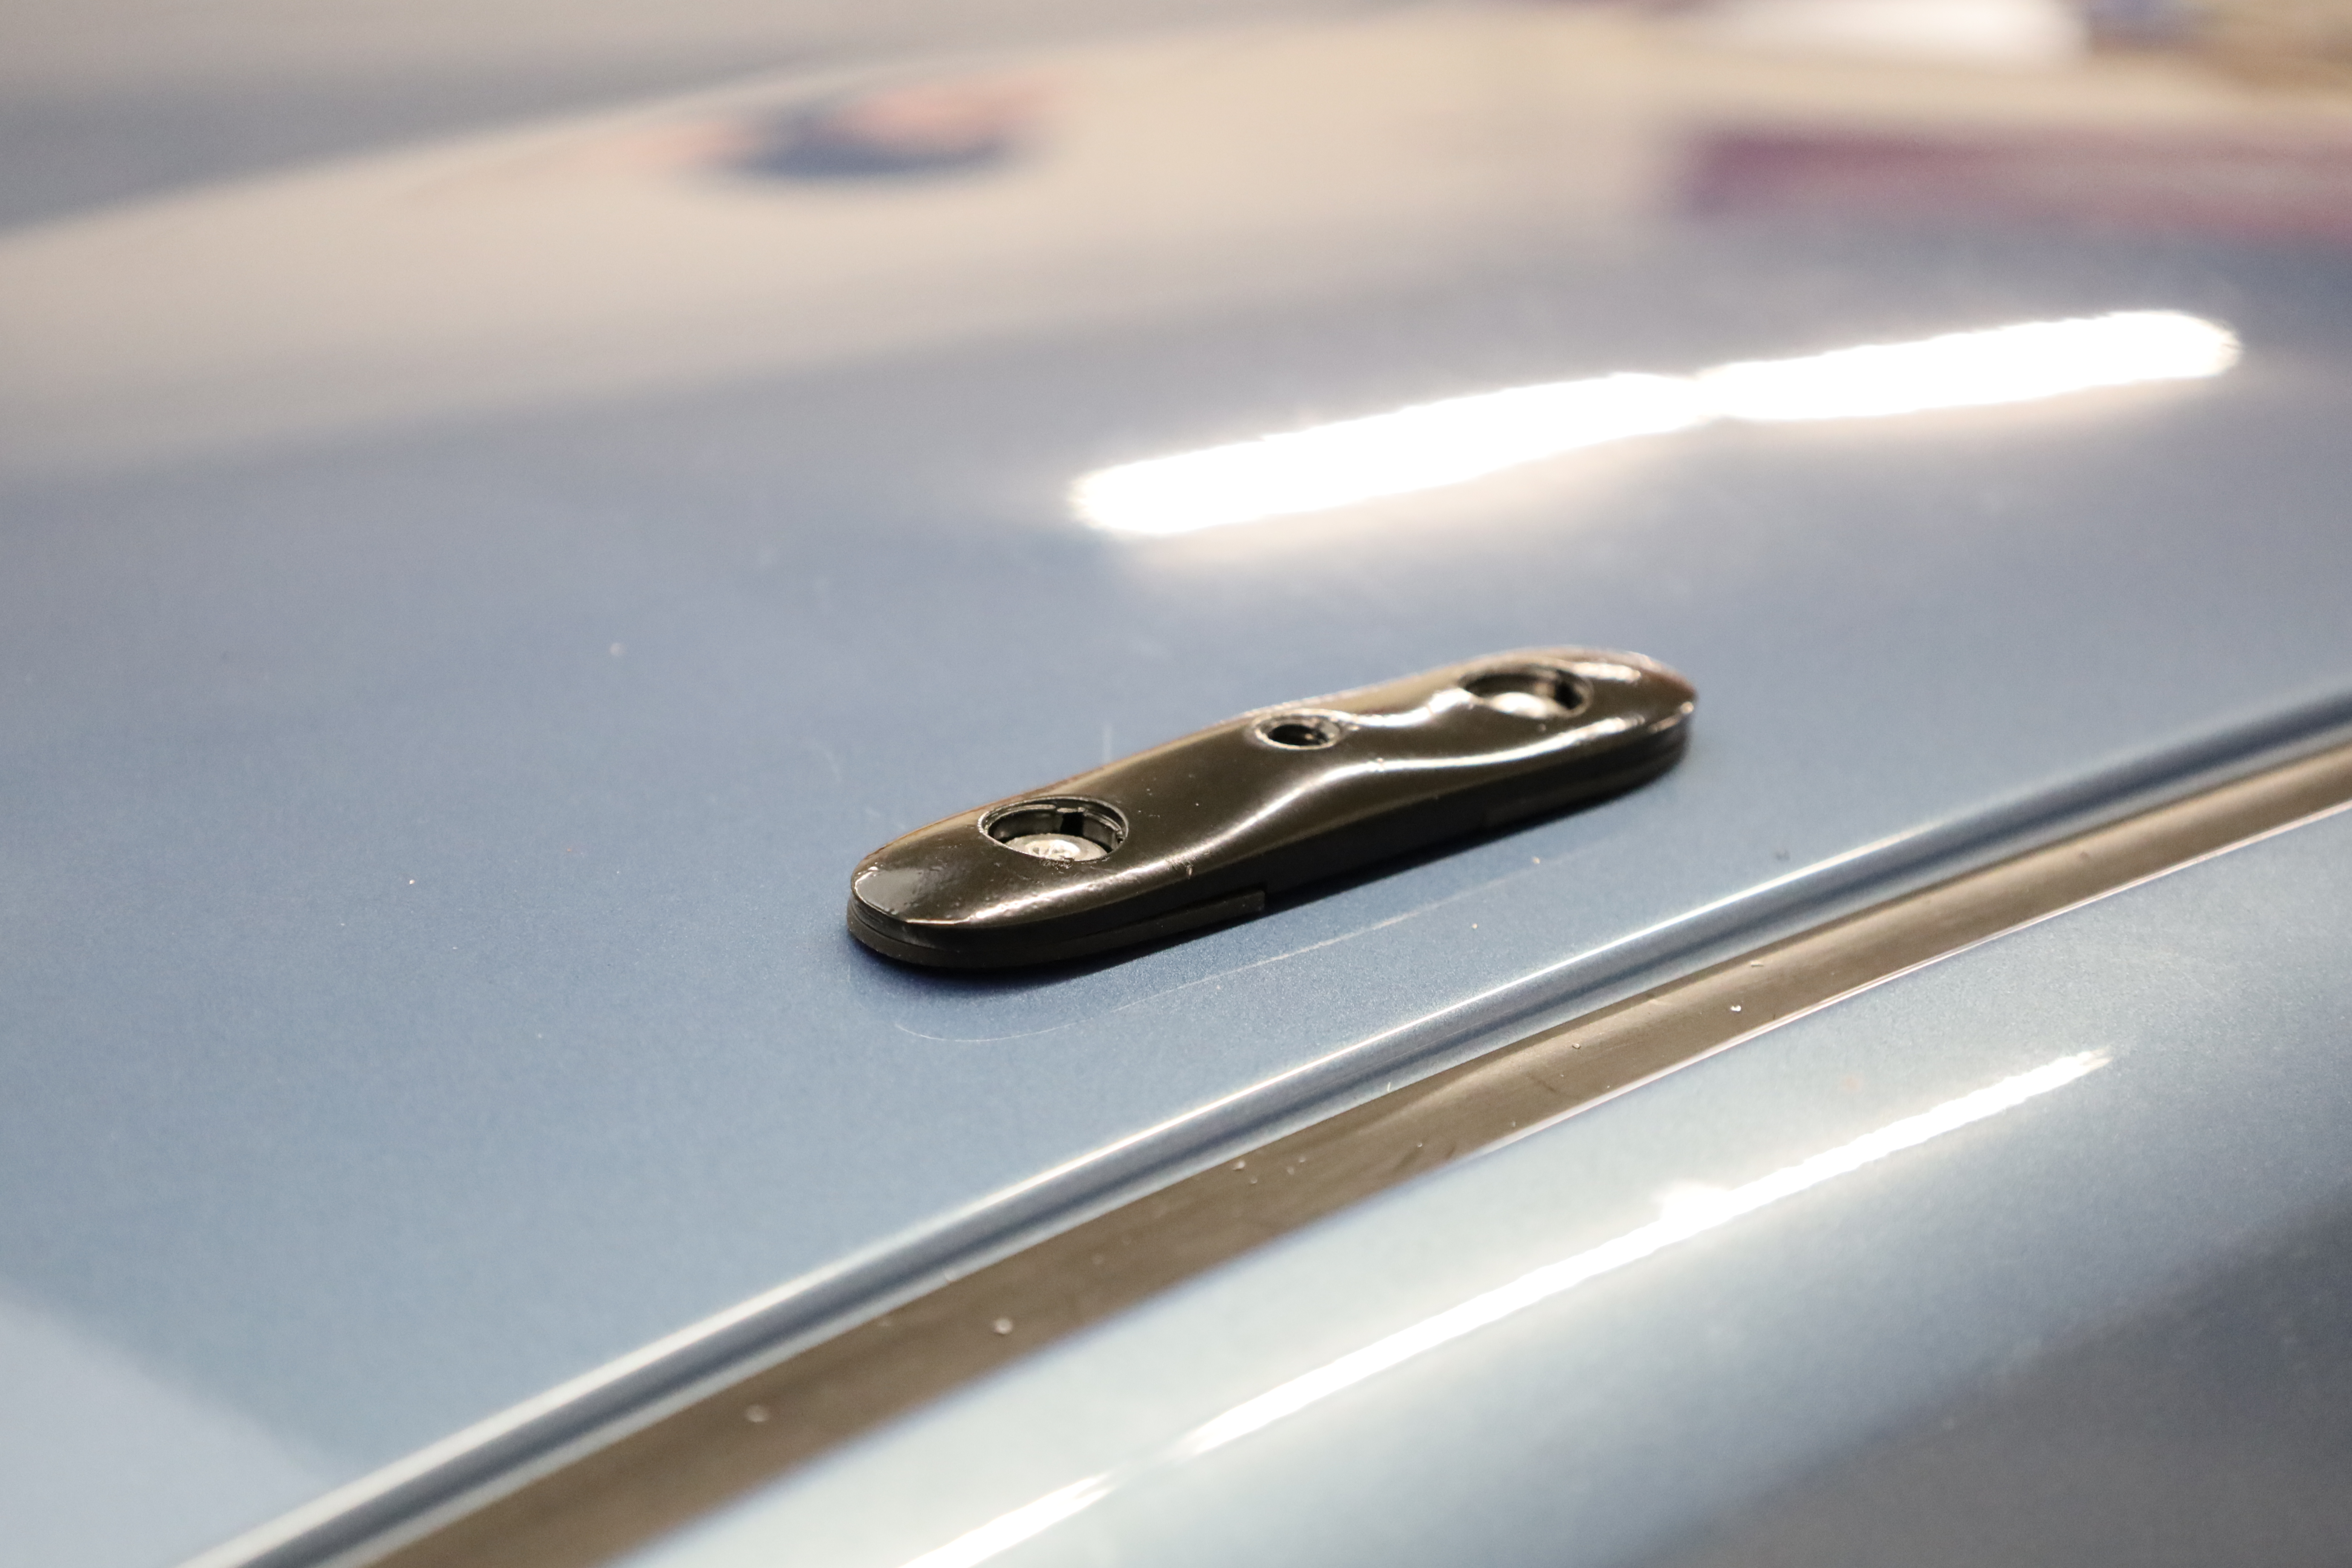
We use the drill bit to mark where the holes will be, compressed air to blow away metal shavings, and silicone sealant under the mounting plate keeps the holes from leaking. This is the piece that will be permanently affixed to the vehicle.
 |
|
|
|
|
|


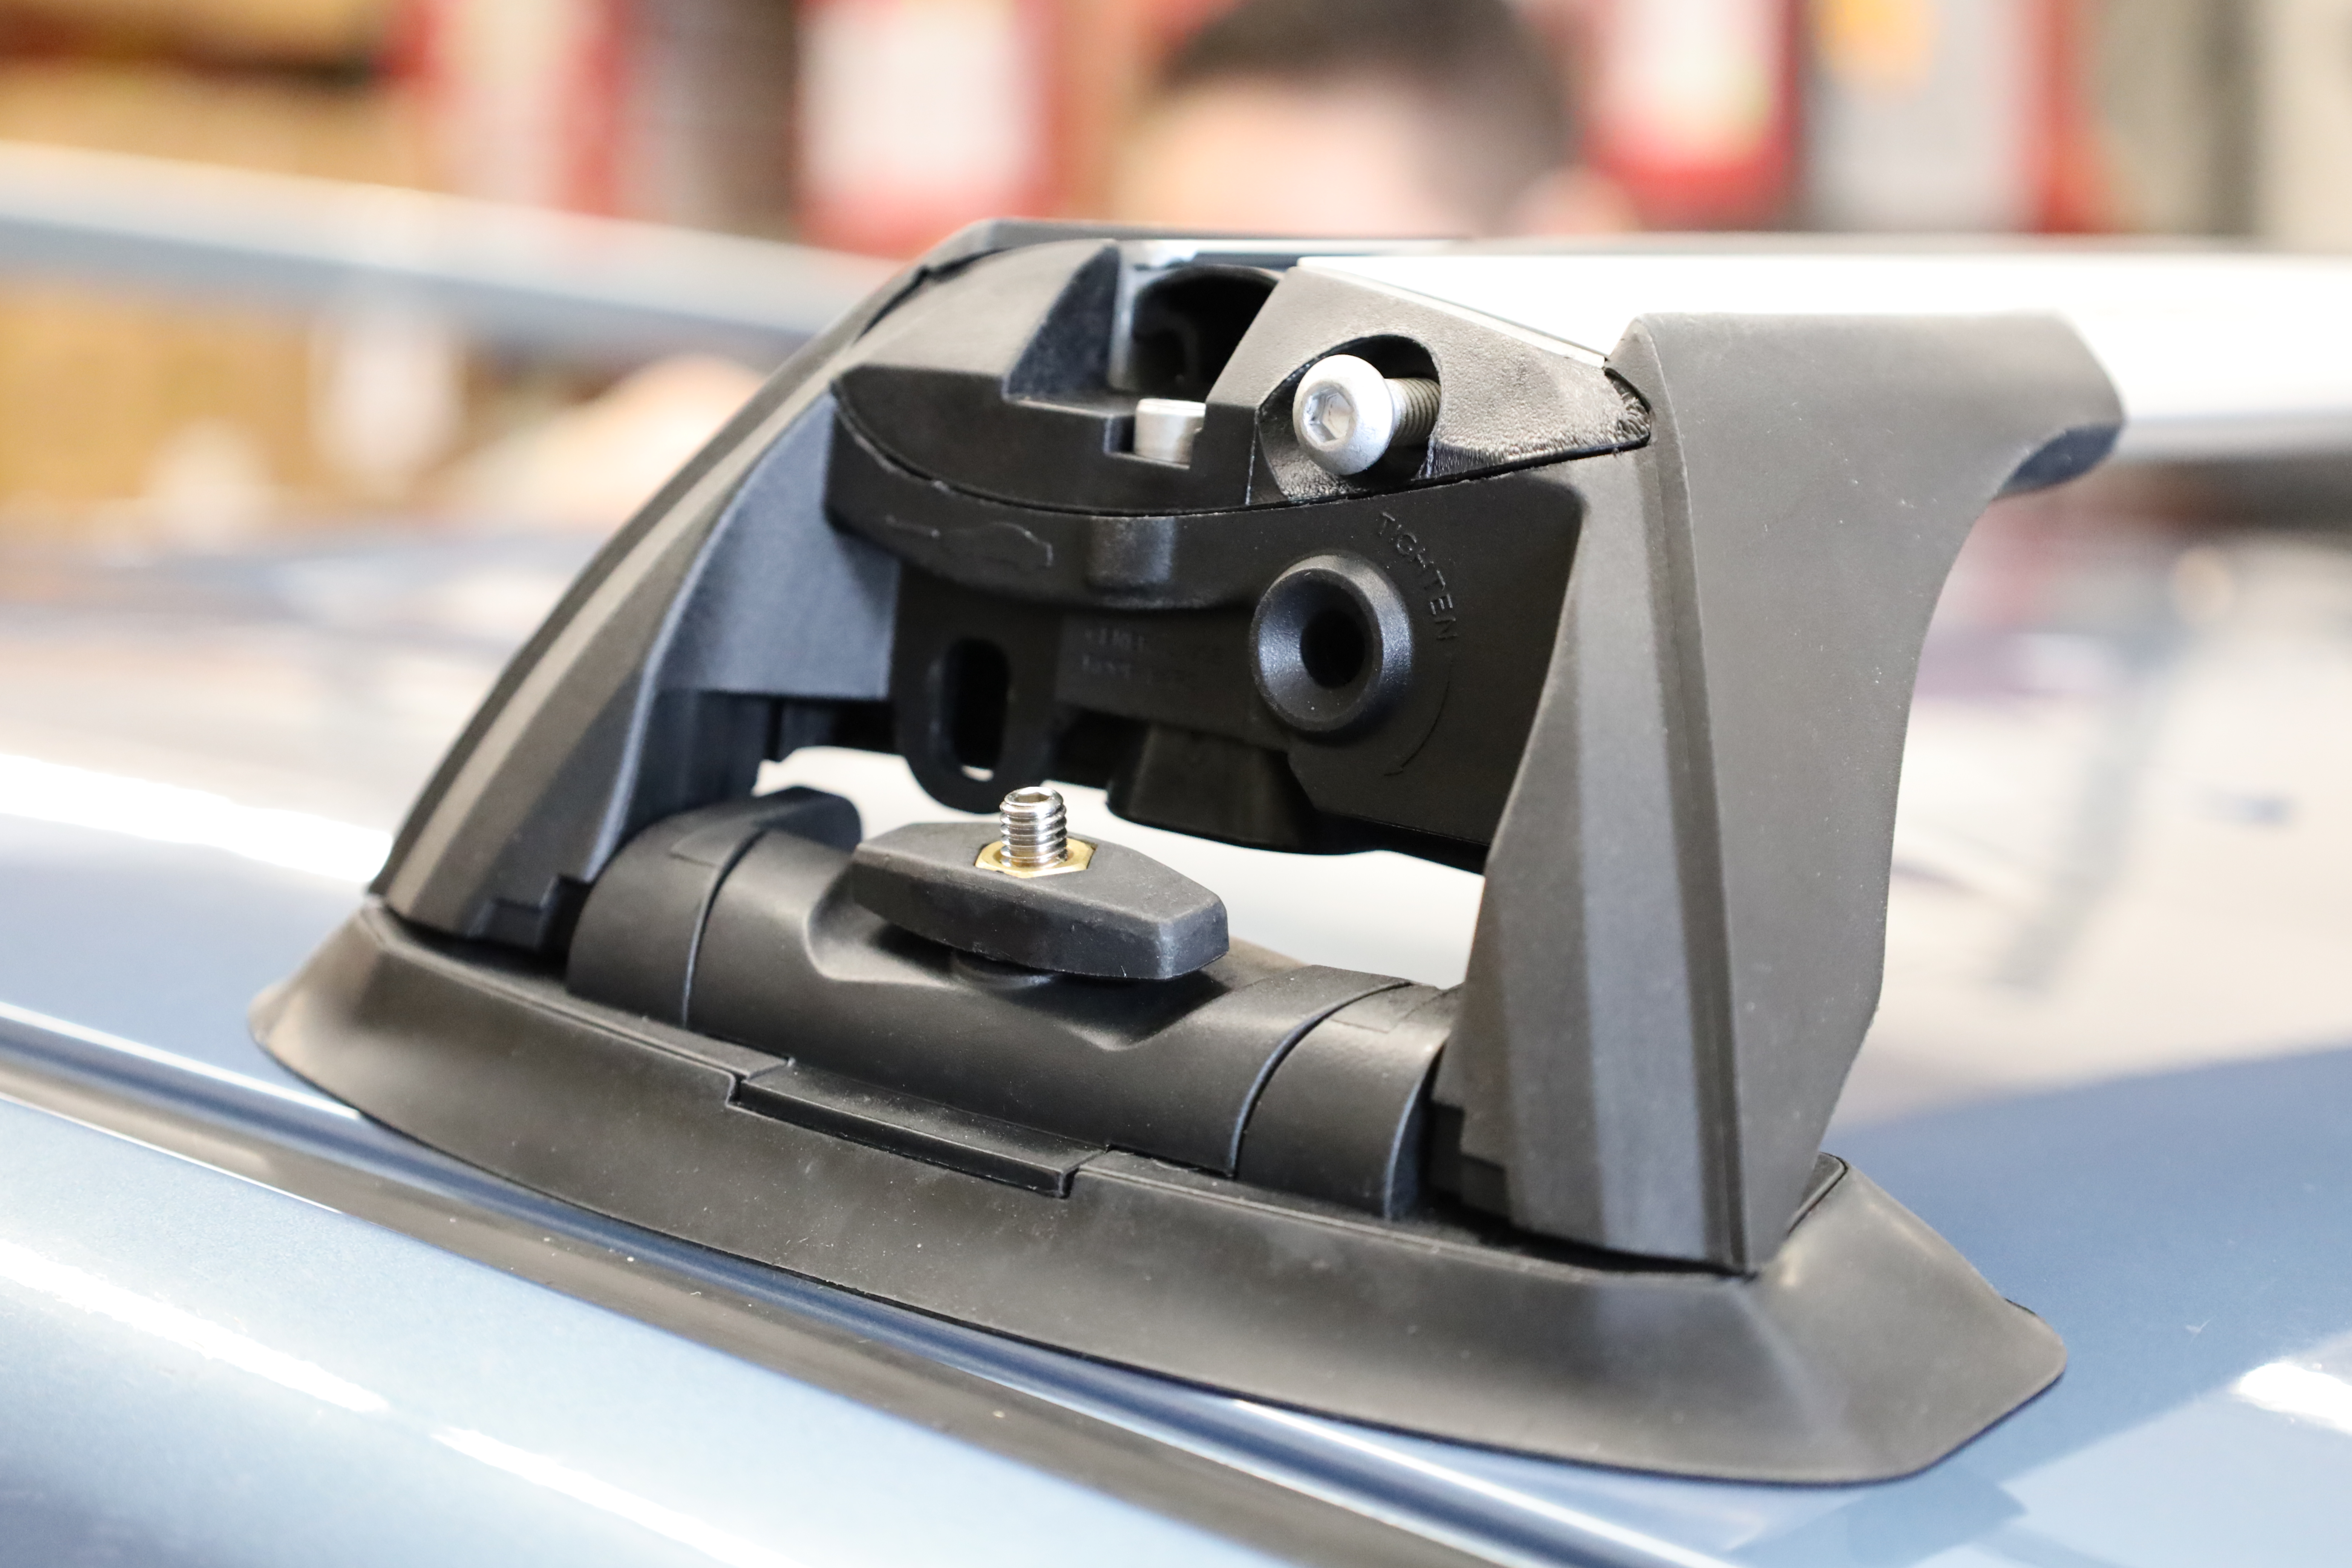
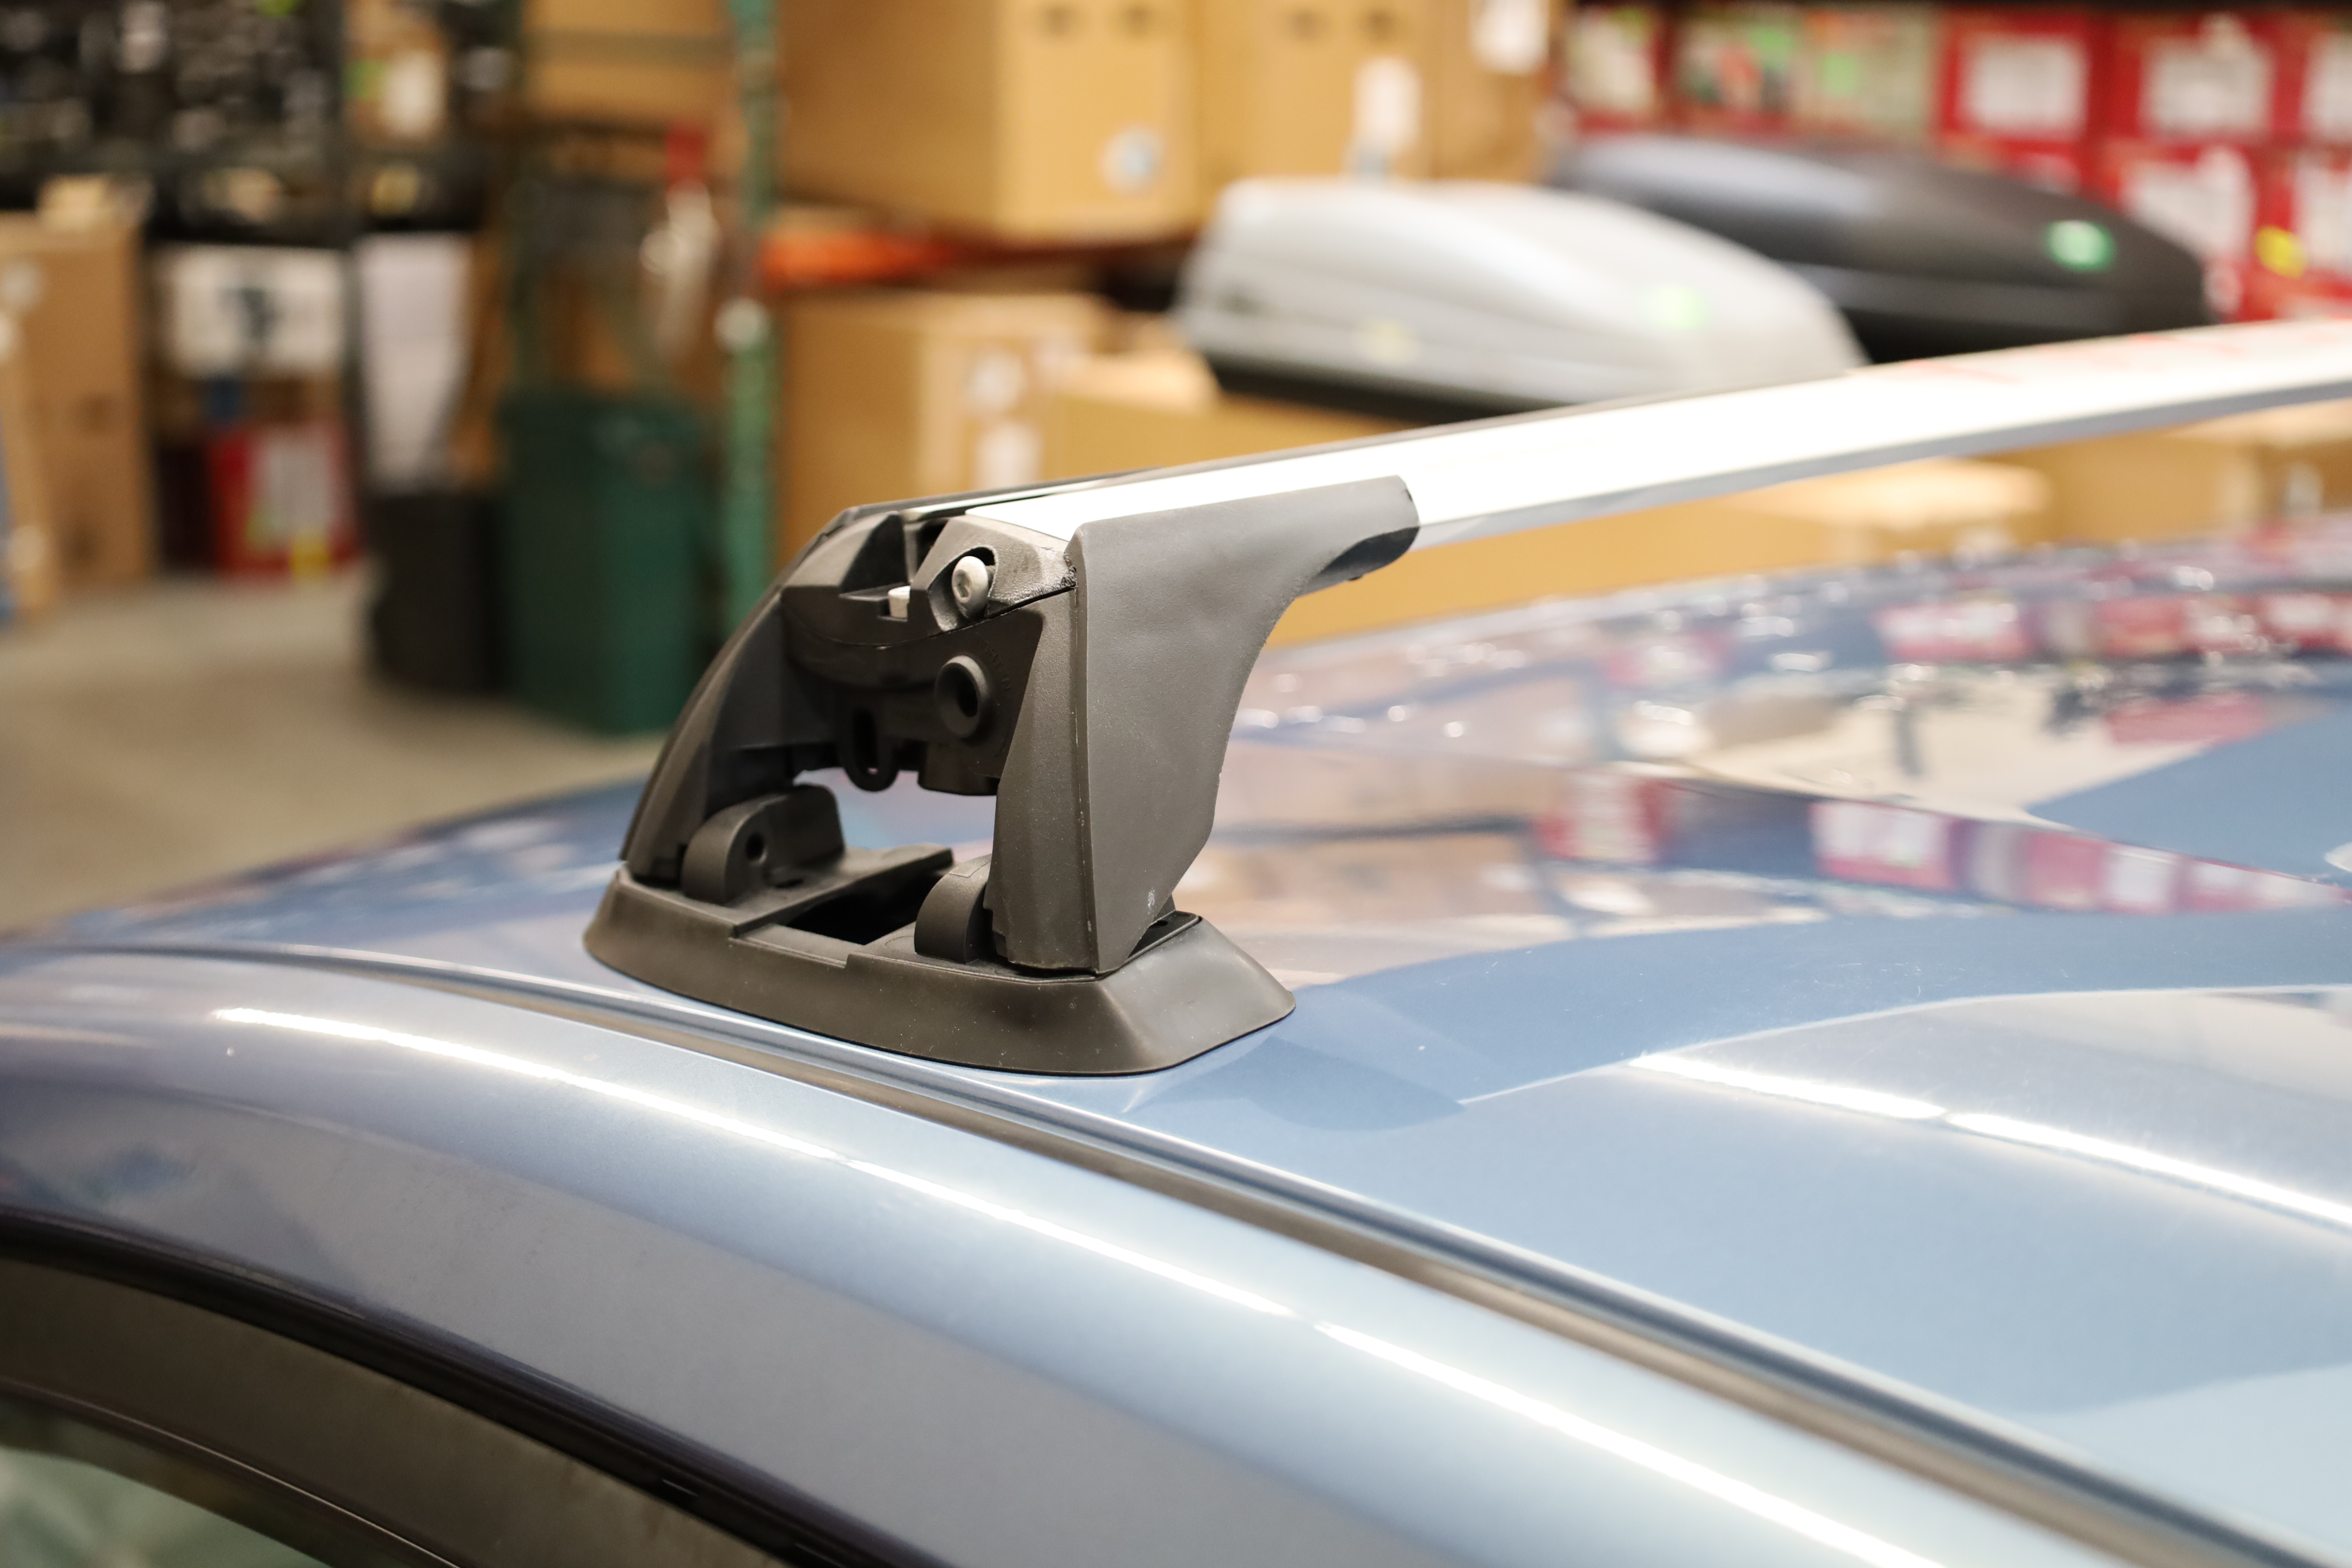
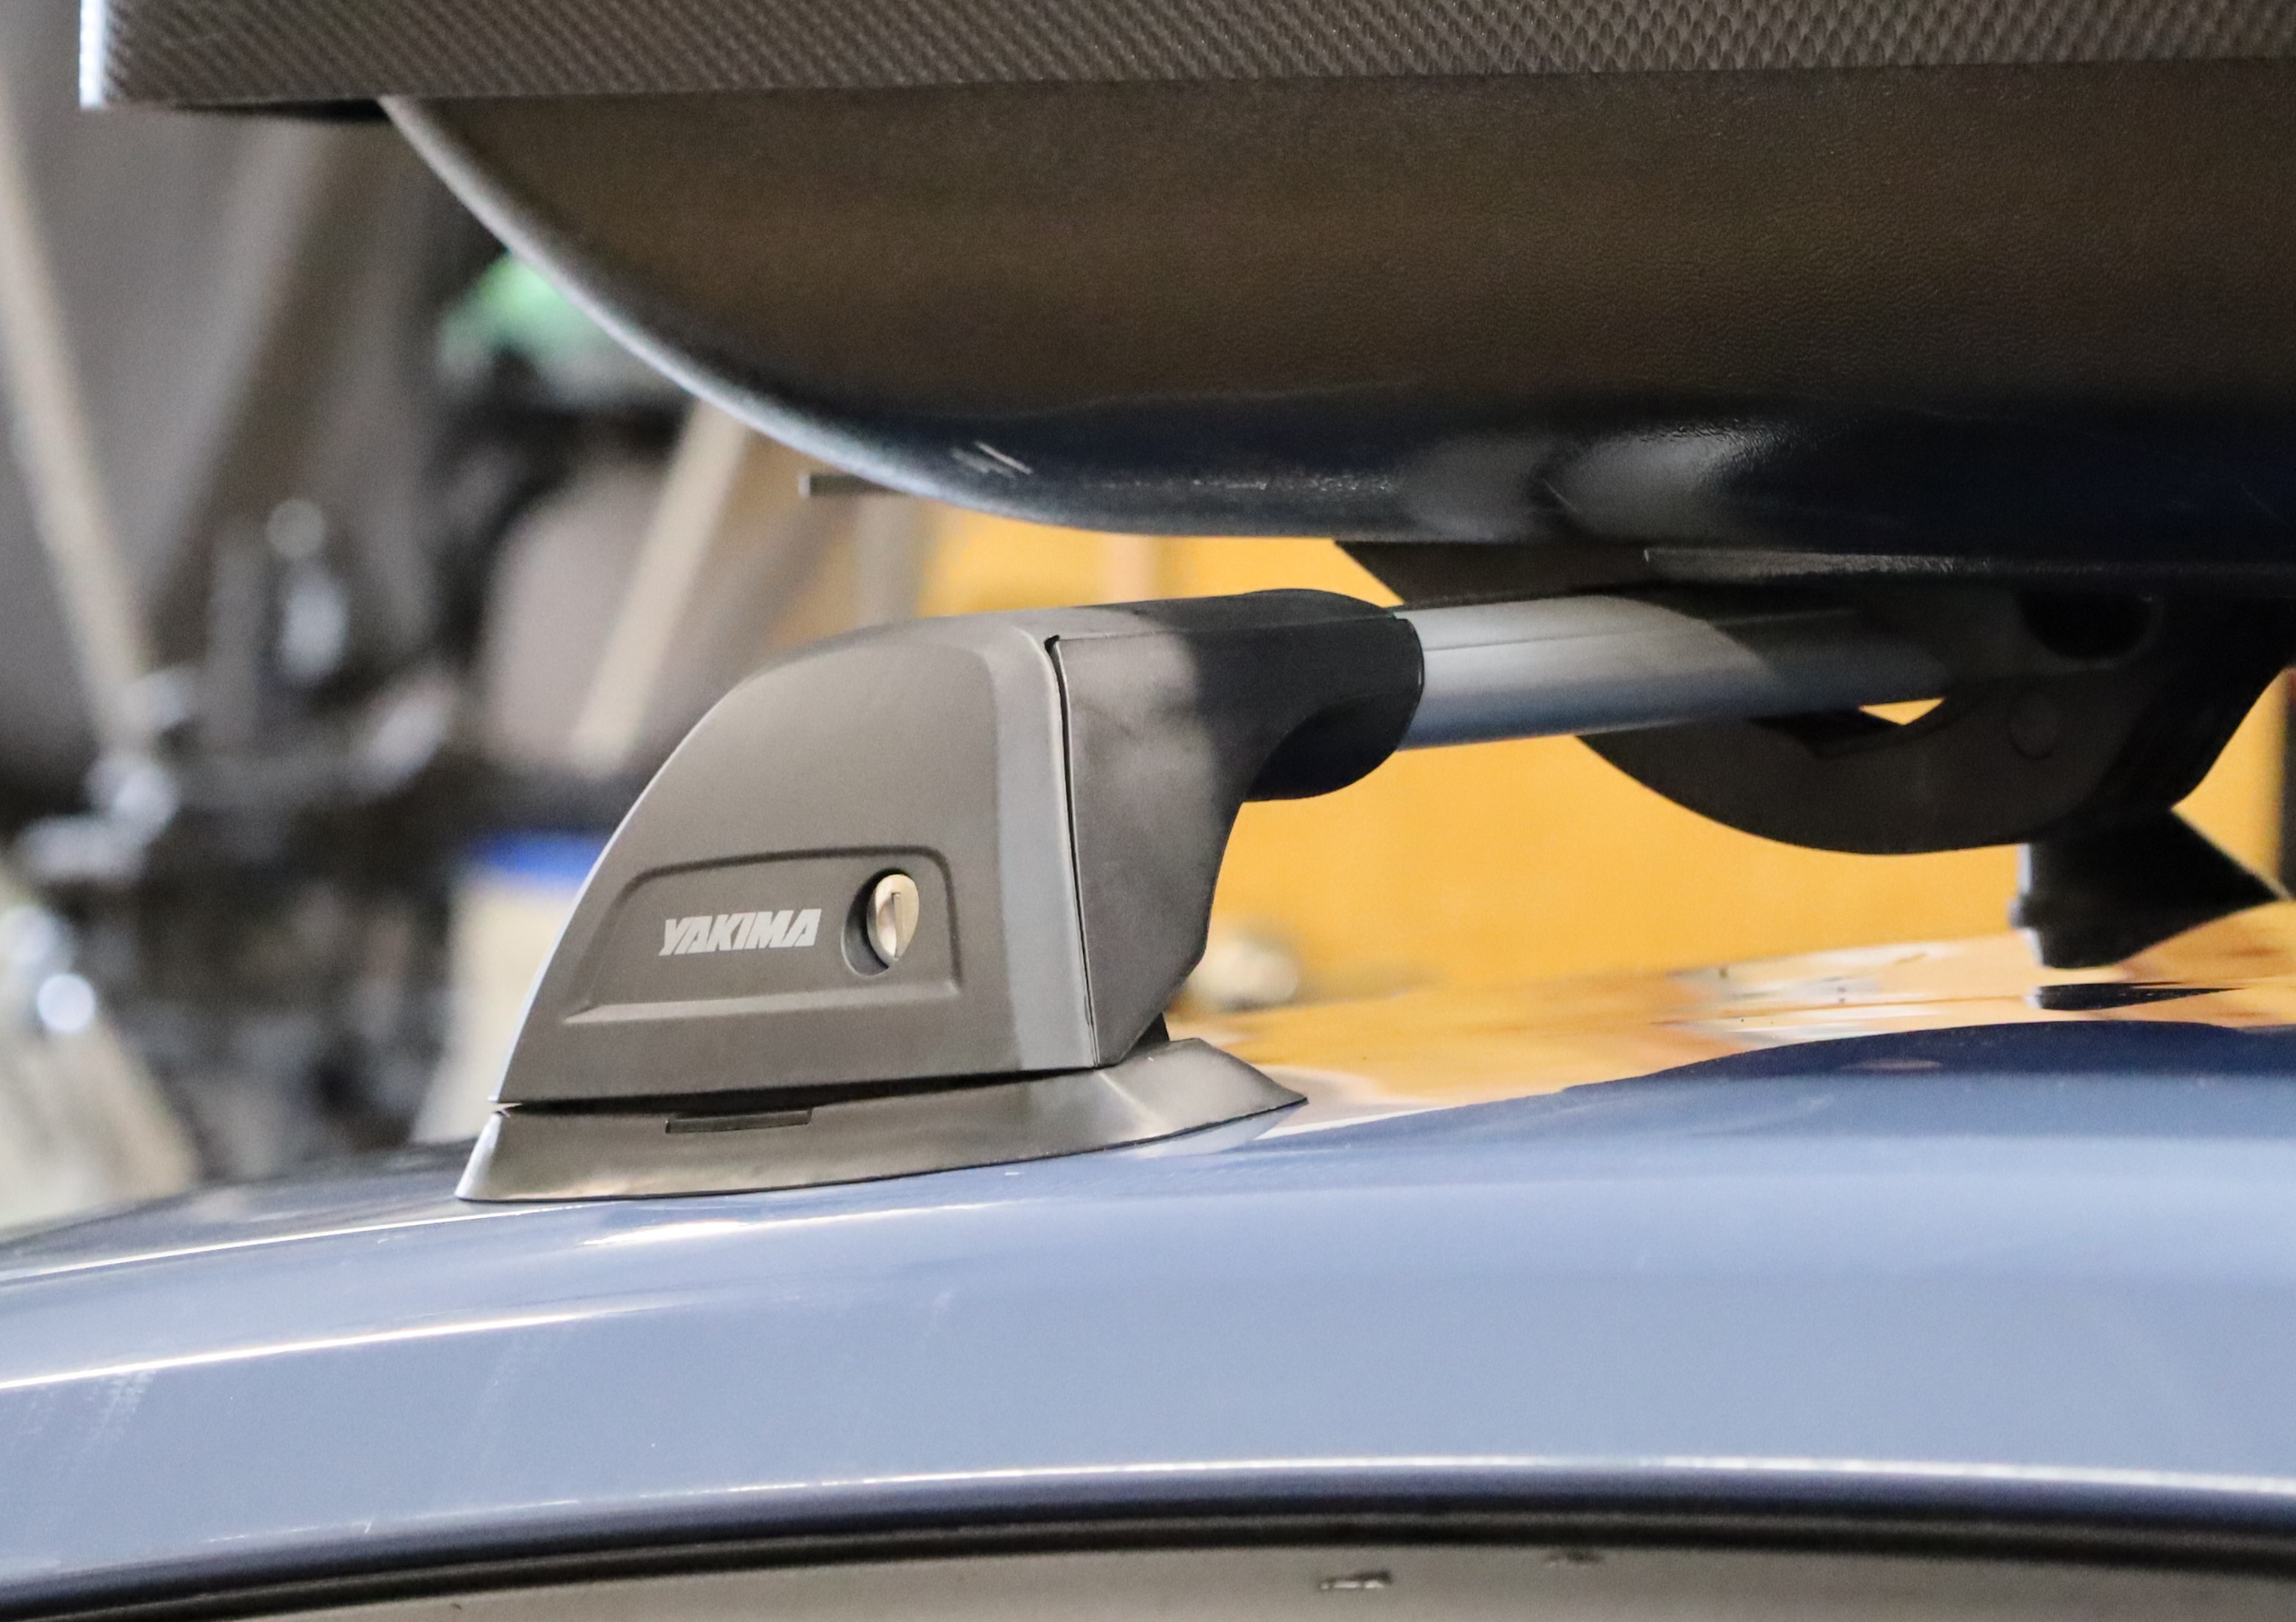
When it’s all done, a firm shake confirms a solid attachment, and the bars are ready for use! Lock cores are the finishing touch to keep the bars from being easily removed by the wrong hands.
We know that drilling into your roof can be a daunting task. Feel free to contact us if there is anything we can help with, and if you’re in the Portland or Seattle area, our retail shops can make sure your rack is ready to go!
Disclaimer: K323 requires drilling into your vehicle. Attempt at your own risk. While we are happy to offer tips, we cannot be responsible for installations that result in damage to your vehicle. FlushBars are rated for a maximum dynamic load of 165 pounds, but the actual weight capacity of your roof or specific installation may be less. FlushBars are not suitable for rooftop tent applications.